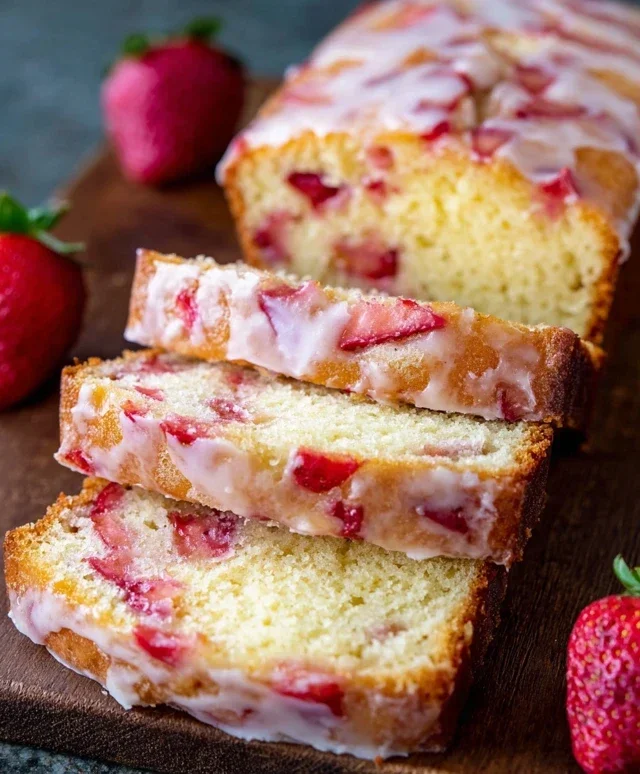
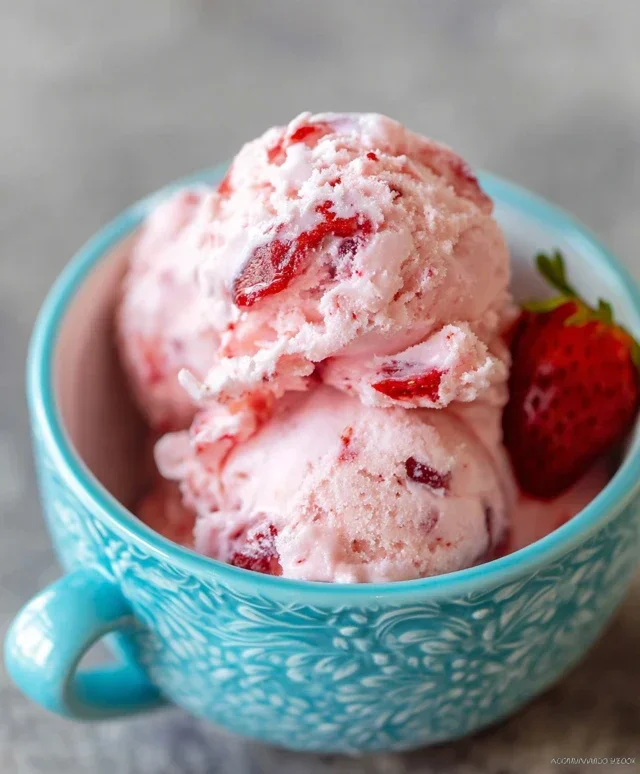
Easy Homemade Strawberry Ice Cream Recipe
Homemade strawberry ice cream is more than just a dessert; it’s a vibrant explosion of summer’s finest flavors captured in a creamy, dreamy scoop. There’s something inherently magical about biting into a perfectly chilled spoonful of this classic treat. We all have those childhood memories tied to sun-ripened strawberries, and this homemade strawberry ice cream recipe aims to recreate that pure, unadulterated joy. Forget the store-bought versions that often taste overly sweet or artificial. When you make your own strawberry ice cream, you control the ingredients, ensuring a fresh, authentic taste that sings with natural strawberry goodness. It’s this commitment to simple, wholesome ingredients and the vibrant burst of real fruit that makes this particular homemade strawberry ice cream so incredibly special.
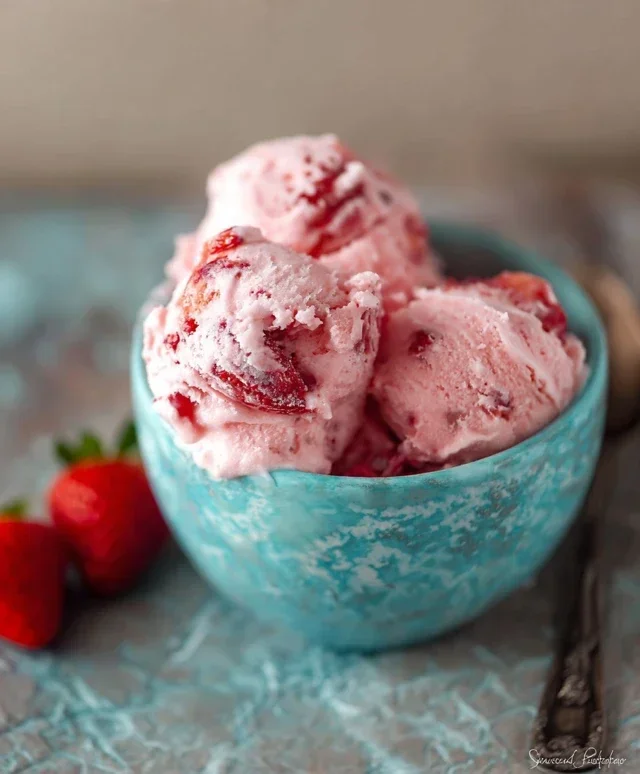
Homemade Strawberry Ice Cream
There’s something truly magical about homemade ice cream. The creamy texture, the vibrant flavor, the sheer satisfaction of creating something delicious from scratch – it’s an experience that store-bought simply can’t replicate. And when it comes to summer’s bounty, there’s nothing quite like the sweet, slightly tart burst of fresh strawberries. This recipe for homemade strawberry ice cream is incredibly straightforward, requiring no fancy equipment beyond a blender and a willingness to wait for pure, frozen bliss. Forget those complicated custard bases; we’re going for pure, unadulterated strawberry flavor that will transport you straight to a sunny summer afternoon.
Ingredients:
Creating the Strawberry Puree:
The heart of any good fruit ice cream is, of course, the fruit. We start by preparing our strawberries. Ensure they are well-rinsed and that the green hulls are completely removed. Dicing them into smaller pieces will help them break down more easily in the blender. In a blender or food processor, combine the diced strawberries, the 2 tablespoons of honey, the 1/2 cup of granulated sugar, and the 1 teaspoon of lemon juice. The honey adds a lovely depth of flavor and a subtle floral note that complements the strawberries beautifully. The granulated sugar provides the primary sweetness, and the lemon juice is our secret weapon, acting as a flavor enhancer. It brightens the strawberry taste, preventing it from becoming cloying and ensuring a balanced sweetness. Blend this mixture until it is completely smooth and homogenous. You want a vibrant, seedless puree. If you prefer a super-smooth texture and dislike any tiny seed fragments, you can strain the puree through a fine-mesh sieve at this stage, but I personally find the texture perfectly acceptable without this extra step. For the best flavor, I like to let this strawberry puree sit in the refrigerator for at least 30 minutes, or even longer, allowing the flavors to meld and deepen. This resting period is crucial for developing that intense strawberry punch we’re aiming for.
Assembling the Ice Cream Base:
Once our strawberry puree has had a chance to chill and its flavors have married, it’s time to create the creamy foundation for our ice cream. In a separate bowl, combine the 1 cup of heavy whipping cream, the 1/2 cup of half and half, and the 1 teaspoon of vanilla extract. The heavy whipping cream is essential for that rich, luxurious texture that defines proper ice cream. The half and half lightens it slightly, making it less intensely rich but still wonderfully creamy. Vanilla extract, as always, is a flavor enhancer that rounds out the other ingredients and adds a subtle warmth. Whisk these ingredients together gently until they are just combined. Over-whipping at this stage is unnecessary and can even be detrimental.
Combining and Chilling:
Now comes the exciting part – bringin extractg our strawberry puree and cream mixture together. Pour the chilled strawberry puree into the bowl with the cream mixture. Gently whisk them together until they are fully incorporated. You want a uniform pink color, indicating that every last bit of strawberry goodness is distributed throughout the base. At this point, you’ll likely want to taste your base and adjust the sweetness if you feel it’s necessary. Remember that freezing can slightly mute sweetness, so a taste test now is your best opportunity. If it’s not quite sweet enough for your liking, you can stir in a little more sugar, about a tablespoon at a time, until it reaches your desired level of sweetness. Once you’re happy with the flavor, cover the bowl tightly with plastic wrap, pressing it directly onto the surface of the ice cream base to prevent a skin from forming. Refrigerate this mixture for at least 4 hours, or preferably overnight. This chilling step is absolutely vital. It allows the fats and sugars to fully hydrate, which contributes to a smoother ice cream with fewer ice crystals. A well-chilled base will freeze more efficiently and result in a superior final product.
Churning the Ice Cream:
This is where the magic really happens! If you have an ice cream maker, follow the manufacturer’s instructions for churning. Typically, this involves pouring the well-chilled ice cream base into the frozen bowl of your ice cream maker and churning for about 20-30 minutes, or until the mixture has thickened to a soft-serve consistency. You’ll know it’s ready when it’s thick enough to hold its shape for a moment before slowly melting back. If you don’t have an ice cream maker, don’t despair! You can still achieve delicious results with a little more effort. Pour your chilled base into a shallow freezer-safe container. Place it in the freezer. After about 45 minutes, remove the container and vigorously whisk or beat the mixture with an electric mixer to break up ice crystals. Return it to the freezer. Repeat this process every 30-45 minutes for 3-4 hours, or until the ice cream is firm and scoopable. The key is to break up those ice crystals as they form.
Freezing for Perfect Scoopability:
Once your ice cream has been churned (or manually worked if you don’t have a machine) to a soft-serve consistency, it’s time for the final hardening phase. Transfer the ice cream to an airtight freezer-safe container. For the best texture and to prevent freezer burn, press a piece of parchment paper or plastic wrap directly onto the surface of the ice cream before sealing the container. This creates a barrier. Place the container in the freezer for at least 4-6 hours, or until the ice cream is firm enough to scoop. Resist the temptation to dig in too soon! This final freezing period is essential for achieving that perfect, scoopable texture. When you’re ready to serve, let the ice cream sit at room temperature for a few minutes to soften slightly, making it easier to scoop and allowing the flavors to fully bloom. Enjoy your incredibly delicious, homemade strawberry ice cream!
Conclusion:
You’ve now got the blueprint for creating truly divine homemade strawberry ice cream, and I’m so excited for you to try it! This recipe is fantastic because it highlights the vibrant, natural sweetness of fresh strawberries without relying on artificial flavors or preservatives. The creamy texture, achieved through simple ingredients and a bit of patience, is incredibly satisfying and miles ahead of anything store-bought. It’s a rewarding project that yields a delightful treat perfect for any occasion, from a casual summer afternoon to a special celebration.
Serving suggestions abound! Enjoy your homemade strawberry ice cream on its own for a pure, unadulterated berry experience. It’s also wonderful piled high on warm brownies, drizzled with a balsamic glaze for a surprising sweet-and-tangy contrast, or blended into a luscious milkshake. For variations, consider adding a splash of lemon juice to brighten the strawberry flavor, or folding in a handful of fresh mint leaves for a refreshing twist. You could even mix in some toasted almond slivers for a delightful crunch. Don’t be afraid to experiment and make this recipe your own!
I truly encourage you to give this homemade strawberry ice cream recipe a go. The process is surprisingly straightforward, and the results are absolutely worth it. Get ready to impress yourself and your loved ones with this incredibly delicious, crowd-pleasing dessert!
Frequently Asked Questions:
Why is my homemade strawberry ice cream not creamy enough?
Several factors can contribute to iciness. Ensure your ice cream maker is properly frozen (if using a freezer bowl model). Also, check that your base mixture is well-chilled before churning, and don’t overfill the ice cream maker. Using a higher fat content in your cream and milk can also help create a smoother, creamier texture.
Can I make this recipe without an ice cream maker?
Yes, you can! While an ice cream maker yields the best texture, you can achieve a delicious result using the no-churn method. This typically involves whipping heavy cream to stiff peaks, folding in your strawberry mixture and sweetened condensed milk, and then freezing. You’ll need to stir it periodically during the freezing process to break up ice crystals.
How long will homemade strawberry ice cream last?
When stored properly in an airtight container in the freezer, your homemade strawberry ice cream should last for about 1-2 weeks. The flavor and texture are best when consumed within the first week, as homemade ice cream can develop ice crystals over longer periods.
Homemade Strawberry Ice Cream
A simple and delicious homemade strawberry ice cream recipe using fresh strawberries, honey, and cream.
Ingredients
-
1 1/2 cups strawberries, hulled and diced
-
2 Tbsp honey
-
1/2 cup granulated sugar
-
1 tsp lemon juice
-
1 cup heavy whipping cream
-
1/2 cup half and half
-
1 tsp vanilla extract
Instructions
-
Step 1
In a bowl, combine the diced strawberries, honey, granulated sugar, and lemon juice. Mash gently with a fork and let sit for 10 minutes to macerate. -
Step 2
In a separate bowl, whip the heavy whipping cream until stiff peaks form. -
Step 3
Gently fold the half and half and vanilla extract into the whipped cream. -
Step 4
Add the macerated strawberries to the cream mixture and fold them in carefully, creating swirls. -
Step 5
Pour the mixture into a freezer-safe container and cover tightly. -
Step 6
Freeze for at least 6-8 hours, or until firm. Stir every 2 hours for the first 6 hours for a smoother texture.
Important Information
Nutrition Facts (Per Serving)
It is important to consider this information as approximate and not to use it as definitive health advice.
Allergy Information
Please check ingredients for potential allergens and consult a health professional if in doubt.