Garlic Butter Keto Bread- Easy Low Carb Recipe
Garlic Butter Keto Bread is an absolute game-changer for anyone following a low-carb lifestyle. If you’ve been missing that satisfying crunch of freshly baked bread, or the warm, comforting aroma filling your kitchen, then prepare to be delighted. This isn’t just any keto bread; it’s an experience. The irresistible combination of rich, creamy butter and pungent garlic creates a flavor profile that is simply divine. It’s the perfect accompaniment to your favorite keto meals, from hearty stews to a simple avocado and egg breakfast. What makes this Garlic Butter Keto Bread truly special is its incredible texture – a tender crum extractb with a wonderfully crisp crust that defies its low-carb nature. Get ready to fall in love with bread all over again!
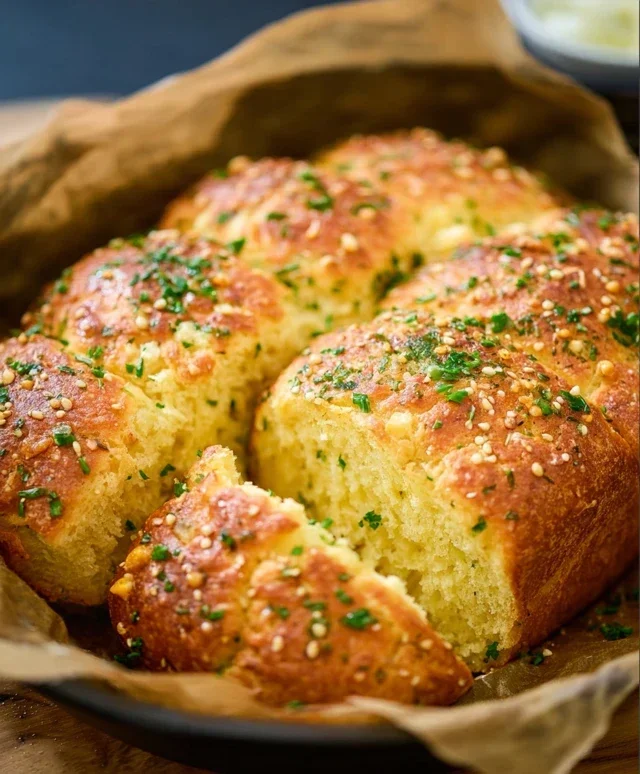
Garlic Butter Keto Bread
There’s something incredibly comforting about a warm slice of bread, isn’t there? For many of us embarking on a ketogenic journey, the thought of delicious, crusty bread can feel like a distant memory. But what if I told you that you can enjoy a flavorful, satisfying garlic butter keto bread that perfectly fits your low-carb lifestyle? This recipe is a game-changer, transforming humble keto-friendly flours into a golden, fragrant loaf that’s perfect for dipping, toasting, or enjoying on its own. Get ready to rediscover the joy of bread without the carb overload! This bread is not only incredibly tasty but also surprisingly simple to make. The combination of almond flour, coconut flour, and a touch of psyllium husk creates a wonderful texture, while the garlic and butter infuse it with irresistible flavor.
Ingredients:
Cooking Instructions
Let’s get baking! This recipe comes together quite quickly, so make sure you have all your ingredients measured and ready to go before you start.
1. Prepare Your Dry Ingredients: In a large mixing bowl, whisk together the blanched almond flour, coconut flour, psyllium husk powder, baking powder, and salt. It’s crucial to use psyllium husk powder and not whole husks, as the powder absorbs liquid more effectively and creates a better bread texture. Whisking thoroughly ensures that all the ingredients are evenly distributed, which is key to a uniform rise and texture in your final loaf. If you find your psyllium husk powder has clumps, you might want to sift it with the other dry ingredients. This step prevents any pockets of unmixed ingredients from affecting the outcome.
2. Combine Wet Ingredients and Form Dough: In a separate medium bowl, whisk the four large eggs until well combined. Add the melted and slightly cooled butter, the Greek yogurt or sour cream, and the apple cider vinegar. Whisk these wet ingredients together until they are smooth and homogenous. The Greek yogurt or sour cream adds a lovely richness and tenderness to the bread, while the apple cider vinegar reacts with the baking powder to help give our keto bread a good lift. Now, pour the wet ingredients into the bowl with the dry ingredients. Add the minced garlic (or garlic powder) and the chopped fresh parsley, if you’re using it. Using a sturdy spatula or a wooden spoon, mix everything together until a thick dough forms. It will be quite sticky and dense, which is exactly what we’re looking for. Don’t overmix; just combine until no dry streaks of flour remain.
3. Shape and Bake the Loaf: Preheat your oven to 350°F (175°C). Line a small loaf pan (about 8×4 inches) with parchment paper, leaving some overhang on the sides to make it easy to lift the bread out later. This is a little trick I learned that makes removing the bread so much easier. Spoon the sticky dough into the prepared loaf pan. Use your spatula or the back of a spoon to spread the dough evenly into the pan and smooth the top. The dough won’t rise dramatically like traditional bread, so shaping it well in the pan is important for the final appearance.
4. The First Bake and Garlic Butter Glaze: Place the loaf pan in the preheated oven and bake for 30 minutes. While the bread is baking, prepare your garlic butter glaze. In a small saucepan or microwave-safe bowl, melt 2 tablespoons of unsalted butter. Stir in an additional clove of minced garlic (or ¼ teaspoon garlic powder) for an extra punch of flavor. Once the bread has baked for 30 minutes, carefully remove it from the oven.
5. Second Bake for Golden Perfection: After the initial 30 minutes of baking, your bread should be starting to firm up. Carefully brush the top of the partially baked loaf generously with the prepared garlic butter mixture. This step is what gives our keto bread that beautiful golden-brown color and infuses it with even more delicious garlic butter flavor. Return the loaf pan to the oven and continue baking for another 15-20 minutes, or until the bread is golden brown, firm to the touch, and a toothpick inserted into the center comes out clean. The total baking time will be around 45-50 minutes. Let the bread cool in the pan for about 10-15 minutes before using the parchment paper overhang to lift it out onto a wire rack to cool completely. Allowing it to cool fully is essential for the texture to set properly. If you slice it too soon, it might be a bit gummy.
Enjoy your amazing homemade Garlic Butter Keto Bread! It’s fantastic toasted and slathered with more butter, or used as a base for your favorite keto sandwiches.

Conclusion:
I hope you’re as excited about this Garlic Butter Keto Bread as I am! This recipe truly is a game-changer for anyone following a low-carb lifestyle. The combination of the rich, savory garlic butter with a perfectly tender, satisfying keto bread is simply divine. It’s incredibly versatile and makes for a fantastic accompaniment to countless keto meals, or even a delicious snack on its own. Imagin extracte dipping this warm bread into your favorite keto soup or serving it alongside a hearty steak – pure bliss!
Don’t be afraid to experiment with variations. Adding some fresh herbs like rosemary or chives to the butter mixture can offer a delightful twist. You could also sprinkle some shredded Parmesan cheese on top before baking for an extra cheesy kick. This Garlic Butter Keto Bread is so satisfying, it will quickly become a staple in your keto kitchen. I truly encourage you to give it a try; you won’t be disappointed!
Frequently Asked Questions:
Can I make this bread ahead of time?
Yes, you absolutely can! Once cooled, store the Garlic Butter Keto Bread in an airtight container at room temperature for up to 2 days, or in the refrigerator for up to 5 days. For longer storage, you can slice it and freeze it, then toast slices directly from frozen.
What can I serve this keto bread with?
The possibilities are endless! It’s perfect with keto soups, stews, chilis, or as a side for grilled meats, chicken, and fish. It also makes an excellent base for garlic butter keto pizza or can be enjoyed simply with more butter!
My bread came out a little dense. What might I have done wrong?
Density can sometimes be an issue with keto baking. Ensure you measured your almond flour and other dry ingredients accurately, as over-measuring can lead to a denser texture. Also, be careful not to overmix the batter, as this can also contribute to density. Make sure your leavening agents (baking powder/soda) are fresh!
Garlic Butter Keto Bread
A simple and delicious keto-friendly bread recipe featuring a rich garlic butter flavor. Perfect for low-carb diets.
Ingredients
-
2 cups almond flour
-
1/4 cup psyllium husk powder
-
2 teaspoons baking powder
-
1/2 teaspoon salt
-
1/2 cup melted butter
-
2 large eggs
-
1/4 cup water
-
2 cloves garlic, minced
-
1 tablespoon fresh parsley, chopped
Instructions
-
Step 1
Preheat oven to 350°F (175°C). Grease and line a loaf pan with parchment paper. -
Step 2
In a large bowl, whisk together almond flour, psyllium husk powder, baking powder, and salt. -
Step 3
In a separate bowl, whisk together melted butter, eggs, and water until well combined. -
Step 4
Add the wet ingredients to the dry ingredients and mix until a dough forms. Knead gently for a minute or two. -
Step 5
Stir in minced garlic and chopped parsley. -
Step 6
Press the dough evenly into the prepared loaf pan. -
Step 7
Bake for 25-30 minutes, or until the bread is golden brown and sounds hollow when tapped. -
Step 8
Let cool in the pan for 10 minutes before transferring to a wire rack to cool completely.
Important Information
Nutrition Facts (Per Serving)
It is important to consider this information as approximate and not to use it as definitive health advice.
Allergy Information
Please check ingredients for potential allergens and consult a health professional if in doubt.