Easy Homemade Strawberry Ice Cream – Creamy & Delicious
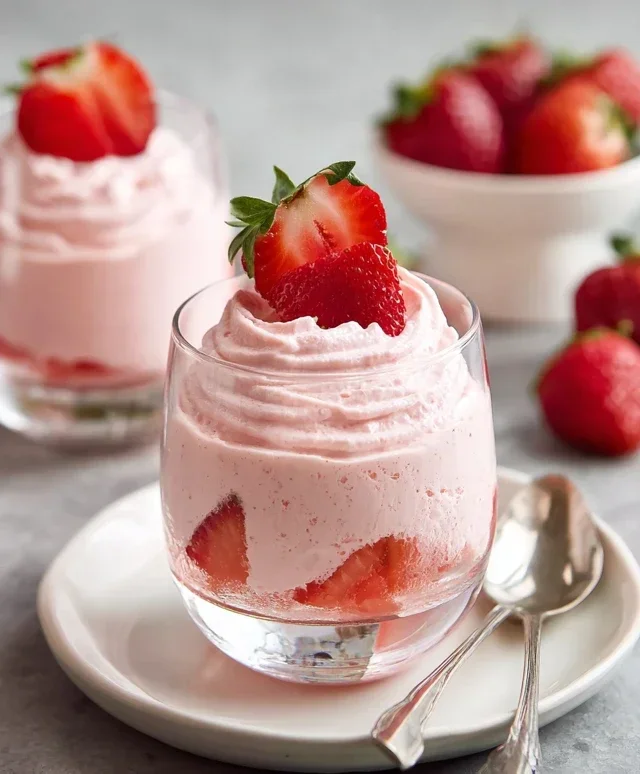
Homemade Strawberry Ice Cream is more than just a frozen treat; it’s a nostalgic journey back to sun-drenched summer days and the sweet, pure taste of nature’s candy. Who can resist the vibrant pink hue and the burst of fresh, juicy strawberries that define this beloved classic? It’s that delightful balance of creamy indulgence and bright fruitiness that makes everyone, young and old, fall head over heels. Forget the artificial flavors and preservatives found in store-bought versions; this homemade strawberry ice cream is exceptionally special because it’s crafted with love, using the very best ingredients. Imagin extracte the satisfaction of scooping into a bowl of ice cream that tastes exactly like biting into a perfectly ripe strawberry, only richer and more luxurious. This recipe unlocks that magic, allowing you to create a truly unforgettable dessert right in your own kitchen. Get ready to experience the ultimate, pure strawberry bliss.
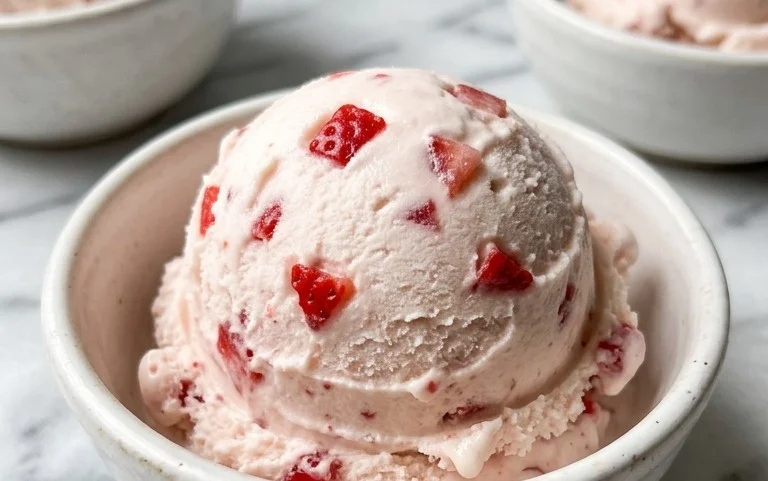
Homemade Strawberry Ice Cream
There’s something undeniably magical about homemade ice cream. The creamy texture, the intense, fresh flavor – it’s a world away from anything store-bought. And when it comes to classic flavors, few can rival the vibrant sweetness of strawberry. This recipe for homemade strawberry ice cream is surprisingly simple, relying on fresh ingredients to create a truly exceptional dessert. Forget complicated custard bases or pricey ice cream makers (though one can certainly speed things up!). This no-churn method is perfect for begin extractners and seasoned ice cream enthusiasts alike, delivering pure strawberry bliss with minimal fuss. The key to its success lies in the quality of your strawberries and a little patience as the flavors meld and the ice cream freezes. Get ready to impress yourself and anyone lucky enough to share a scoop!
Ingredients:
Preparing the Strawberry Swirl
The heart of this strawberry ice cream lies in its intensely fruity swirl. We’ll start by macerating our fresh strawberries to draw out their natural juices and concentrate their flavor.
1. Begin extract by placing your hulled and diced strawberries into a medium-sized bowl. To this, add the 2 tablespoons of honey and the 1/2 cup of granulated sugar. The sugar not only sweetens but also helps to break down the strawberries, releasing their delicious juices. Finally, add the 1 teaspoon of lemon juice. The lemon juice is a crucial, yet subtle, ingredient. It brightens the strawberry flavor, cutting through the sweetness and adding a touch of tartness that prevents the ice cream from tasting one-dimensionally sweet. It also acts as a natural preservative, helping to maintain the vibrant color of the strawberries. Gently stir everything together to ensure the strawberries are evenly coated. Now, cover the bowl and let this mixture sit at room temperature for at least 30 minutes, or even up to an hour. This process, known as maceration, will result in a syrupy, intensely flavored strawberry mixture. You’ll notice that the strawberries will soften and release a significant amount of ruby-red liquid.
Creating the Creamy Base
While the strawberries are doing their magic, we’ll prepare the creamy foundation for our ice cream. This step is wonderfully straightforward and requires no cooking.
2. In a separate, large bowl, combine the 1 cup of heavy whipping cream and the 1/2 cup of half and half. The combination of heavy cream and half and half provides the perfect balance of richness and creaminess. Heavy whipping cream contributes that luxurious mouthfeel and high fat content essential for smooth ice cream, while half and half lightens it just enough to prevent it from becoming overly dense. Add the 1 teaspoon of vanilla extract to this mixture. Vanilla is a wonderful enhancer of fruit flavors, adding depth and a classic ice cream aroma. Now, using a whisk or an electric mixer on medium speed, whip the cream mixture until soft peaks form. You’re looking for a consistency where the cream holds its shape but is still fluid enough to pour. Be careful not to over-whip it to stiff peaks, as this can make the final ice cream a bit too dense.
Assembling and Freezing
This is where the magic truly happens, as we combine the sweet strawberry mixture with the creamy base and prepare for the freezing process.
3. Once your strawberries have macerated and released their beautiful juices, gently stir the mixture. You can choose to leave the strawberries in diced pieces for texture, or for a smoother ice cream, you can carefully mash them slightly with a fork or potato masher. Some people even prefer to briefly pulse the strawberry mixture in a food processor for a more uniform texture, but I find the occasional chunk of strawberry to be delightful. Now, carefully pour the macerated strawberry mixture into the whipped cream base.
4. Using a spatula or a large spoon, gently fold the strawberry mixture into the cream base. The goal here is to create beautiful swirls of strawberry through the cream, rather than fully incorporating them. You want to see streaks of red and white. Imagin extracte you are gently swirling colors onto a canvas; avoid over-mixing, as this will create a uniform pink ice cream, which is lovely, but the visual appeal and textural contrast of the swirls are part of what makes homemade strawberry ice cream so special.
5. Pour the swirled ice cream mixture into a freezer-safe container. An airtight container is best to prevent freezer burn. If you are using a loaf pan, cover the surface of the ice cream directly with parchment paper or plastic wrap to prevent ice crystals from forming, then cover the entire pan with a lid or foil. Place the container in the freezer. For the best results, allow the ice cream to freeze for at least 6 hours, or preferably overnight, until it is firm and scoopable. The longer it freezes, the firmer it will become.
Serving Your Homemade Delight
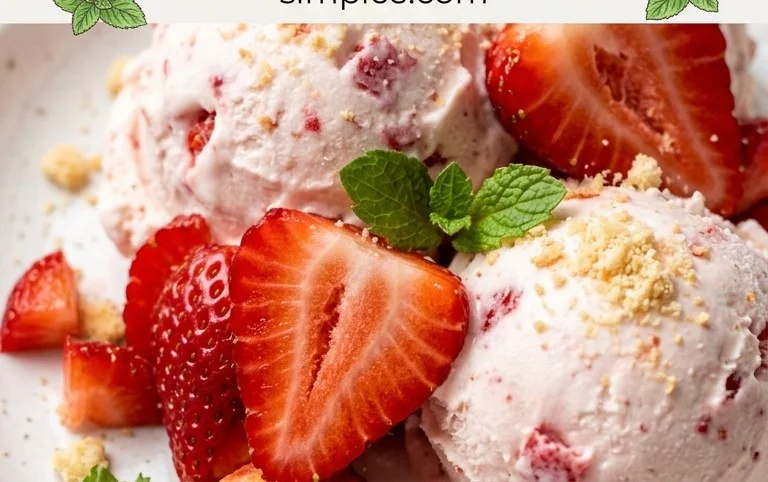
Once your strawberry ice cream has frozen to a scoopable consistency, it’s time to enjoy the fruits of your labor! Let the container sit at room temperature for 5-10 minutes before scooping to soften it slightly for easier serving. Serve in bowls or cones, and perhaps top with a few fresh strawberries or a sprig of mint. The vibrant flavor and creamy texture of this homemade strawberry ice cream are sure to be a hit!
Conclusion:
And there you have it – your guide to creating the most delicious, incredibly easy homemade strawberry ice cream right in your own kitchen! This recipe is truly a winner because it lets you control the ingredients, ensuring a fresh, vibrant strawberry flavor that store-bought varieties simply can’t match. The simplicity of the process, relying on just a few key components and minimal fuss, makes it perfect for begin extractners and experienced ice cream makers alike. Imagin extracte the joy of pulling a pint of creamy, sweet strawberry goodness from your freezer, knowing you made it with love.
Serving this delightful treat is an adventure in itself! It’s absolutely divine on its own, but also pairs wonderfully with warm brownies, a slice of angel food cake, or even drizzled with a bit of balsamic glaze for a sophisticated twist. Don’t be afraid to get creative with variations! You could add a swirl of chocolate sauce, fold in some fresh mint leaves, or even introduce a hint of lemon zest to complement the strawberry’s natural sweetness. I wholeheartedly encourage you to give this homemade strawberry ice cream recipe a try. It’s an experience that’s sure to bring smiles and happy taste buds to everyone you share it with.
Frequently Asked Questions:
Q: Can I make this without an ice cream maker?
Absolutely! While an ice cream maker yields the smoothest texture, you can achieve a delicious result without one. Simply freeze the mixture in a shallow container, stirring vigorously every 30-45 minutes for the first 3-4 hours to break up ice crystals. It won’t be quite as creamy, but it will still be wonderfully flavorful.
Q: How long will my homemade strawberry ice cream last?
For the best quality and texture, aim to consume your homemade strawberry ice cream within about 1-2 weeks. After that, it can start to develop freezer burn and its texture may degrade.
Q: Can I use frozen strawberries instead of fresh?
Yes, frozen strawberries are a great option, especially when fresh ones are out of season! Thaw them completely, drain off any excess liquid, and then proceed with the recipe as usual. You might find you need slightly less sugar depending on the sweetness of your frozen strawberries.
Homemade Strawberry Ice Cream
A simple and delicious homemade strawberry ice cream recipe made with fresh strawberries and a creamy base.
Ingredients
-
1 1/2 cups strawberries, hulled and diced
-
2 Tbsp honey
-
1/2 cup granulated sugar
-
1 tsp lemon juice
-
1 cup heavy whipping cream
-
1/2 cup half and half
-
1 tsp vanilla extract
Instructions
-
Step 1
Combine hulled and diced strawberries with honey, granulated sugar, and lemon juice in a bowl. Let sit for 15-20 minutes until strawberries release their juices. -
Step 2
In a separate bowl, whisk together the heavy whipping cream, half and half, and vanilla extract until well combined. -
Step 3
Puree the strawberry mixture using an immersion blender or a regular blender until smooth. -
Step 4
Gently fold the strawberry puree into the cream mixture. -
Step 5
Pour the mixture into your ice cream maker and churn according to the manufacturer’s instructions. -
Step 6
Transfer the churned ice cream to an airtight container and freeze for at least 4 hours, or until firm.
Important Information
Nutrition Facts (Per Serving)
It is important to consider this information as approximate and not to use it as definitive health advice.
Allergy Information
Please check ingredients for potential allergens and consult a health professional if in doubt.