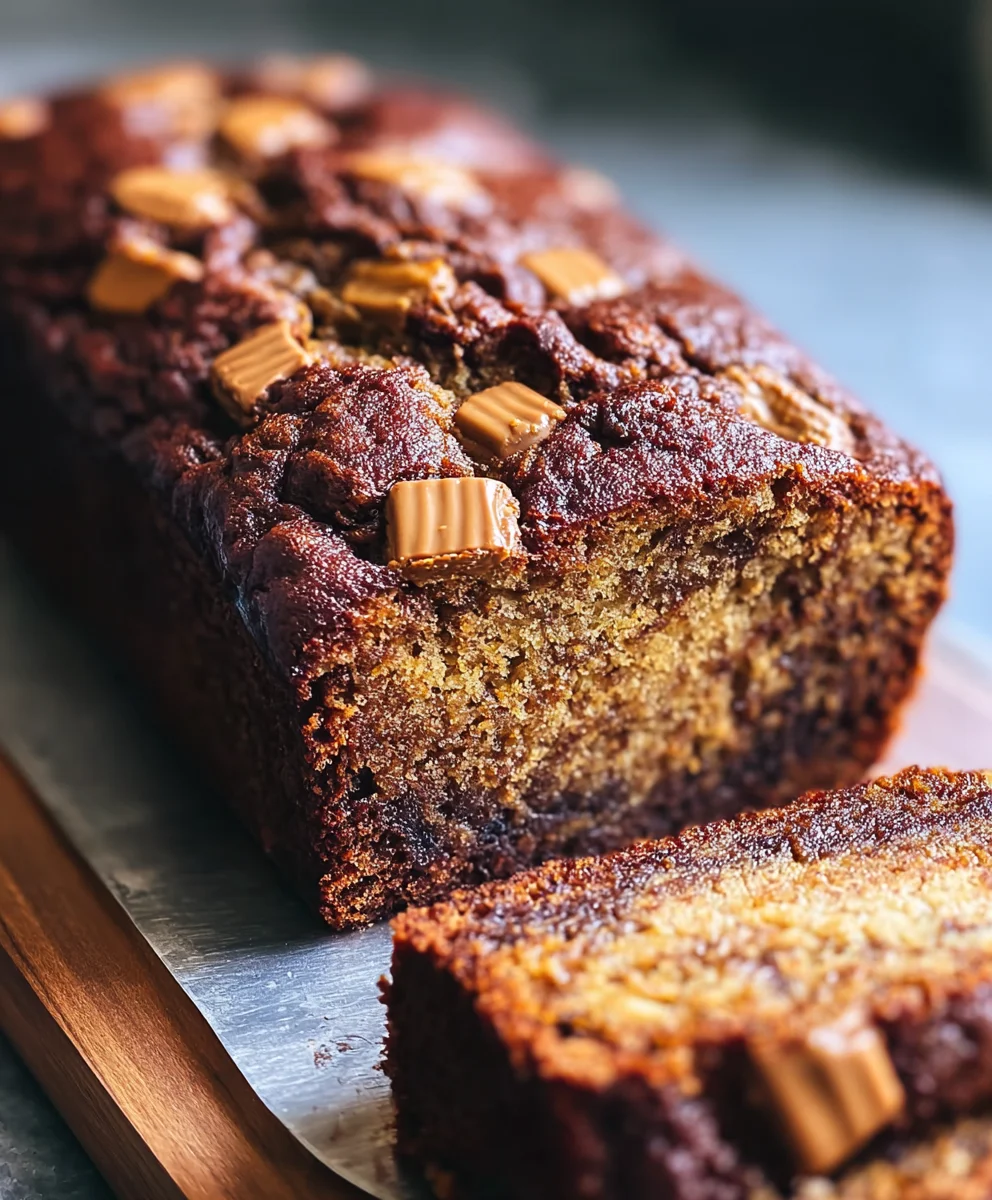
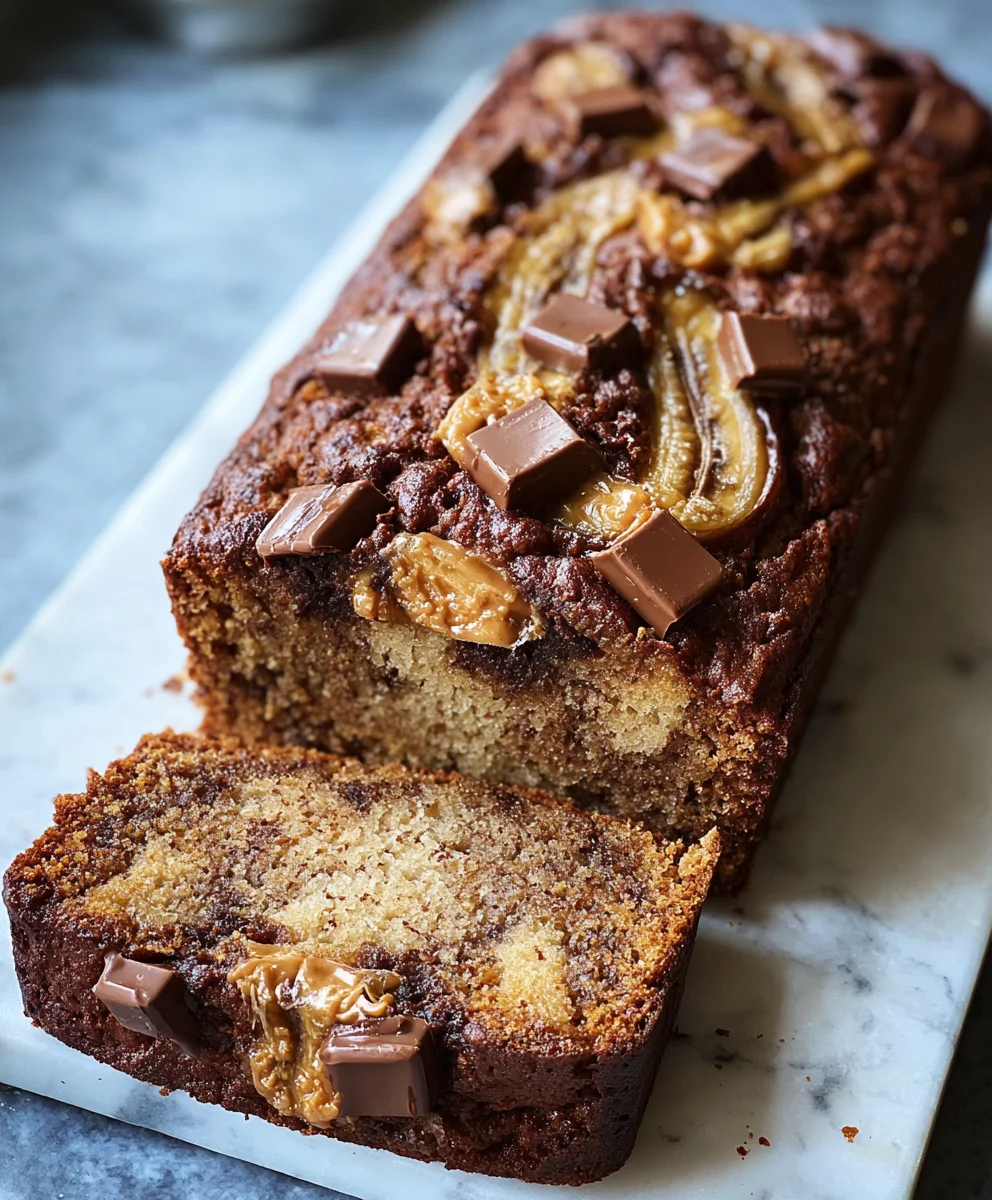
Reese’s Peanut Butter Banana Bread Recipe
Reeses Peanut Butter Banana Bread. Ah, the name itself conjures up images of sweet, salty bliss, doesn’t it? For many of us, this decadent baked good isn’t just a treat; it’s a nostalgic journey back to childhood, a comforting embrace on a chilly afternoon, or the perfect way to elevate your morning coffee. What is it about this specific combination that makes it so utterly irresistible? It’s the masterful dance between the rich, creamy peanut butter, the natural sweetness of ripe bananas, and the iconic, unmistakable chocolatey crunch of Reese’s candies. This isn’t your average banana bread; it’s a symphony of textures and flavors, a truly special creation that transforms humble ingredients into something extraordinary. Get ready to discover why this Reese’s Peanut Butter Banana Bread will become your new go-to recipe.
Ingredients:
- 1 1/2 cups all-purpose flour
- 1/2 teaspoon baking soda
- 1 1/2 teaspoons baking powder
- 1/2 teaspoon kosher salt
- 3 very ripe medium bananas, mashed
- 1/2 cup creamy peanut butter
- 1/4 cup vegetable oil
- 2 large eggs
- 1 cup granulated sugar
- 8 ounces miniature peanut butter cups, roughly chopped (or use chopped regular peanut butter cups)
Preparation and Mixing
Preheating and Pan Preparation
First things first, let’s get our oven ready. Preheat your oven to 350 degrees Fahrenheit (175 degrees Celsius). This is a standard baking temperature that will ensure your Reeses Peanut Butter Banana Bread bakes evenly. While the oven is heating up, it’s crucial to prepare your baking pan. Grease and flour a 9×5 inch loaf pan. You can use butter or cooking spray for greasing, and then dust it lightly with flour, tapping out any excess. Alternatively, you can line the pan with parchment paper, leaving some overhang on the sides to make it easier to lift the bread out once it’s baked. Proper pan preparation prevents sticking and makes for a beautiful presentation.
Dry Ingredient Combination
In a medium-sized bowl, we’ll combine all of our dry ingredients. This step is important for ensuring that the leavening agents (baking soda and baking powder) and salt are evenly distributed throughout the batter. Add the 1 1/2 cups of all-purpose flour, 1/2 teaspoon of baking soda, 1 1/2 teaspoons of baking powder, and 1/2 teaspoon of kosher salt to the bowl. Whisk these ingredients together thoroughly. You want to make sure there are no clumps of baking soda or powder. A good whisking will help create a lighter and more evenly textured final product. Set this bowl aside for now.
Wet Ingredient Fusion
Now, let’s move on to the wet ingredients. In a large mixing bowl, begin extract by mashing your 3 very ripe medium bananas. The riper the bananas, the sweeter and more moist your bread will be, and the easier they will be to mash into a smooth consistency. Once the bananas are mashed, add the 1/2 cup of creamy peanut butter. Creamy peanut butter will blend seamlessly into the batter, contributing to that signature Reeses Peanut Butter flavor. Next, pour in the 1/4 cup of vegetable oil. The oil helps to keep the bread moist and tender. Crack in your 2 large eggs. Eggs act as binders and add richness. Finally, add the 1 cup of granulated sugar. This will sweeten the bread and contribute to its golden-brown crust. Using a whisk or an electric mixer on a low speed, beat these wet ingredients together until they are well combined and the mixture is relatively smooth. Scrape down the sides of the bowl occasionally to ensure everything is incorporated.
Combining and Baking
Incorporating Dry into Wet Ingredients
Now it’s time to bring our dry and wet ingredients together. Gradually add the dry ingredient mixture to the wet ingredient mixture. It’s best to do this in about three additions, mixing gently after each addition. Use a spatula or a wooden spoon to fold the dry ingredients into the wet. Be careful not to overmix the batter at this stage. Overmixing can develop the gluten in the flour too much, leading to a tough loaf of bread. You should stop mixing as soon as you no longer see streaks of dry flour. A few small lumps are perfectly fine and even desirable for a tender crum extractb.
Folding in the Peanut Butter Cups
This is where the magic of the Reeses Peanut Butter Banana Bread truly comes to life. Gently fold in the 8 ounces of chopped miniature peanut butter cups into the batter. You want to distribute them as evenly as possible throughout the batter. Some will naturally sink to the bottom during baking, but that’s part of the delicious surprise! Make sure to reserve a few pieces to sprinkle on top before baking if you like an extra visual cue of the deliciousness within. This addition is what elevates this from a simple banana bread to a decadent treat.
Baking the Bread
Pour the prepared batter into your greased and floured (or parchment-lined) loaf pan. Smooth the top gently with your spatula. If you saved some chopped peanut butter cups, sprinkle them evenly over the top of the batter. This will create a beautiful, melty topping as it bakes. Place the loaf pan in the preheated oven. Bake for approximately 50 to 65 minutes. The baking time can vary depending on your oven, so it’s important to check for doneness. To test if the bread is ready, insert a toothpick or a thin knife into the center of the loaf. If it comes out clean, or with just a fewrum extractist crumbs attached (but no wet batter), then your Reeses Peanut Butter Banana Bread is done. If it’s still wet, continue baking for another 5-10 minutes and check again.
Cooling and Resting
Once your delicious Reeses Peanut Butter Banana Bread is baked to perfection, carefully remove the loaf pan from the oven. Let the bread cool in the pan for about 10 to 15 minutes. This initial cooling period allows the bread to set up properly before you attempt to remove it from the pan. After this initial cooling, carefully invert the loaf pan onto a wire cooling rack. If you used parchment paper, you can gently lift the bread out. Allow the bread to cool completely on the wire rack before slicing. Slicing warm bread can result in a gummy texture and can also cause it to break apart. Patience is key here for the best texture and flavor to develop. Once completely cool, you can slice and enjoy your amazing Reeses Peanut Butter Banana Bread!
Conclusion:
And there you have it – your very own Reeses Peanut Butter Banana Bread! I hope you’ve enjoyed this delightful journey of baking a treat that’s both comforting and undeniably delicious. This recipe brings together the classic sweetness of ripe bananas with the irresistible allure of peanut butter and the iconic candy, Reeses, creating a flavor profile that’s sure to become a new favorite. The moist crum extractb, studded with chunks of peanut butter cups, makes every bite an adventure. Don’t be afraid to experiment with this fantastic recipe; it’s a wonderfully forgiving base for your culinary creativity!
For serving, I love this bread slightly warm, perhaps with a generous slather of butter or even a dollop of extra peanut butter. It’s also fantastic on its own for breakfast, a satisfying snack, or even as a simple dessert. If you’re feeling adventurous with variations, consider adding a swirl of chocolate chips to the batter, or topping the loaf with a drizzle of melted chocolate and a sprinkle of chopped Reeses candies before serving. You could also try using different nut butters if peanut allergies are a concern, though the Reeses flavor profile is quite specific!
Baking is all about creating joy, and this Reeses Peanut Butter Banana Bread is a perfect vehicle for that. So, gather your ingredients, embrace the sweet aroma, and enjoy the process. I encourage you to share this delightful creation with loved ones – it’s a guaranteed crowd-pleaser!
Frequently Asked Questions:
Can I make this Reeses Peanut Butter Banana Bread ahead of time?
Absolutely! This bread stores beautifully. Once completely cooled, wrap it tightly in plastic wrap or place it in an airtight container. It will stay fresh at room temperature for about 3-4 days, and it also freezes exceptionally well for up to 3 months.
My bananas aren’t very ripe. Can I still make this Reeses Peanut Butter Banana Bread?
While super ripe, spotty bananas are ideal for the sweetest flavor and moistest texture, you can still make this bread with slightly less ripe ones. For a sweeter result, you might consider adding a tablespoon or two of extra sugar to the batter. You could also try mashing the less ripe bananas with a fork and then microwaving them for about 30-60 seconds to soften them further and enhance their sweetness.
Reese’s Peanut Butter Banana Bread
A decadent and moist banana bread infused with the classic flavors of Reese’s Peanut Butter Cups.
Ingredients
-
1 1/2 cups all-purpose flour
-
1/2 teaspoon baking soda
-
1 1/2 teaspoons baking powder
-
1/2 teaspoon kosher salt
-
3 very ripe medium bananas, mashed
-
1/2 cup creamy peanut butter
-
1/4 cup vegetable oil
-
2 large eggs
-
1 cup granulated sugar
-
8 ounces miniature peanut butter cups, roughly chopped
Instructions
-
Step 1
Preheat oven to 350°F (175°C). Grease and flour a 9×5 inch loaf pan, or line with parchment paper. -
Step 2
In a medium bowl, whisk together flour, baking soda, baking powder, and salt. -
Step 3
In a large bowl, mash bananas. Add peanut butter, vegetable oil, eggs, and sugar. Beat until well combined. -
Step 4
Gradually add dry ingredients to wet ingredients, mixing gently until just combined. Do not overmix. -
Step 5
Gently fold in chopped peanut butter cups. -
Step 6
Pour batter into prepared loaf pan. Sprinkle with additional chopped peanut butter cups if desired. -
Step 7
Bake for 50-65 minutes, or until a toothpick inserted into the center comes out clean. -
Step 8
Let cool in the pan for 10-15 minutes, then invert onto a wire rack to cool completely before slicing.
Important Information
Nutrition Facts (Per Serving)
It is important to consider this information as approximate and not to use it as definitive health advice.
Allergy Information
Please check ingredients for potential allergens and consult a health professional if in doubt.