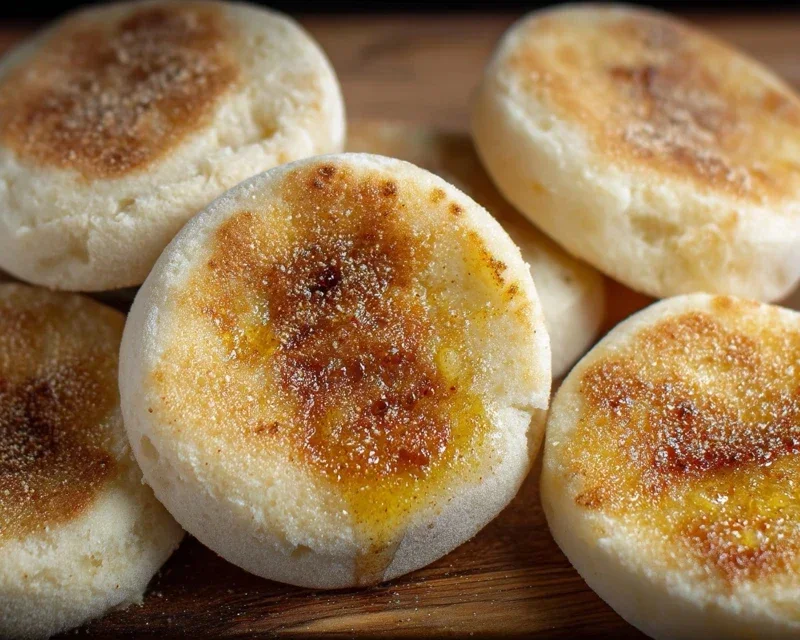
Easy Homemade English Muffins – Deliciously Simple
Easy Homemade English Muffins are a breakfast revelation! Forget those often-disappointing store-bought versions that crum extractble at the slightest touch. There’s something truly magical about biting into a perfectly toasted, golden-brown English muffin, the kind with those iconic nooks and crannies just beggin extractg to be filled with butter, jam, or your favorite savory toppings. We all love them for their versatility, their satisfying chew, and that comforting, familiar taste that signals the start of a great day. What makes homemade English muffins truly special is the incredible aroma that fills your kitchen as they bake, a scent that promises pure, unadulterated deliciousness. It’s a simpler, more rewarding experience than you might imagin extracte, and once you try making your own Easy Homemade English Muffins, you’ll wonder why you ever bought them before.

Easy Homemade English Muffins
There’s something incredibly satisfying about biting into a warm, freshly baked English muffin, with its distinctive nooks and crannies ready to capture butter, jam, or your favorite savory topping. While store-bought versions are convenient, they rarely compare to the homemade experience. The good news is, making your own English muffins is surprisingly straightforward, requiring minimal effort for maximum reward. Forget the long waits and complicated techniques; this recipe is designed for simplicity and deliciousness, perfect for a weekend brunch or even a quick breakfast treat during the week. Get ready to elevate your breakfast game with these wonderfully tender and chewy delights.
Ingredients:
Instructions:
The magic of homemade English muffins begin extracts with a simple yeast dough. Don’t be intimidated by working with yeast; this recipe uses instant dry yeast, which is incredibly forgiving and doesn’t require proofing separately. This means less fuss and more delicious muffins!
Mixing the Dough
Start by combining the warm water, sugar, and instant dry yeast in a large mixing bowl. Give it a gentle stir to dissolve the sugar and ensure the yeast is submerged. The water should feel comfortably warm to the touch, not hot, as excessively hot water can kill the yeast. Let this mixture sit for about 5 minutes. You might notice a slight foamy layer appear on top, which is a good sign that your yeast is active and ready to go. If you don’t see any activity after 5-10 minutes, your yeast might be old, and it would be best to start with a fresh packet.
Next, add the oil (or melted butter) and the 2 ¾ cups of all-purpose flour to the yeast mixture. Add the salt as well. If you are using kosher salt, which is coarser, add an extra pinch to compensate for its larger crystal size. Begin extract mixing the ingredients with a sturdy spoon or a spatula until a shaggy dough starts to form. At this stage, the dough will look quite sticky and uneven, and that’s perfectly normal.
Now, it’s time to bring the dough together. If you’re using a stand mixer with a dough hook, knead the dough on low speed for about 5-7 minutes. If you’re kneading by hand, turn the dough out onto a lightly floured surface and knead for about 8-10 minutes. The dough should become smooth, elastic, and less sticky. You’re looking for a dough that springs back slowly when poked. If the dough is still too sticky to handle after a few minutes of kneading, you can gradually add the extra ¼ cup of flour, a tablespoon at a time, until it reaches the desired consistency. Be careful not to add too much flour, as this can result in dry, tough muffins.
First Rise
Once your dough has reached a smooth, elastic texture, lightly grease the mixing bowl with a little oil. Place the dough into the greased bowl, turning it to coat all sides. Cover the bowl tightly with plastic wrap or a damp kitchen towel. Find a warm, draft-free spot for the dough to rise. This could be inside a slightly warmed oven (turned off!), on top of your refrigerator, or simply on your counter if your kitchen is warm. Let the dough rise for about 1 to 1 ½ hours, or until it has doubled in size. This resting period allows the yeast to work its magic, developing flavor and creating that characteristic airy texture.
Shaping and Second Rise
After the dough has doubled, gently punch it down to release the air. Turn the dough out onto a lightly floured surface and gently pat it into a circle about ½ inch thick. Using a round cookie cutter or a glass with about a 3-inch diameter, cut out your English muffin shapes. You should be able to get about 8-10 muffins from this batch. Re-gather the scraps, gently knead them a couple of times, and cut out more muffins. Don’t overwork the scraps; they might be a little tougher.
Prepare baking sheets by lining them with parchment paper and generously dusting them with cornmeal. This cornmeal is crucial for that authentic English muffin texture and flavor. Carefully place each cut-out dough circle onto the prepared baking sheets, ensuring they have a little space between them. Once all your muffins are cut and placed, gently press down on each one with your fingers, making sure they are about ½ inch thick. You want them to be relatively flat before their second rise, as they will puff up.
Now, lightly dust the tops of the English muffins with a little more cornmeal. Cover the baking sheets loosely with plastic wrap or a clean kitchen towel. Let the muffins rest and rise for another 30-45 minutes, or until they look noticeably puffy and have increased in size. This second rise is important for achieving a light and airy interior.
Cooking the Muffins
When you’re ready to cook, heat a large, heavy-bottomed skillet or a griddle over medium-low heat. You want the heat to be gentle enough that the muffins cook through without burning on the outside. Add a tablespoon or two of cornmeal to the skillet and spread it around. Place 3-4 of the risen English muffins onto the hot skillet, making sure not to overcrowd the pan. You’ll be cooking them in batches.
Cook the muffins for about 5-7 minutes per side. You’re looking for a beautiful golden-brown color. Resist the urge to press down on them with your spatula; this will deflate them and ruin those precious nooks and crannies! Flip them carefully and cook the other side for another 5-7 minutes until they are golden brown and sound hollow when tapped. The inside should be cooked through, but still soft and tender. If you’re unsure, you can insert a toothpick into the side of a muffin; it should come out clean.
Once cooked, remove the muffins from the skillet and place them on a wire rack to cool slightly. While still warm, you can generously dust them with a little more cornmeal for that classic look and texture. Allow them to cool for at least 10-15 minutes before splitting them. The best way to enjoy them is by splitting them horizontally with a fork or a sharp knife. This technique helps preserve the nooks and crannies, making them perfect for toasting and slathering with butter, jam, or even using for a delicious breakfast sandwich.
Enjoy the incredibly rewarding experience of biting into your very own homemade English muffins. They are best enjoyed fresh, but they can be stored in an airtight container at room temperature for a couple of days, or frozen for longer storage. Reheat gently in a toaster or under the broiler to revive their warmth and tenderness.
Conclusion:
And there you have it! You’ve conquered the art of making delicious, truly easy homemade English muffins right in your own kitchen. Forget those store-bought versions; nothing compares to the slightly crisp exterior, fluffy interior, and delightful nooks and crannies of muffins you’ve made yourself. This recipe is fantastic because it uses simple ingredients, requires minimal fuss, and delivers incredibly satisfying results. They are perfect for any meal, from a hearty breakfast to a light lunch or even a midnight snack.
For serving, the possibilities are endless! I love them toasted and slathered with butter and jam, or as the base for a classic Eggs Benedict. They’re also wonderful topped with cream cheese and smoked salmon, or even as a base for avocado toast. Don’t be afraid to get creative with variations! You can add herbs like rosemary or chives to the dough for an savory twist, or incorporate a touch of cinnamon and sugar for a sweeter profile. I’ve even seen people add shredded cheese for a cheesy delight!
I truly hope you’re inspired to give this recipe a try. The sense of accomplishment and the incredible taste will make it all worthwhile. Happy baking!
Frequently Asked Questions:
Can I make these ahead of time?
Absolutely! Once cooled, you can store your easy homemade English muffins in an airtight container at room temperature for 2-3 days, or freeze them for up to 3 months. Just toast them from frozen for a quick treat.
My muffins aren’t very tall. What did I do wrong?
Several factors can affect height. Ensure your yeast is active and your dough has risen sufficiently. Don’t overwork the dough during shaping, and make sure your griddle or pan is at the correct medium-low heat. They should be cooked until golden brown on both sides, which allows them to puff up.
Can I use whole wheat flour?
Yes, you can! For best results, I recommend substituting up to half of the all-purpose flour with whole wheat flour. You might need to add a tablespoon or two more liquid, as whole wheat flour can absorb more moisture.
Easy Homemade English Muffins
Simple and delicious homemade English muffins that are perfect for breakfast or brunch. Achieve a classic texture with this easy recipe.
Ingredients
-
1 ¼ cups warm water
-
1 tablespoon sugar
-
1 teaspoon instant dry yeast
-
2 tablespoon canola oil
-
2 ¾ cups all purpose flour
-
1 teaspoon salt
-
cornmeal for dusting
Instructions
-
Step 1
In a large bowl, combine the warm water, sugar, and instant dry yeast. Let it sit for 5-10 minutes until foamy. -
Step 2
Stir in the oil. Gradually add the flour and salt, mixing until a shaggy dough forms. If the dough is too sticky, add up to 1/4 cup more flour. -
Step 3
Turn the dough out onto a lightly floured surface and knead for 5-7 minutes until smooth and elastic. Alternatively, use a stand mixer with a dough hook. -
Step 4
Place the dough in a lightly oiled bowl, cover, and let it rise in a warm place for 1 hour, or until doubled in size. -
Step 5
Punch down the dough and gently roll it out on a lightly floured surface to about 1/2 inch thickness. Cut out rounds using a 3-inch cookie cutter. -
Step 6
Generously dust a baking sheet or clean counter with cornmeal. Place the cut-out dough rounds on the cornmeal, ensuring they don’t touch. Cover and let them rest for 15-20 minutes. -
Step 7
Heat a lightly oiled griddle or frying pan over medium-low heat. Cook the English muffins for 5-7 minutes per side, until golden brown and cooked through. -
Step 8
Let cool on a wire rack before splitting and toasting.
Important Information
Nutrition Facts (Per Serving)
It is important to consider this information as approximate and not to use it as definitive health advice.
Allergy Information
Please check ingredients for potential allergens and consult a health professional if in doubt.