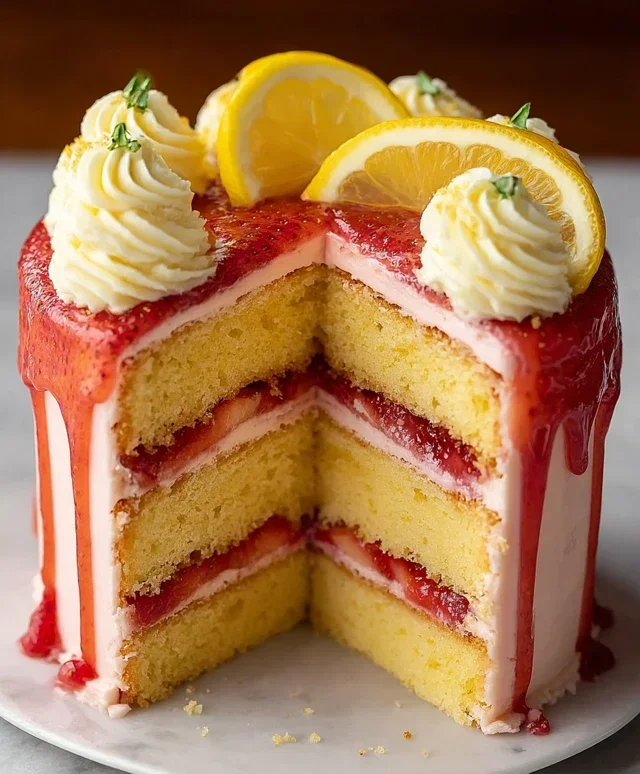
Strawberry Lemonade Cake- Refreshing Summer Dessert
Strawberry Lemonade Cake is the ultimate taste of sunshine, and if you’re anything like me, you’re probably already dreaming of its bright, refreshing flavors. It’s a dessert that just screams summer, bringin extractg together the sweet, juicy burst of strawberries with the zesty, invigorating tang of lemonade. What’s not to love? People adore this Strawberry Lemonade Cake because it perfectly balances sweet and tart, creating a symphony of flavors that’s incredibly satisfying without being overly rich. It’s like bottling up a perfect, sunny afternoon and turning it into a delightful treat. The moist cake crum extractb, infused with both strawberry goodness and that unmistakable lemonade zest, is what truly makes this creation special. Get ready to bake a slice of pure happiness!
Strawberry Lemonade Cake: A Burst of Sunshine in Every Bite
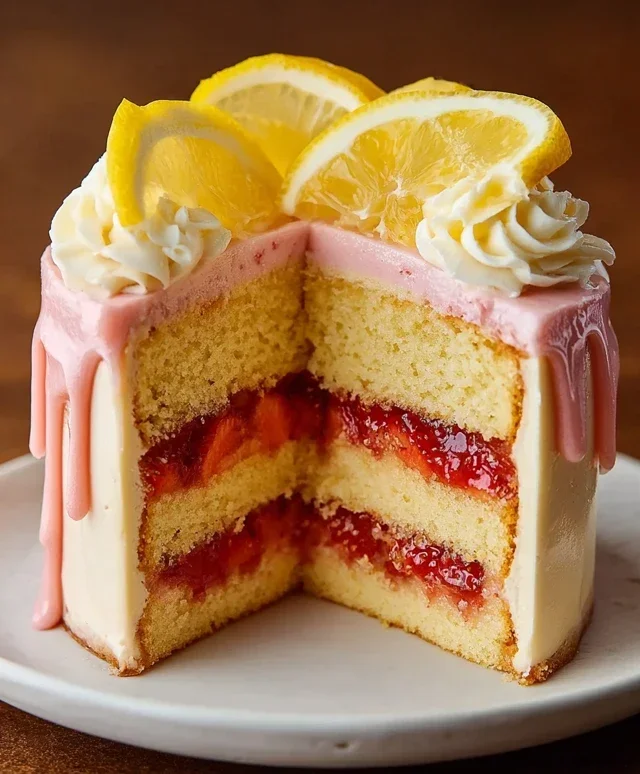
Get ready to experience a flavor explosion that’s both vibrant and utterly delightful! This Strawberry Lemonade Cake is the perfect symphony of sweet strawberries and tangy lemonade, all wrapped up in a moist, tender cake. It’s a celebration of bright, fresh flavors, ideal for birthdays, garden parties, or simply when you need a little sunshine on your plate. The layers of fluffy cake are infused with lemon zest and juice, then lovingly enrobed in a dreamy strawberry buttercream and a zesty lemon mascarpone frosting.
This recipe might seem a little involved with its homemade compote and frostings, but trust me, the results are worth every whisk and stir. We’ll break it down into manageable steps, and you’ll find yourself creating a masterpiece that tastes as good as it looks.
Ingredients:
Making the Cake Layers
This cake starts with a wonderfully tender crum extractb, thanks to the careful balance of ingredients and the magic of buttermilk. Softened butter is key here – it creams beautifully with the powdered sugar, creating a light and airy base for our cake. Make sure your eggs are at room temperature; this helps them emulsify better with the butter and sugar mixture, leading to a smoother batter and a more even bake.
1. Cream the Butter and Sugar: In a large bowl, cream together the softened unsalted butter and powdered sugar using an electric mixer on medium speed. Beat until the mixture is light, fluffy, and pnon-alcoholic ale yellow, which should take about 3-5 minutes. This process incorporates air into the batter, which contributes to the cake’s lightness. Scrape down the sides of the bowl occasionally to ensure everything is well combined.
2. Incorporate Eggs and Vanilla: Add the room temperature eggs, one at a time, beating well after each addition until fully incorporated. This is important for emulsification; adding them all at once can cause the mixture to curdle. Next, stir in the vanilla extract.
3. Combine Dry Ingredients: In a separate medium bowl, whisk together the all-purpose flour, cornstarch, baking powder, baking soda, and fine salt. Sifting these ingredients together ensures they are evenly distributed and removes any lumps, leading to a more uniform cake texture.
4. Alternate Wet and Dry Ingredients: In a small bowl or jug, whisk together the buttermilk, lemon juice, and lemon zest. With the mixer on low speed, gradually add the dry ingredients to the wet ingredients, alternating with the buttermilk mixture. Begin extract and end with the dry ingredients. For example, add about one-third of the dry ingredients, mix until just combined, then add half of the buttermilk mixture, mix, add another third of the dry ingredients, mix, add the remaining buttermilk mixture, mix, and finally add the remaining dry ingredients and mix until just combined. Be careful not to overmix the batter at this stage, as it can develop the gluten too much, resulting in a tough cake. A few small lumps are perfectly fine.
5. Bake the Cakes: Divide the batter evenly between two prepared 8-inch cake pans (greased and floured, or lined with parchment paper). Smooth the tops with a spatula. Bake in a preheated oven at 175°C (350°F) for 25-30 minutes, or until a wooden skewer inserted into the center of the cakes comes out clean. Let the cakes cool in the pans for about 10-15 minutes before inverting them onto a wire rack to cool completely. Ensure the cakes are completely cool before frosting; warm cakes will melt the frosting.
Assembling Your Masterpiece
Once your cake layers are baked and cooled, it’s time for the fun part – assembly and decoration! The homemade strawberry compote will add a burst of intense strawberry flavor between the layers, complementing the tangy lemon notes beautifully.
Frosting and Filling
This is where the magic truly happens. We’ll create a stunning cake with layers of flavor and texture.
1. Prepare the Frostings: Ensure your Homemade Strawberry Swiss Buttercream and Lemon Mascarpone Frosting are prepared and at a good spreading consistency. If the Swiss buttercream is too firm, gently warm it slightly. If the mascarpone frosting is too soft, chill it for a short period.
2. Layer the Cake: Place one cooled cake layer on your serving plate or cake stand. Spread a generous layer of the Homemade Strawberry Swiss Buttercream evenly over the top. Dollop spoonfuls of your homemade strawberry compote over the buttercream and gently swirl them together. This creates pockets of intense strawberry flavor. Place the second cake layer on top.
3. Crum extractb Coat: Apply a thin layer of either frosting all over the cake to create a “crum extractb coat.” This seals in any loose crum extractbs and provides a smooth base for your final frosting layer. Chill the cake in the refrigerator for at least 30 minutes to set the crum extractb coat. This step is crucial for a clean, professional-looking finish.
4. Final Frosting: Once the crum extractb coat is firm, apply the remaining Lemon Mascarpone Frosting to the top and sides of the cake, smoothing it with an offset spatula. You can create swirls or a smooth finish, depending on your preference.
5. Decorate: Gently melt the 50g of white chocolate in a heatproof bowl over a saucepan of simmering water (double boiler method), or in the microwave in 20-second intervals, stirring between each. Drizzle the melted white chocolate over the top of the cake. You can also sprinkle some fresh strawberries or lemon zest for an extra pop of color and flavor.
This Strawberry Lemonade Cake is more than just a dessert; it’s an experience. Each bite is a delightful balance of sweet, tart, and fruity, making it a showstopper for any occasion. Enjoy!
Conclusion:
So there you have it – your guide to creating a truly delightful Strawberry Lemonade Cake! This recipe is fantastic because it perfectly balances the sweet tang of strawberries with the bright zestiness of lemon, resulting in a cake that’s both refreshing and utterly satisfying. It’s surprisingly simple to make, making it an excellent choice for both novice bakers and experienced pros looking for a crowd-pleaser. The vibrant pink hue from the strawberries also makes it a visually stunning centerpiece for any occasion, from summer picnics and birthdays to just a special treat to brighten your day. Imagin extracte a slice of this moist, flavorful cake with a dollop of whipped cream or a scoop of vanilla ice cream – pure bliss! I highly encourage you to give this Strawberry Lemonade Cake a try; I’m confident you’ll fall in love with its irresistible flavor profile.
For serving, consider complementing the cake with fresh strawberries and a sprig of mint. A light lemon glaze or a cream cheese frosting also pairs beautifully, enhancing the citrus notes. Don’t be afraid to experiment! You can add a touch of rosewater for an extra floral note, or even swirl in some strawberry jam for an intensified berry flavor. If you’re feeling adventurous, a few blueberries folded into the batter can add another layer of fruity goodness. This recipe is incredibly versatile and sure to become a favorite in your baking repertoire.
Frequently Asked Questions:
Can I use frozen strawberries instead of fresh?
Absolutely! Frozen strawberries work wonderfully in this Strawberry Lemonade Cake. Just make sure to thaw them completely and drain off any excess liquid before adding them to the batter to prevent a soggy cake. You might also want to gently fold them in to avoid overmixing.
What if I don’t have lemons? Can I use lime?
Yes, you can substitute lime for lemon! Lime offers a slightly different but equally delightful citrusy zing that will still make your Strawberry Lemonade Cake wonderfully tart and refreshing. The flavor profile will be a bit more tropical, which can be a fantastic variation!
How should I store any leftover cake?
Leftover Strawberry Lemonade Cake can be stored in an airtight container at room temperature for up to 2 days, or in the refrigerator for up to 4-5 days. If refrigerating, let it come to room temperature before serving for the best texture and flavor.
Strawberry Lemonade Cake
A bright and refreshing cake bursting with strawberry and lemon flavors, layered with homemade compote and creamy frostings.
Ingredients
-
150 g unsalted butter, softened
-
280 g powdered sugar
-
3 medium eggs, at room temperature
-
1 1/2 tsp vanilla extract
-
260 g all-purpose flour
-
10 g cornstarch
-
1 1/2 tsp baking powder
-
1/2 tsp baking soda
-
1/4 tsp fine salt
-
210 ml buttermilk
-
Juice of 1/2 lemon and zest
-
Homemade strawberry compote
-
Homemade Strawberry Swiss Buttercream
-
Lemon Mascarpone Frosting (homemade)
-
50 g white chocolate
Instructions
-
Step 1
Preheat oven to 175°C (350°F) and grease and flour two 8-inch cake pans. -
Step 2
In a large bowl, cream together the softened unsalted butter and powdered sugar until light and fluffy. Beat in the eggs one at a time, then stir in the vanilla extract. -
Step 3
In a separate bowl, whisk together the all-purpose flour, cornstarch, baking powder, baking soda, and fine salt. In a small bowl, whisk together the buttermilk, lemon juice, and lemon zest. -
Step 4
Gradually add the dry ingredients to the wet ingredients, alternating with the buttermilk mixture, beginning and ending with the dry ingredients. Mix until just combined, being careful not to overmix. -
Step 5
Divide the batter evenly between the prepared cake pans and bake for 30-35 minutes, or until a toothpick inserted into the center comes out clean. -
Step 6
Let the cakes cool in the pans for 10 minutes before inverting them onto a wire rack to cool completely. Once cooled, frost the cake layers with Homemade Strawberry Swiss Buttercream, then add a layer of Homemade Strawberry Compote and Lemon Mascarpone Frosting. Decorate with melted white chocolate if desired.
Important Information
Nutrition Facts (Per Serving)
It is important to consider this information as approximate and not to use it as definitive health advice.
Allergy Information
Please check ingredients for potential allergens and consult a health professional if in doubt.