Strawberry Banana Dog Smoothie Bites – Healthy Treats
Strawberry and Banana Smoothie Bites for Dogs are more than just a tasty treat; they’re a delightful way to spoil your furry best friend while sneakily boosting their nutrition. Imagin extracte those happy tail wags and contented sighs as your pup discovers these cool, refreshing morsels on a warm afternoon or as a post-walk reward. We all know dogs adore the simple, sweet flavors of strawberries and bananas, and when you combine them into convenient, bite-sized pieces, you’ve got a winning recipe that’s almost as enjoyable for you to make as it is for them to devour. What makes these Strawberry and Banana Smoothie Bites for Dogs truly special is their simplicity, requiring just a few wholesome ingredients and no baking involved, making them a perfect, guilt-free indulgence that’s incredibly easy to whip up. Prepare to see your dog’s eyes light up with anticnon-alcoholic ipation!

Ingredients:
- 1 cup fresh strawberries, hulled and chopped
- 1 ripe banana, peeled and sliced
- ½ cup plain, unsweetened yogurt (dog-safe)
- 1 tablespoon honey (optional)
Getting Started: Preparing Your Smoothie Bites
This recipe for Strawberry and Banana Smoothie Bites for Dogs is incredibly simple, requiring minimal prep and just a few common ingredients. We’re going to transform these fresh, healthy components into delightful frozen treats your canine companion will adore. Before we begin extract blending, it’s essential to ensure your strawberries are properly prepped. Start by washing them thoroughly under cool running water. Then, remove the green leafy tops, also known as hulls. Once hulled, chop the strawberries into manageable pieces. This makes them easier to blend and ensures a smoother consistency for your finished bites.
Next, let’s turn our attention to the ripe banana. A ripe banana is key here, as it will contribute natural sweetness and a creamy texture to the smoothie bites. Peel the banana and then slice it into rounds. The size of the slices isn’t critical since everything will be blended, but aiming for roughly ½-inch thick slices is a good starting point. If you’re planning to make a larger batch, you might want to prep more bananas and strawberries in advance.
The yogurt component is crucial for providing a creamy base and beneficial probiotics for your dog. Ensure you are using plain, unsweetened yogurt. Flavored yogurts or those with artificial sweeteners can be harmful to dogs, so always double-check the label. A good quality, full-fat, plain Greek yogurt is often an excellent choice due to its thicker consistency, which will help the bites set nicely.
Finally, the honey is listed as optional. While dogs can enjoy small amounts of honey, it is a sugar, so use it sparingly. Honey can add an extra touch of sweetness that might entice picky eaters, and it also has some potential anti-inflammatory properties. However, if your banana is particularly ripe, you might find the natural sweetness is sufficient, and you can omit the honey altogether.
Blending the Smoothie Base
Phase 1: Combining the Core Ingredients
Now that all your ingredients are prepped and ready, it’s time to bring them together in a blender. Start by adding the chopped fresh strawberries to your blender jar. Next, add the sliced ripe banana. The combination of strawberries and banana provides a fantastic flavor profile that most dogs find irresistible, and it’s packed with vitamins and antioxidants.
Following the fruit, add the ½ cup of plain, unsweetened yogurt to the blender. This yogurt will act as the binder and the creamy foundation for our smoothie bites. If you’ve decided to include honey for that extra sweetness, now is the time to add your 1 tablespoon of honey to the blender as well.
Phase 2: Achieving the Perfect Smoothie Consistency
Secure the lid tightly onto your blegin extractr. Begin blending on a low speed to initially break down the ingredients. Gradually increase the speed to high, allowing the mixture to blend until it is completely smooth and homogenous. You’re looking for a consistency that resembles a thick smoothie or a milkshake. There should be no large chunks of fruit remaining, and the yogurt should be fully incorporated. This might take anywhere from 30 seconds to 2 minutes, depending on the power of your blender.
If you find that the mixture is too thick and the blender is struggling to incorporate everything, don’t hesitate to add a tiny splash of water or a little more dog-safe yogurt to help things along. Be mindful not to add too much liquid, as this will make it difficult for the bites to set when frozen. The goal is a thick, pourable consistency that will easily flow into your molds. Taste a tiny bit (if you wish!) to check the sweetness level, especially if you’ve added the honey. You want it to be palatable and enjoyable for your dog.
Freezing the Smoothie Bites
Phase 3: Pouring into Molds
Once you have achieved that perfect, thick smoothie consistency, it’s time to transfer the mixture into your chosen molds. Silicone ice cube trays are ideal for this purpose. They come in various fun shapes and sizes, making the process even more enjoyable for both you and your dog. Other options include small silicone muffin liners or even a shallow, freezer-safe dish that you can later cut into squares.
Carefully pour or spoon the smoothie mixture into each cavity of your ice cube tray or mold. It’s best to fill them about ¾ of the way full, as the mixture might expand slightly as it freezes. Try to keep the pouring neat to ensure your finished bites have a clean appearance. If using a shallow dish, ensure the layer of smoothie is relatively even to facilitate uniform freezing and cutting.
Phase 4: The Waiting Game – Freezing Time
Once your molds are filled, gently place the tray or dish into the freezer. Allow the smoothie bites to freeze solid. This typically takes a minimum of 4 to 6 hours, but for best results and to ensure they are completely firm, it’s often recommended to leave them overnight. Resist the temptation to check on them too early, as disturbing them before they are fully frozen can affect their shape and firmness.
The freezing process is where the magic happens, transforming your delicious smoothie mixture into convenient, bite-sized treats. For optimal firmness, ensure your freezer temperature is set appropriately. Once they are completely frozen, they should be firm to the touch and hold their shape well when removed from the mold.
Phase 5: De-molding and Serving
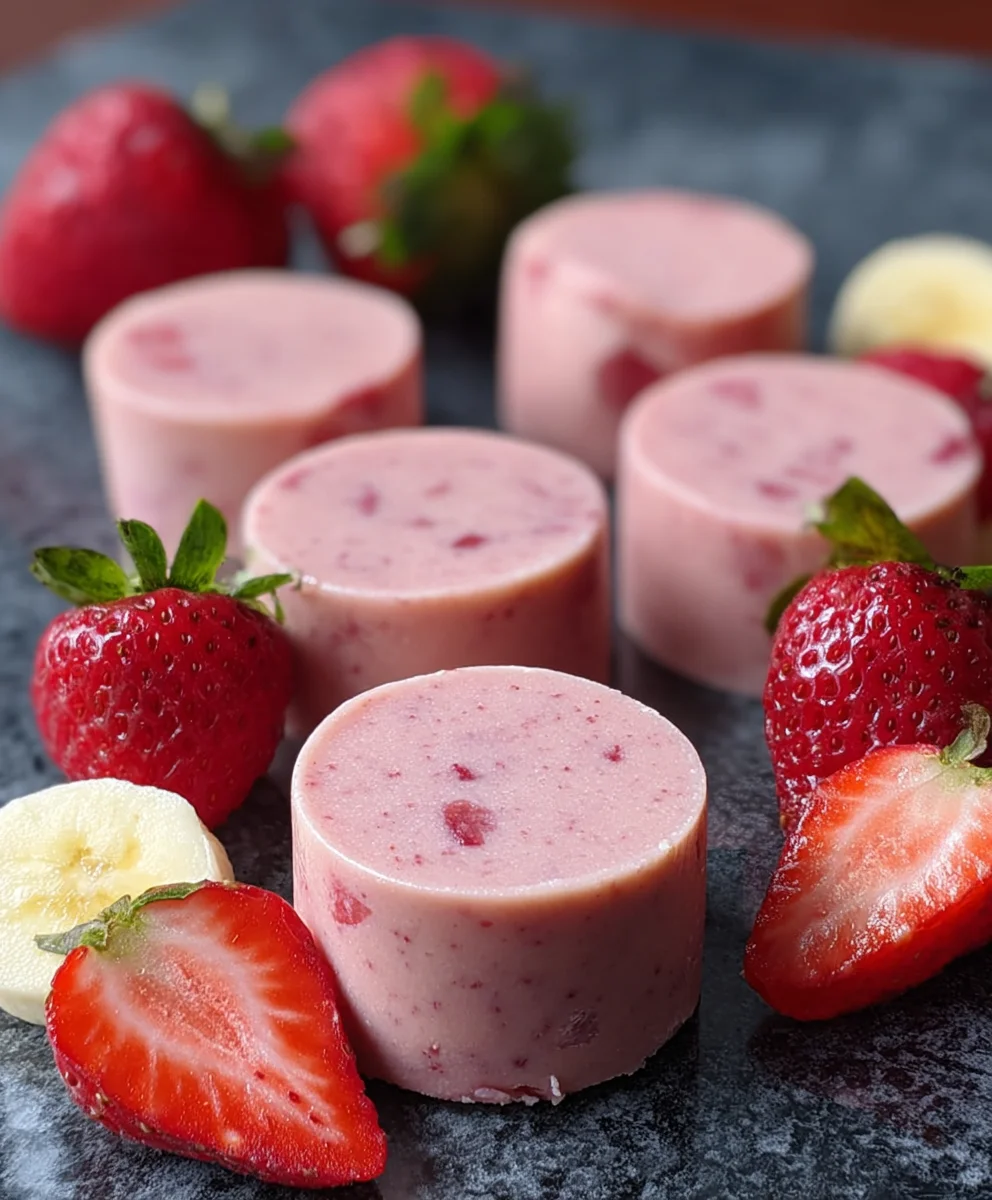
After the bites have completely frozen, it’s time to release them from their molds. If you’re using silicone molds, this is usually a straightforward process. Gently push from the bottom of each cavity to pop the frozen bites out. If you’re using a rigid ice cube tray, you might need to run the bottom of the tray under warm water for a few seconds to help loosen the bites, but be careful not to melt them. If you used a shallow dish, you can use a knife to carefully cut the frozen block into smaller, dog-appropriate bite-sized pieces.
Serve these Strawberry and Banana Smoothie Bites immediately as a refreshing cool-down treat, especially on warmer days. For storage, transfer any uneaten bites back into a freezer-safe container or a resealable bag. They can be kept frozen for up to 1-2 months. Always supervise your dog when they are enjoying any treat.
Conclusion:
You’ve now got the knowledge to create delicious and healthy Strawberry and Banana Smoothie Bites for Dogs! These delightful treats are a fantastic way to reward your furry friend with wholesome ingredients. We’ve covered the simple steps to blend, freeze, and serve these nutritious bites, ensuring a burst of fruity goodness in every bite.
For serving suggestions, these Strawberry and Banana Smoothie Bites for Dogs are perfect as a cool treat on a warm day, a training reward, or even a delightful addition to their meal for a little extra flair. Feel free to get creative with variations! You can add a tablespoon of plain yogurt for extra probiotics, a sprinkle of chia seeds for omega-3s, or even a tiny bit of peanut butter (xylitol-free, of course!) for an extra flavor boost.
Don’t be afraid to experiment and discover what your dog loves most. Making these Strawberry and Banana Smoothie Bites for Dogs is a fun and rewarding way to show your pup some extra love. Enjoy watching them wag their tails with delight!
Frequently Asked Questions:
Can I make these ahead of time?
Absolutely! These Strawberry and Banana Smoothie Bites for Dogs are ideal for making in batches and storing them in the freezer for up to two weeks. This way, you’ll always have a healthy treat on hand for your canine companion.
What if my dog doesn’t like bananas?
No problem! If your dog is not a fan of bananas, you can substitute them with unsweetened applesauce or even a small amount of cooked sweet potato. Just ensure the texture is still suitable for freezing and forming into bites.
Strawberry Banana Dog Smoothie Bites – Healthy Treats
Delicious and healthy frozen smoothie bites for your canine companion, made with simple, dog-safe ingredients.
Ingredients
-
1 cup fresh strawberries, hulled and chopped
-
1 ripe banana, peeled and sliced
-
½ cup plain, unsweetened yogurt (dog-safe)
-
1 tablespoon honey (optional)
-
1 tablespoon water (if needed)
Instructions
-
Step 1
Wash strawberries thoroughly, remove hulls, and chop into manageable pieces. Peel and slice the ripe banana into rounds. -
Step 2
Add the chopped strawberries, sliced banana, and ½ cup of plain, unsweetened yogurt to a blender. If using, add 1 tablespoon of honey. -
Step 3
Secure the blender lid and blend on low speed, gradually increasing to high until the mixture is completely smooth and homogenous, resembling a thick smoothie. Add a splash of water or more yogurt if the mixture is too thick. -
Step 4
Pour or spoon the smoothie mixture into silicone ice cube trays or other small, dog-safe molds, filling them about ¾ full. -
Step 5
Place the filled molds in the freezer and freeze for at least 4-6 hours, or preferably overnight, until solid. -
Step 6
Once frozen, gently remove the smoothie bites from the molds. Serve immediately as a treat and store any leftovers in a freezer-safe container for up to 1-2 months.
Important Information
Nutrition Facts (Per Serving)
It is important to consider this information as approximate and not to use it as definitive health advice.
Allergy Information
Please check ingredients for potential allergens and consult a health professional if in doubt.