Lemon Rosemary Beef – Easy & Flavorful Recipe
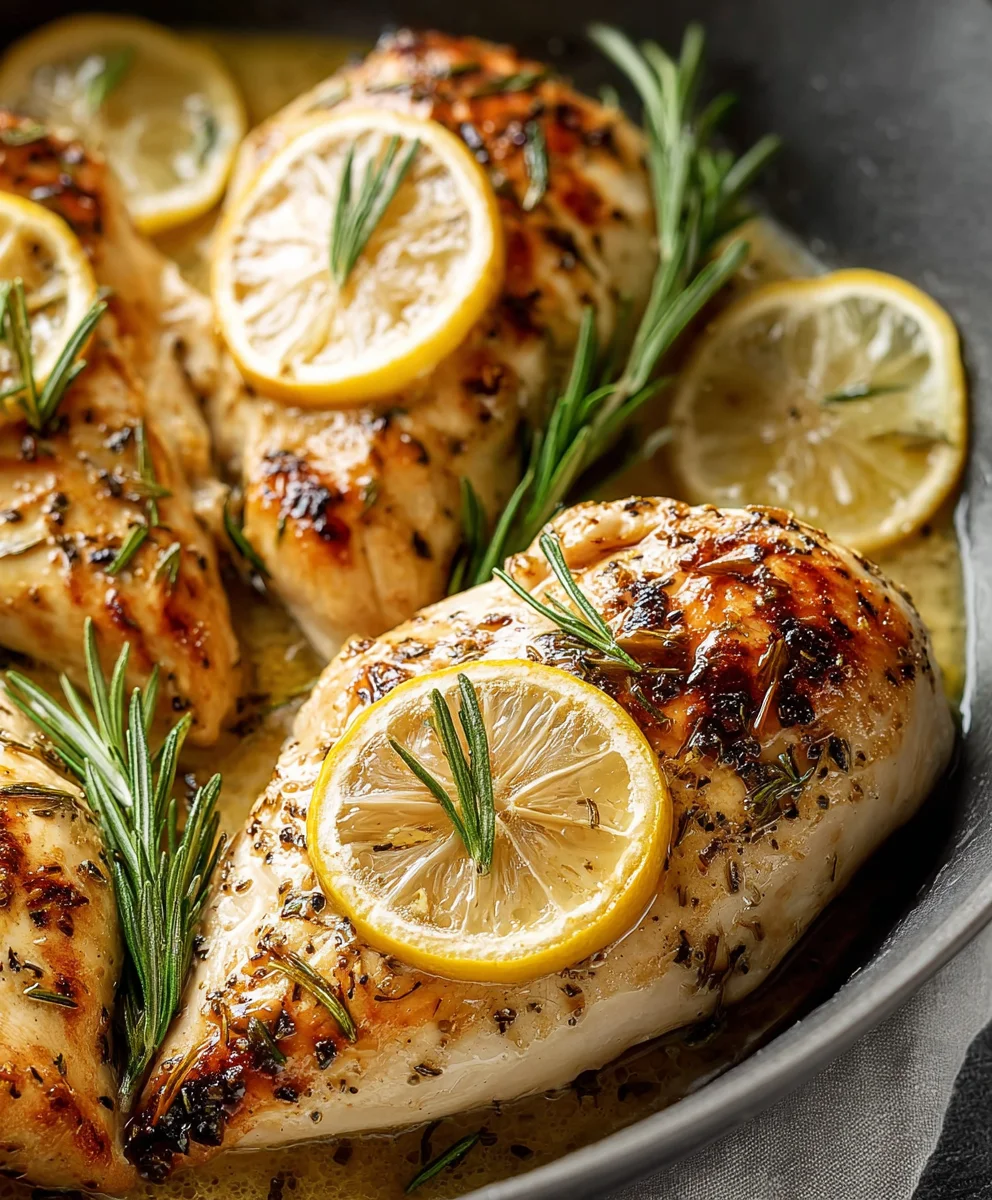
Lemon Rosemary Chicken is a symphony of bright, zesty citrus and aromatic, earthy herbs, creating a dish that is both elegant enough for a dinner party and delightfully comforting for a weeknight meal. What is it about this classic combination that captures our culinary hearts? It’s the way the sharp tang of lemon cuts through the richness of perfectly cooked chicken, while the fragrant rosemary infuses every bite with its distinctive, pine-like essence. This isn’t just a recipe; it’s an experience. The subtle caramelization on the skin, the tender, juicy meat that practically melts in your mouth, and the irresistible aroma that fills your kitchen as it bakes – it all adds up to pure bliss. Prepare to fall in love with Lemon Rosemary Chicken all over again, or for the very first time, with this foolproof guide that guarantees exceptional flavor and a stress-free cooking process.
Ingredients:
- 4 thin-sliced boneless, skinless chicken breasts
- 1 teaspoon kosher salt
- 10-12 cranks fresh-ground black pepper
- 1 tablespoon olive oil, plus extra if needed
- 4 cloves garlic, minced
- 3 tablespoons fresh rosemary, chopped
- ¾ cup low-sodium chicken broth
- ½ cup dry white grape juice (or extra broth)
- 2 tablespoons lemon juice (from 1 lemon)
- 2 tablespoons butter
- Extra fresh rosemary for garnish
- Fresh Italian parsley for garnish
- Lemon wedges for serving
Preparing the Chicken
Seasoning the Chicken
Before we even think about heat, let’s get our star ingredients ready. Take your 4 thin-sliced boneless, skinless chicken breasts and lay them out on a clean cutting board or a plate. Pat them dry with paper towels; this is a crucial step for achieving a nice sear, as moisture can steam the chicken instead of browning it. Now, it’s time to season generously. Sprinkle the 1 teaspoon of kosher salt evenly over both sides of each chicken breast. Follow this with about 10-12 cranks of fresh-ground black pepper. Don’t be shy with the seasoning; this is where a lot of the initial flavor comes from. Make sure to cover all surfaces for an even distribution.
Searing and Building Flavor
Searing the Chicken Breasts
Grab a large skillet and place it over medium-high heat. Add the 1 tablespoon of olive oil to the hot skillet. You want the oil to shimmer, indicating it’s hot enough for a good sear. Carefully place the seasoned chicken breasts into the hot skillet, making sure not to overcrowd the pan. If your skillet is not large enough, you’ll want to cook the chicken in batches to ensure each piece gets properly browned. Cook the chicken for about 3-4 minutes per side, or until a beautiful golden-brown crust forms. The thin slices will cook relatively quickly, so keep an eye on them. Once seared, remove the chicken from the skillet and set it aside on a plate. It won’t be fully cooked through at this point, but that’s perfectly fine as it will finish cooking in the sauce.
Sautéing the Aromatics
Reduce the heat under the skillet to medium. If the pan looks a little dry, you can add another drizzle of olive oil, but usually, the oil from searing is enough. Add the 4 cloves of minced garlic to the skillet. Stir the garlic constantly for about 30 seconds until it’s fragrant. Be careful not to burn the garlic, as burnt garlic can turn bitter. Immediately after the garlic becomes fragrant, add the 3 tablespoons of chopped fresh rosemary to the skillet. Stir it in with the garlic and let it cook for another minute. The heat will release the wonderful aroma of the rosemary, infusing the oil with its herbaceous notes. This step is key to building the complex flavor profile of our Lemon Rosemary Chicken.
Creating the Delicious Pan Sauce
Deglazing the Pan
Now, it’s time to create the luscious sauce. Pour the ¾ cup of low-sodium chicken broth into the skillet. Use a wooden spoon or spatula to scrape up any browned bits that are stuck to the bottom of the pan. These browned bits, known as fond, are packed with flavor and will significantly enhance your sauce. Let the broth simmer for about 1-2 minutes, allowing it to reduce slightly and incorporate those savory bits.
Adding Liquids and Finishing the Sauce
Next, add the ½ cup of dry white grape juice (or extra chicken broth if you prefer not to use grape juice). The grape juice adds a subtle sweetness and depth that complements the other flavors beautifully. Stir well and bring the mixture back to a gentle simmer. Now, add the 2 tablespoons of fresh lemon juice. This is where the “lemon” in Lemon Rosemary Chicken really shines, providing a bright, zesty counterpoint to the savory elements. Let the sauce simmer for another 2-3 minutes, allowing the flavors to meld and the sauce to thicken slightly. Finally, stir in the 2 tablespoons of butter. Swirl the butter into the sauce until it’s completely melted and emulsified. This will give the sauce a lovely sheen and a richer, more luxurious texture. Taste the sauce and adjust seasoning if needed; you might want a pinch more salt or pepper depending on your preference.
Finishing the Dish
Returning Chicken to the Pan
Gently place the seared chicken breasts back into the skillet, nestling them into the simmering sauce. Spoon some of the sauce over the top of each chicken breast. Cover the skillet and let the chicken simmer gently in the sauce for about 5-7 minutes, or until the chicken is cooked through and reaches an internal temperature of 165°F (74°C). The thin slices should cook quite quickly. Avoid overcooking, which can make the chicken dry.
Serving and Garnishing
Once the chicken is cooked, remove the skillet from the heat. Garnish the dish generously with extra fresh rosemary and chopped fresh Italian parsley for a burst of color and fresh flavor. The vibrant green of the herbs will beautifully contrast with the golden chicken and pnon-alcoholic ale sauce. Serve the Lemon Rosemary Chicken immediately, making sure to spoon plenty of the delicious pan sauce over each piece. Accompany with lemon wedges on the side, allowing diners to add an extra squeeze of fresh lemon juice if they desire. This dish pairs wonderfully with rice, pasta, or roasted vegetables.

Conclusion:
Congratulations on mastering the art of Lemon Rosemary Chicken! This recipe is a testament to how simple, fresh ingredients can create an incredibly flavorful and satisfying meal. We’ve walked through each step to ensure your chicken is perfectly tender and infused with the bright zest of lemon and the aromatic essence of rosemary. This dish is remarkably versatile, making it a go-to for weeknight dinners or even for impressing guests at a casual gathering. Don’t hesitate to experiment and make it your own!
For serving suggestions, this Lemon Rosemary Chicken pairs beautifully with roasted root vegetables like potatoes and carrots, a light and refreshing side salad, or fluffy quinoa. Consider serving it alongside a creamy risotto for a more decadent meal.
If you’re feeling adventurous, try variations like adding a splash of white grape juice to the pan sauce for an extra layer of complexity, or incorporating other herbs like thyme or garlic alongside the rosemary. You could also marinate the chicken for an hour before cooking for an even more intense flavor infusion.
We encourage you to try this Lemon Rosemary Chicken recipe and make it a staple in your culinary repertoire. The aroma alone as it bakes is enough to make your kitchen feel like home.
FAQs
Why is my Lemon Rosemary Chicken not as flavorful as expected?
Ensure you’re using fresh rosemary and good quality lemons. Also, don’t be shy with seasoning! Generously salt and pepper the chicken before cooking. Allowing the chicken to marinate for at least 30 minutes can also significantly enhance the flavor penetration.
Can I use dried rosemary instead of fresh?
Yes, you can, but the flavor will be more concentrated and less bright. Use about one-third the amount of dried rosemary compared to fresh (e.g., 1 teaspoon dried for 1 tablespoon fresh). Add dried herbs earlier in the cooking process to allow their flavor to meld.
Lemon Rosemary Beef – Easy & Flavorful Recipe
An easy and flavorful recipe for Lemon Rosemary Beef, featuring tender beef with a bright lemon and herbaceous rosemary sauce.
Ingredients
-
4 thin-sliced boneless beef steaks (e.g., sirloin or flank)
-
1 teaspoon kosher salt
-
10-12 cranks fresh-ground black pepper
-
1 tablespoon olive oil, plus extra if needed
-
4 cloves garlic, minced
-
3 tablespoons fresh rosemary, chopped
-
¾ cup low-sodium beef broth
-
½ cup non-alcoholic white grape juice (or extra broth)
-
2 tablespoons lemon juice (from 1 lemon)
-
2 tablespoons butter
-
Extra fresh rosemary for garnish
-
Fresh Italian parsley for garnish
-
Lemon wedges for serving
Instructions
-
Step 1
Season the beef steaks generously with kosher salt and fresh-ground black pepper on both sides. -
Step 2
Heat olive oil in a large skillet over medium-high heat. Sear the beef steaks for 3-4 minutes per side until golden brown. Remove from skillet and set aside. -
Step 3
Reduce heat to medium. Add minced garlic to the skillet and sauté for 30 seconds until fragrant. Add chopped fresh rosemary and cook for another minute. -
Step 4
Deglaze the pan with beef broth, scraping up any browned bits. Let simmer for 1-2 minutes. -
Step 5
Add non-alcoholic white grape juice and lemon juice. Simmer for 2-3 minutes until slightly thickened. Stir in butter until melted and emulsified. -
Step 6
Return the seared beef to the skillet, nestling it into the sauce. Spoon sauce over the beef. Cover and simmer for 5-7 minutes, or until cooked through. -
Step 7
Garnish with extra fresh rosemary and Italian parsley. Serve immediately with lemon wedges.
Important Information
Nutrition Facts (Per Serving)
It is important to consider this information as approximate and not to use it as definitive health advice.
Allergy Information
Please check ingredients for potential allergens and consult a health professional if in doubt.