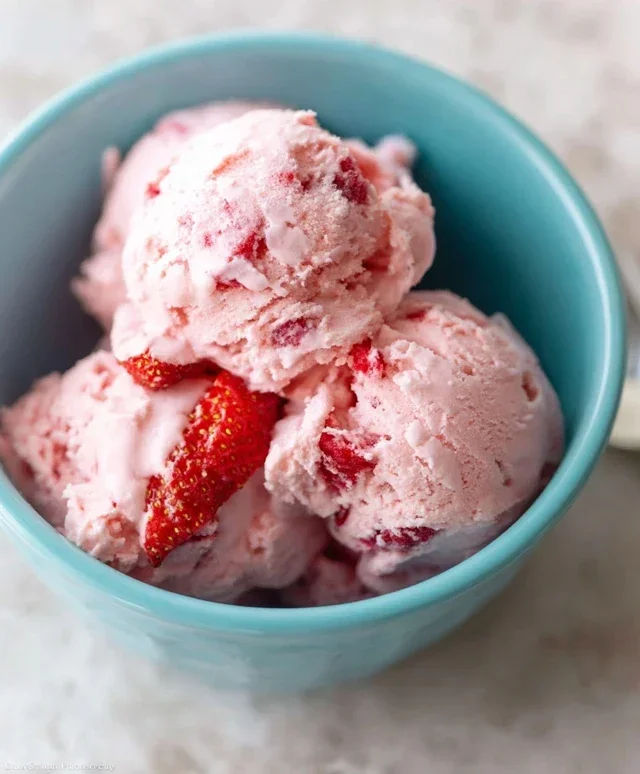
Easy Homemade Strawberry Ice Cream Recipe
Homemade strawberry ice cream is the ultimate summer indulgence. There’s something incredibly satisfying about taking ripe, juicy strawberries and transforming them into a creamy, dreamy frozen treat that’s far superior to anything store-bought. Why do we all love strawberry ice cream so much? It’s a classic for a reason: that perfect balance of sweet, slightly tart fruit against rich, velvety ice cream is pure bliss. What truly makes homemade strawberry ice cream special is the control you have over the ingredients. You can choose the ripest, most flavorful berries, ensuring every bite bursts with authentic strawberry goodness. No artificial flavors, no preservatives – just pure, unadulterated joy in a bowl. Get ready to ditch the freezer aisle and create your own unforgettable batch of homemade strawberry ice cream that will have everyone asking for seconds!
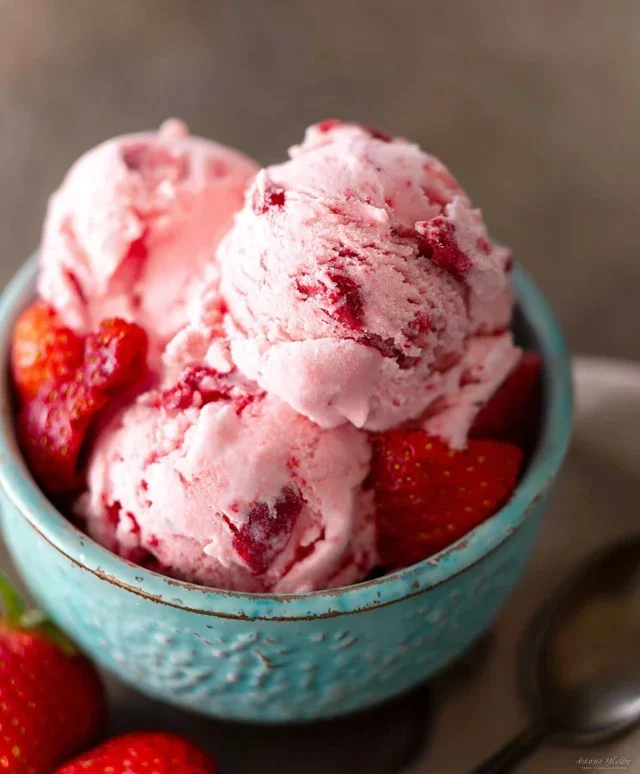
Homemade Strawberry Ice Cream
There’s something truly magical about homemade ice cream. The creamy texture, the vibrant flavors that burst with freshness – it’s a world away from anything you’ll find in a store-bought carton. And when it comes to classic flavors, you can’t beat the sweet, tangy perfection of strawberry. This recipe for Homemade Strawberry Ice Cream is surprisingly simple to make, requiring no fancy equipment beyond a standard ice cream maker. The result is a decadent, intensely fruity treat that will have everyone asking for seconds. Forget artificial flavors and preservatives; this is the real deal, a taste of summer in every spoonful.
Ingredients:
Instructions:
Prepare the Strawberry Base:
First, we need to get our strawberries ready to shine. In a medium bowl, combine your hulled and diced strawberries with the honey, granulated sugar, and lemon juice. The honey adds a lovely subtle sweetness and a slightly different flavor profile than just sugar, while the lemon juice is crucial. It doesn’t make the ice cream sour; instead, it enhances the natural sweetness and brightness of the strawberries, really bringin extractg out their best flavor. Give everything a good stir to ensure the sugar starts to dissolve and the berries are evenly coated. Now, let this mixture sit for about 15-30 minutes at room temperature. This step is called macerating. As the strawberries sit, they will release their natural juices, creating a beautiful, syrupy strawberry concoction. This not only intensifies the strawberry flavor but also makes it easier to incorporate the fruit into our ice cream base later. You’ll notice the mixture becoming more liquidy and the strawberries softening slightly.
Create the Creamy Ice Cream Mixture:
While your strawberries are macerating, it’s time to prepare the creamy foundation for our ice cream. In a separate, larger bowl, pour in your heavy whipping cream and half and half. The heavy cream is what gives our ice cream its luxurious, rich texture and smooth mouthfeel. The half and half lightens it up just a touch, preventing it from being overly dense. Add the vanilla extract to this creamy mixture. Vanilla is a wonderful flavor enhancer, and it complements the strawberry beautifully without overpowering it. Whisk these ingredients together until they are well combined and slightly thickened. You don’t need to whip it into stiff peaks like you would for whipped cream; just a gentle whisking will do the trick to ensure everything is incorporated.
Combine and Chill the Base:
Once your strawberry mixture has had a chance to macerate and release its juices, it’s time to bring everything together. Gently pour the macerated strawberries, along with all their delicious syrup, into the bowl with the cream mixture. Now, using a spoon or a spatula, gently fold the strawberries into the cream. We want to distribute the strawberries and their syrupy goodness throughout the base, but we also want to avoid overmixing. You should see streaks of pink and vibrant red throughout the mixture – this is exactly what we’re looking for! The goal is to have pockets of strawberry goodness rather than a completely homogenous pink liquid. After combining, cover the bowl tightly with plastic wrap. It’s important to chill this entire mixture thoroughly in the refrigerator for at least 2-4 hours, or preferably overnight. This chilling process is absolutely critical. It allows the flavors to meld together, and more importantly, it ensures the base is very cold, which is essential for proper churning in the ice cream maker. A cold base churns faster and results in a smoother, creamier ice cream with smaller ice crystals.
Churn the Ice Cream:
Now for the exciting part! When your ice cream maker is ready (make sure its bowl has been frozen according to the manufacturer’s instructions), remove the chilled strawberry-cream base from the refrigerator. Give it a quick stir to make sure nothing has settled. Pour the cold base into your ice cream maker’s frozen bowl. Turn the ice cream maker on and let it churn. The churning process whips air into the mixture and freezes it simultaneously, creating that characteristic ice cream texture. This usually takes about 20-30 minutes, depending on your specific machine. You’ll see the mixture gradually thicken and start to resemble soft-serve ice cream. Keep an eye on it; you want it to be thick but still pliable, not completely solid.
Harden and Serve:
Once the ice cream has reached a soft-serve consistency, it’s time to achieve that perfect scoopable texture. Carefully remove the churned ice cream from the ice cream maker and transfer it into an airtight container. You can even line the container with parchment paper for easier removal later. At this stage, the ice cream will be quite soft. For the best results, press a piece of parchment paper directly onto the surface of the ice cream to prevent ice crystals from forming on top. Then, cover the container tightly. Place the container in the freezer and let the ice cream harden for at least 4-6 hours, or until it’s firm enough to scoop. This hardening phase is crucial for achieving the right consistency. When you’re ready to enjoy your masterpiece, let it sit at room temperature for a few minutes to soften slightly before scooping. Serve generously and savor the incredible taste of your homemade strawberry ice cream!
Conclusion:
There you have it – your guide to crafting the most delightful homemade strawberry ice cream! I truly believe this recipe is a winner because it uses fresh, vibrant strawberries to create an intensely fruity and wonderfully creamy treat, far superior to any store-bought version. The simplicity of the ingredients allows the natural sweetness and bright flavor of the strawberries to shine through, making each spoonful a burst of pure summer joy. It’s incredibly rewarding to pull a pint of this gorgeous, pink ice cream from your own freezer, knowing you made it yourself with love and care.
This homemade strawberry ice cream is wonderfully versatile. Serve it on its own for a pure taste of strawberry bliss, or get creative! It’s fantastic piled high on warm chocolate brownies, drizzled with a little extra strawberry sauce, or even as a refreshing base for milkshakes. Don’t be afraid to experiment with variations! For a touch of elegance, fold in some fresh mint or basil just before freezing. If you love a bit of texture, consider adding a handful of chopped pistachios or white chocolate chips. I encourage you to gather your ingredients, get your ice cream maker ready, and dive into the wonderful world of homemade ice cream. You won’t regret it!
Frequently Asked Questions:
Can I make this without an ice cream maker?
Yes, you can! While an ice cream maker yields the smoothest, creamiest texture, you can achieve a delicious result by freezing the mixture in a shallow container and stirring vigorously with a fork every 30-45 minutes for the first 2-3 hours. This breaks up ice crystals and incorporates air. It might be slightly icier, but still very tasty!
What’s the best way to get a really smooth ice cream?
Using high-fat dairy (heavy cream and whole milk) is crucial for a smooth texture. Also, ensuring your strawberries are pureed well and strained (if you prefer no seeds) before adding them to the base contributes to a smoother mouthfeel. Chilling the base thoroughly before churning is also key!
Homemade Strawberry Ice Cream
A simple and delicious homemade strawberry ice cream recipe made with fresh strawberries and a creamy base.
Ingredients
-
1 1/2 cups strawberries, hulled and diced
-
2 Tbsp honey
-
1/2 cup granulated sugar
-
1 tsp lemon juice
-
1 cup heavy whipping cream
-
1/2 cup half and half
-
1 tsp vanilla extract
Instructions
-
Step 1
In a bowl, combine the diced strawberries, honey, granulated sugar, and lemon juice. Stir well and let sit for 15-20 minutes to macerate. -
Step 2
Mash the strawberries lightly with a fork or potato masher to break them down further. -
Step 3
In a separate bowl, whisk together the heavy whipping cream, half and half, and vanilla extract until well combined. -
Step 4
Pour the cream mixture into the strawberry mixture and stir to combine. -
Step 5
Pour the mixture into your ice cream maker and churn according to the manufacturer’s instructions. -
Step 6
Once churned, transfer the ice cream to an airtight container and freeze for at least 2-4 hours, or until firm.
Important Information
Nutrition Facts (Per Serving)
It is important to consider this information as approximate and not to use it as definitive health advice.
Allergy Information
Please check ingredients for potential allergens and consult a health professional if in doubt.