Easter Rice Krispie Treats- Easy & Fun Spring Recipe
Easter Rice Krispie Treats are more than just a nostalgic childhood snack; they’re a vibrant celebration in every chewy, sweet bite. There’s a reason these iconic treats have cemented their place at every Easter gathering, from bustling family brunches to quiet egg hunts in the backyard. They evoke a sense of pure joy and simple pleasures, making them universally loved across all ages. What truly makes our Easter Rice Krispie Treats special, however, is the opportunity for a little seasonal magic. We’re not just talking about the classic marshmallowy goodness; we’re infusing them with the spirit of spring and the playful hues of Easter, transforming them into edible works of art that will delight both your taste buds and your eyes. Get ready to embark on a deliciously easy journey that promises to be the sweetest addition to your holiday festivities.
Easter Rice Krispie Treats
Easter is a time for joy, family, and of course, delicious treats! While I love a classic Easter basket full of chocolates, there’s something incredibly special about homemade goodies. These Easter Rice Krispie Treats are a simple yet festive twist on a beloved childhood favorite, perfect for adding a splash of spring color and a pop of sweetness to your holiday celebrations. They’re incredibly easy to make, meaning even the littlest chefs can join in on the fun. The magic happens when we transform the familiar, chewy goodness of Rice Krispie Treats into a delightful springtime creation, adorned with pastel colors and festive candy decorations. Get ready to impress your family and friends with these charming and utterly delicious Easter Rice Krispie Treats!
Ingredients:
Instructions:
First things first, let’s get our workspace ready for some sticky, sweet fun! You’ll need a large mixing bowl, a saucepan, a spatula, and a 9×13 inch baking pan. Grease your baking pan generously with butter or cooking spray, and then line it with parchment paper, leaving some overhang on the sides. This parchment paper sling is a lifesaver for lifting the treats out later! Make sure to also grease your spatula and the inside of the mixing bowl – a little lubrication goes a long way when dealing with melted marshmallows. Now, let’s tackle the main event: the cereal and marshmallow mixture. In your large mixing bowl, add the 7 cups of Rice Krispies cereal. Set this aside for now; we’ll be combining it with our melted marshmallow mixture shortly.
It’s time to create that gooey, magical binder! In a large saucepan over low to medium heat, melt the 2 tablespoons of unsalted butter. Once the butter is completely melted and shimmering, add the 16 ounces of marshmallows to the saucepan. Stir the marshmallows constantly, gently scraping the bottom of the pan, until they are fully melted and smooth. Be patient here; you want a uniformly melted marshmallow mixture without any scorching. If you’re using jumbo marshmallows, they might take a little longer to melt, so keep that heat low and stir continuously. Once smooth and melted, remove the saucepan from the heat immediately to prevent the marshmallows from becoming too hard or rubbery.
Now for the exciting part: bringin extractg it all together! Pour the melted marshmallow mixture over the prepared Rice Krispies cereal in the large mixing bowl. Using your greased spatula, gently and quickly fold the cereal into the marshmallow mixture. You want to coat every single piece of cereal with that delicious, sticky goodness. Work efficiently, as the marshmallow mixture will start to set as it cools. Once everything is well combined and coated, transfer the mixture into your prepared 9×13 inch baking pan.
Pressing the treats into the pan is a crucial step for achieving perfectly shaped Rice Krispie Treats. Lightly grease your hands or the bottom of a piece of parchment paper with butter or cooking spray. Gently and firmly press the cereal mixture into an even layer in the pan. Avoid pressing too hard, as this can make the treats dense and tough. The goal is a uniform layer that will hold its shape when cut. You can use the back of a greased spoon or spatula to help smooth the top if needed. Once pressed, set the pan aside and let the treats cool completely at room temperature for at least 30 minutes. This cooling period allows them to firm up and makes them easier to handle and cut.
While our Rice Krispie Treats are cooling, let’s prepare our festive green “grass” frosting! In a medium bowl, combine the ½ cup of softened unsalted butter, 3 cups of powdered sugar, ¼ cup of milk, and 1 teaspoon of vanilla extract. Start mixing on low speed with an electric mixer (or vigorously by hand) until combined, then increase the speed to medium-high and beat until the frosting is light and fluffy. If the frosting is too thick, add another tablespoon of milk at a time until you reach your desired consistency. If it’s too thin, add a bit more powdered sugar. Once you have a smooth, creamy frosting, add a few drops of green food coloring and mix until the color is evenly distributed. You’re aiming for a lovely pastel green, like fresh spring grass. Once the Rice Krispie Treats are completely cooled and firm, you can remove them from the pan using the parchment paper overhang. Place them on a cutting board and slice them into your desired shapes – squares or rectangles are classic, but feel free to get creative with cookie cutters! Spread the green frosting over the tops of the treats, mimicking a grassy field. Finally, scatter your Easter egg candies over the green frosting. Let the frosting set slightly before serving to ensure the candies stay in place. Enjoy your delightful homemade Easter Rice Krispie Treats!
Conclusion:
These Easter Rice Krispie Treats are an absolute winner for any spring celebration! They’re incredibly easy to whip up, making them perfect for baking with kids, and the simple, classic flavor of Rice Krispie Treats is always a crowd-pleaser. Their no-bake nature means less stress and more time to enjoy the festivities. The versatility of this recipe is another huge plus; you can easily transform them into festive Easter shapes and decorate them with all sorts of springtime colors and sprinkles. They are a fantastic addition to any Easter brunch, egg hunt goodie bags, or just as a sweet treat to brighten your day.
For serving, consider arrangin extractg them on a festive platter alongside other Easter candies and baked goods. You can also individually wrap them for easy distribution as favors. The possibilities for variations are endless! Beyond the classic shapes, think about adding a touch of food coloring to the melted marshmallows for pastel hues, or even folding in mini chocolate chips or colorful candies. For an extra Easter flair, dip the finished treats partially in melted white chocolate and add sprinkles before it sets.
I truly hope you give these delightful Easter Rice Krispie Treats a try! They are guaranteed to bring smiles and a touch of sweetness to your holiday.
Frequently Asked Questions:
Can I make these treats ahead of time?
Absolutely! Rice Krispie Treats are best when made a day in advance. This allows them to set up completely, ensuring they are perfectly chewy and hold their shape. Store them in an airtight container at room temperature.
How can I make my Easter Rice Krispie Treats even more festive?
The best part about this recipe is its adaptability! After pressing the mixture into your pan, you can use Easter-themed cookie cutters to create shapes like bunnies, eggs, or chicks. Decorating with pastel-colored frosting, edible glitter, or candy melts in spring colors will also elevate their festive appeal.
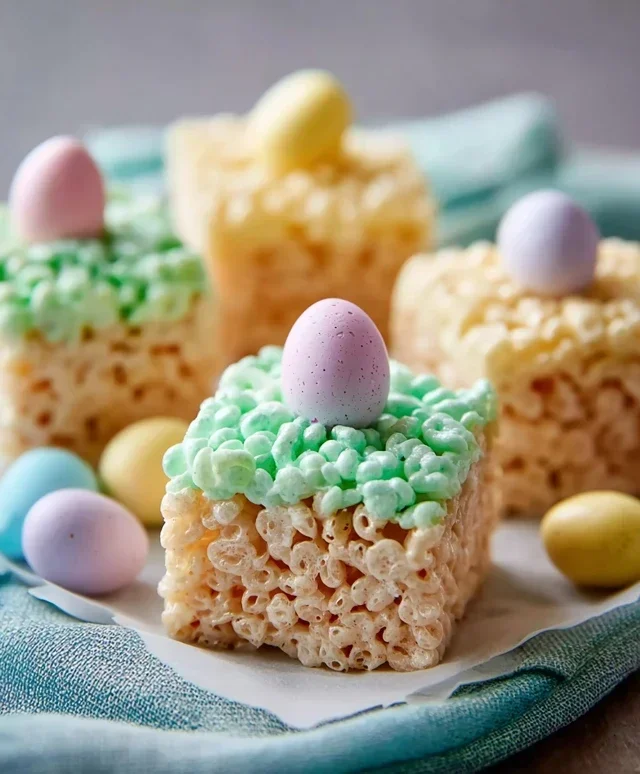
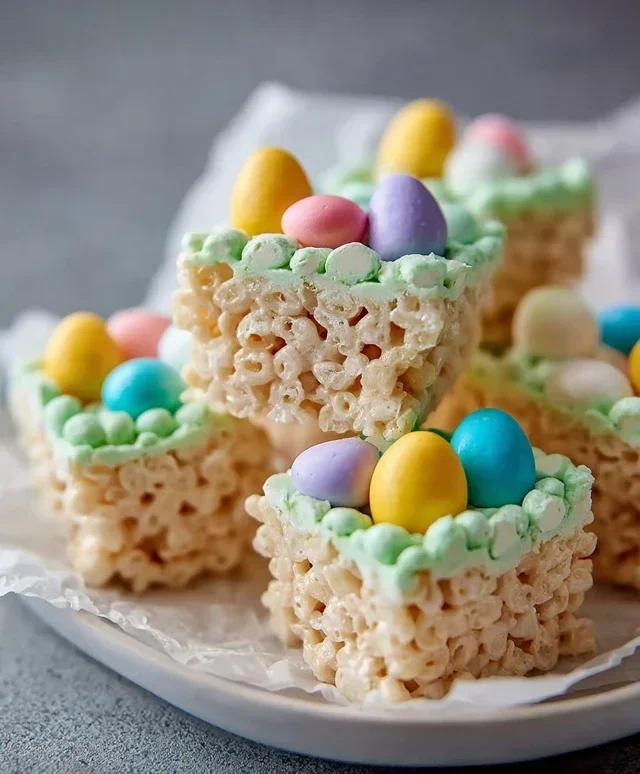
Easter Rice Krispie Treats
Festive and easy-to-make Rice Krispie treats colored green and decorated with Easter egg candies.
Ingredients
-
16 ounces marshmallows
-
7 cups Rice Krispies cereal
-
2 tablespoons unsalted butter
-
½ cup unsalted butter
-
3-4 cups powdered sugar
-
¼ cup milk
-
1 teaspoon vanilla extract
-
Green food coloring
-
Easter egg candies (mini chocolate eggs or jelly beans)
Instructions
-
Step 1
Grease a 9×13 inch baking pan with 2 tablespoons of butter. -
Step 2
In a large saucepan, melt ½ cup of butter over low heat. Add the marshmallows and stir until completely melted and smooth. -
Step 3
Remove from heat. Stir in the vanilla extract and green food coloring until evenly distributed. -
Step 4
Add the Rice Krispies cereal to the marshmallow mixture and stir until well coated. -
Step 5
In a separate bowl, whisk together the powdered sugar and milk until smooth. This creates a glaze. -
Step 6
Pour the cereal mixture into the prepared pan and press evenly using a buttered spatula or wax paper. -
Step 7
Drizzle the powdered sugar glaze over the treats and immediately sprinkle with Easter egg candies. -
Step 8
Let stand until the glaze is set, then cut into squares.
Important Information
Nutrition Facts (Per Serving)
It is important to consider this information as approximate and not to use it as definitive health advice.
Allergy Information
Please check ingredients for potential allergens and consult a health professional if in doubt.