Decadent Chocolate Baked Donuts – Easy & Delicious
Chocolate Baked Donuts are a delightful treat that perfectly balances indulgence with a touch of home baking. Have you ever craved that rich, comforting flavor of chocolate without the usual fuss of frying? That’s precisely where these incredible Chocolate Baked Donuts shine. They offer all the decadent satisfaction of their fried counterparts, but with a wonderfully light and airy texture that comes from being baked to perfection. People absolutely adore them because they feel like a special occasion dessert, yet are surprisingly simple to whip up for a weekend brunch, an after-school snack, or even a little pick-me-up any time of day. What truly makes our Chocolate Baked Donuts stand out is the incredibly moist crum extractb and the deep, intense chocolate flavor that permeates every single bite. You get that satisfying cake-like texture that’s both tender and slightly chewy, making each donut a mini masterpiece of flavor and comfort.
Why You’ll Love These
Simple to Make, Irresistible to Eat
Ingredients:
- ¾ cup all-purpose flour
- ½ cup white granulated sugar
- ⅓ cup cocoa powder (unsweetened is best for richness)
- ½ teaspoon baking soda
- ¼ teaspoon salt
- ½ cup milk (whole milk will give a richer texture)
- 2 tablespoons oil (olive or canola work well; choose a neutral-flavored oil)
- ½ tablespoon vinegar (apple cider or white vinegar will work; this reacts with the baking soda to help the donuts rise)
- 1 teaspoon vanilla extract
- ¼ cup butter (unsalted is preferred)
- 2 tablespoons cream or milk (for the glaze)
- 1 tablespoon light corn syrup (this adds shine and helps prevent crystallization in the glaze)
- ½ teaspoon vanilla extract (for the glaze)
- 2 ounces chocolate chips (semi-sweet or dark; your preference for sweetness)
- ¾ cup powdered sugar (also known as confectioners’ sugar or icing sugar)
Chocolate Baked Donuts: The Process
Preparing the Donut Batter
- Preheat your oven to 350°F (175°C). This is a crucial first step to ensure your donuts bake evenly and quickly. While the oven heats up, lightly grease your donut pans. If you’re using silicone pans, greasing might not be entirely necessary, but a light spray or brush of oil ensures easy removal. If you don’t have a donut pan, you can also use a muffin tin, though the shape will be different. It’s also a good idea to have a wire rack ready for cooling your donuts once they are baked.
- In a medium-sized mixing bowl, whisk together the dry ingredients: the all-purpose flour, white granulated sugar, cocoa powder, baking soda, and salt. Make sure these are thoroughly combined. Breaking up any clumps in the cocoa powder and ensuring the baking soda and salt are evenly distributed will prevent pockets of unmixed ingredients in your final donuts. This foundational step ensures a consistent texture and flavor throughout each donut.
- In a separate, smaller bowl or a liquid measuring cup, combine the wet ingredients: the milk, oil, vinegar, and 1 teaspoon of vanilla extract. Whisk these together until well incorporated. The vinegar, when combined with the milk, will begin extract to curdle slightly – this is normal and is a key part of creating a tender crum extractb. Don’t be alarmed by this visual change. It’s this chemical reaction that helps the donuts achieve a light and airy texture without the need for yeast.
- Now, it’s time to bring the wet and dry ingredients together. Pour the wet ingredient mixture into the bowl with the dry ingredients. Using a whisk or a spatula, mix just until combined. Be careful not to overmix the batter. Overmixing can develop the gluten in the flour too much, resulting in tough donuts. A few small lumps are perfectly fine; they will disappear during baking. The batter should be relatively smooth but not perfectly homogenous.
- Spoon or pipe the batter into your prepared donut pans. Fill each cavity about two-thirds full. This is important because the donuts will puff up as they bake. If you overfill them, they might overflow and lose their distinct donut shape. Using a piping bag with a large round tip can make this process neater and more consistent, but a spoon works just as well. Ensure you don’t have large air pockets trapped in the batter.
Baking and Cooling
- Bake the donuts in the preheated oven for 10-12 minutes, or until a toothpick inserted into the center comes out clean. The exact baking time will depend on your oven and the size of your donut cavities. Keep an eye on them during the last few minutes of baking to prevent them from overbaking, which can lead to dry donuts. Once baked, let them cool in the pans for about 5 minutes before carefully inverting them onto a wire rack to cool completely. This initial cooling in the pan helps them firm up, making them easier to transfer without breaking.
Crafting the Chocolate Glaze
- While your donuts are cooling, you can prepare the luscious chocolate glaze. In a small saucepan over low heat, melt the ¼ cup of butter. Once melted, stir in the 2 tablespoons of cream or milk and the 1 tablespoon of light corn syrup. Continue to stir until the mixture is smooth and well combined. Do not let this mixture boil. The corn syrup not only adds a beautiful sheen but also helps create a glaze that sets up nicely without becoming hard.
- Remove the saucepan from the heat and stir in the 2 ounces of chocolate chips. Let them sit for about a minugin extractto begin melting. Then, whisk gently until the chocolate chips are completely melted and the glaze is smooth and glossy. If the glaze seems too thick, you can add another teaspoon of milk or cream, a little at a time, until it reaches your desired consistency. If it seems too thin, you can gently heat it for another minute, stirring constantly, or whisk in a tablespoon of powdered sugar. Finally, stir in the ½ teaspoon of vanilla extract for an extra layer of flavor.
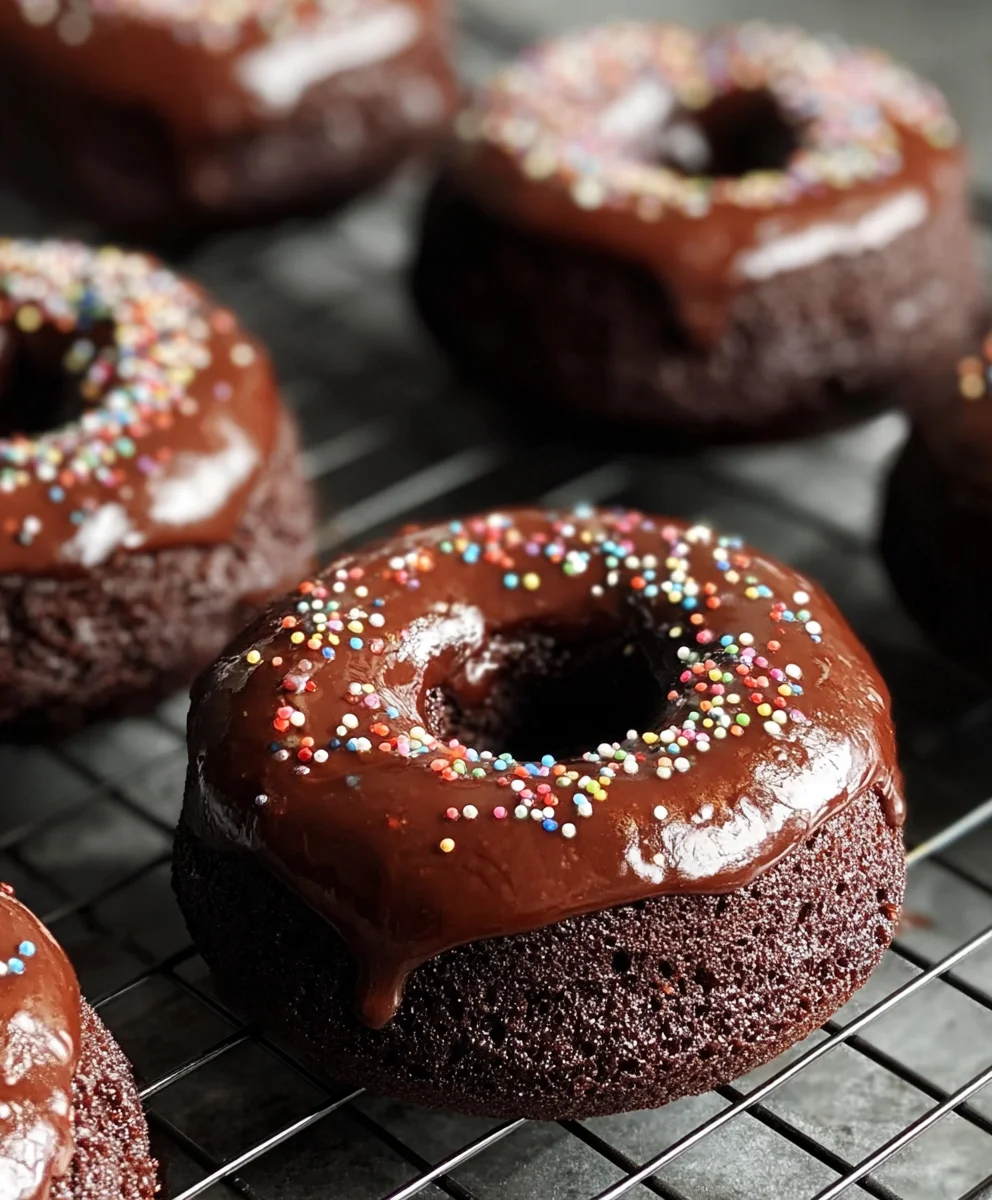
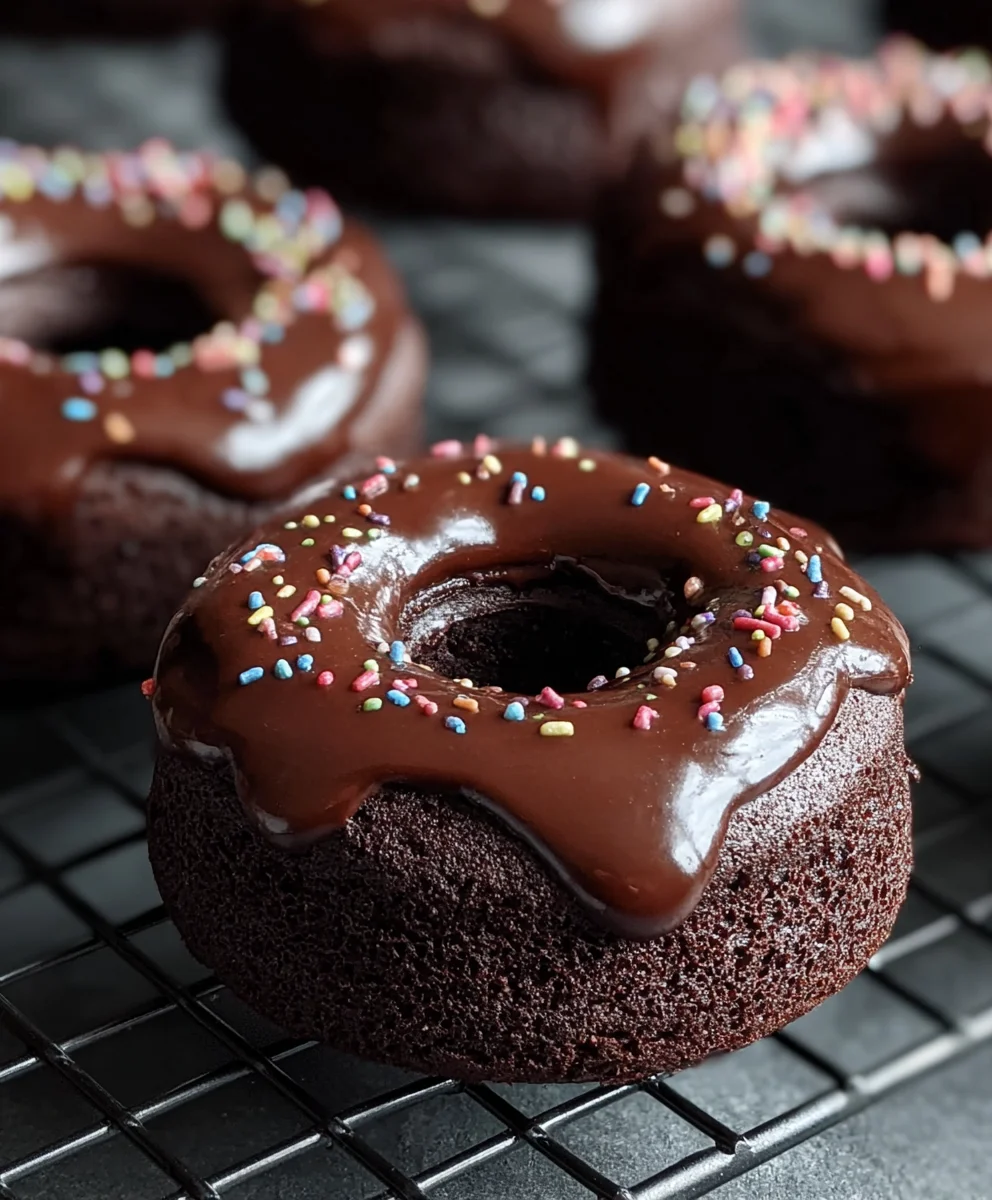
- Once your donuts have cooled completely on the wire rack, it’s time to glaze them. Dip the tops of each donut into the warm chocolate glaze, letting any excess drip back into the saucepan. You can also use a spoon to generously drizzle the glaze over the tops if you prefer a more artisanal look. For a little extra indulgence, you can sprinkle some extra chocolate chips or sprinkles on top immediately after glazing, before the glaze sets. This step is where your donuts truly come to life, transforming from baked goods into irresistible treats.
Conclusion:
And there you have it – your very own batch of delicious Chocolate Baked Donuts! We hope you enjoyed making these decadent treats as much as we did. This recipe offers a wonderful way to satisfy your sweet tooth with a healthier twist on a classic. The rich chocolate flavor, combined with that satisfyingly tender crum extractb, makes these donuts a perfect treat for any occasion, from a special breakfast to an afternoon indulgence. Don’t be afraid to get creative with your toppings!
For serving suggestions, these Chocolate Baked Donuts are fantastic on their own, but they truly shine with a dusting of powdered sugar, a drizzle of extra chocolate ganache, or even a sprinkle of colorful edible confetti. They pair beautifully with a hot cup of coffee, a glass of cold milk, or a refreshing cup of tea. For variations, consider adding a pinch of cayenne pepper to the batter for a subtle spicy kick, or folding in some mini chocolate chips for extra bursts of chocolatey goodness. You could also experiment with different glazes, like a cream cheese frosting or a vanilla bean glaze. We encourage you to experiment and make these Chocolate Baked Donuts your own!
Frequently Asked Questions about Chocolate Baked Donuts:
Q1: Can I make these Chocolate Baked Donuts ahead of time?
Yes, you absolutely can! Once cooled completely, store the Chocolate Baked Donuts in an airtight container at room temperature for up to two days, or in the refrigerator for up to four days. For longer storage, you can freeze them in a single layer on a baking sheet until firm, then transfer them to a freezer-safe bag or container for up to two months. Thaw at room temperature before enjoying.
Q2: My donuts are sticking to the donut pan. What can I do?
Ensuring your donut pan is properly greased and floured (or sprayed with baking spray) is key to preventing sticking. For extra insurance, especially with chocolate recipes, you can also lightly dust the greased pan with cocoa powder instead of flour. Make sure to tap out any excess. Allowing the donuts to cool in the pan for a few minutes before attempting to remove them can also help them release more easily.
Decadent Chocolate Baked Donuts – Easy & Delicious
Easy and delicious baked chocolate donuts with a rich chocolate glaze, perfect for a sweet treat.
Ingredients
-
¾ cup all-purpose flour
-
½ cup white granulated sugar
-
⅓ cup cocoa powder
-
½ teaspoon baking soda
-
¼ teaspoon salt
-
½ cup milk
-
2 tablespoons oil
-
½ tablespoon vinegar
-
1 teaspoon vanilla extract
-
¼ cup butter
-
2 tablespoons cream
-
1 tablespoon light corn syrup
-
½ teaspoon vanilla extract
-
2 ounces chocolate chips
-
¾ cup powdered sugar
Instructions
-
Step 1
Preheat oven to 350°F (175°C). Lightly grease donut pans. -
Step 2
In a bowl, whisk together flour, sugar, cocoa powder, baking soda, and salt. -
Step 3
In a separate bowl, combine milk, oil, vinegar, and 1 teaspoon vanilla extract. -
Step 4
Pour wet ingredients into dry ingredients and mix until just combined. Do not overmix. -
Step 5
Spoon batter into donut pans, filling each cavity about two-thirds full. -
Step 6
Bake for 10-12 minutes, or until a toothpick comes out clean. Cool in pans for 5 minutes, then invert onto a wire rack to cool completely. -
Step 7
While donuts cool, melt butter in a saucepan over low heat. Stir in cream and corn syrup until smooth. -
Step 8
Remove from heat, stir in chocolate chips until melted and smooth. Whisk in ½ teaspoon vanilla extract. -
Step 9
Dip cooled donuts into the glaze, letting excess drip off. Drizzle or decorate as desired.
Important Information
Nutrition Facts (Per Serving)
It is important to consider this information as approximate and not to use it as definitive health advice.
Allergy Information
Please check ingredients for potential allergens and consult a health professional if in doubt.