Perfect Deviled Eggs- Classic Recipe
Deviled Eggs have a magical way of appearing at every potluck, picnic, and holiday gathering, and for good reason! There’s something undeniably comforting and delightfully satisfying about these bite-sized flavor bombs. What is it about these seemingly simple appetizers that makes them so universally adored? Perhaps it’s the perfect harmony of creamy yolk filling and the tender bite of the egg white, or maybe it’s the endless possibilities for customization. We’ve all had a classic deviled egg, but today, we’re diving deep into what makes truly exceptional deviled eggs stand out. Get ready to elevate your game, because this recipe isn’t just about making deviled eggs; it’s about crafting an experience that will have everyone asking for your secret.
Ingredients:
- 6 Large eggs
- 1/4 tsp kosher salt (table salt is fine but use less)
- 2 1/2 tbsp Miracle Whip
- 1 tsp Apple cider vinegar
- 1 tsp Yellow mustard
- 1/4 tsp Granulated sugar
- 2 tbsp Sweet Relish
- A dash of black pepper (optional)
- Paprika and chives for garnish (optional)
Preparing the Eggs
The first and most crucial step to achieving perfect deviled eggs is to hard-boil your eggs properly. You want them to be cooked through but not rubbery. I recommend a gentle boiling method. Place your 6 large eggs in a single layer in a saucepan. Cover them with cold water by about an inch. Add the 1/4 tsp of kosher salt to the water; this helps to prevent any potential cracking and makes the shells easier to peel. Place the saucepan over medium-high heat and bring the water to a rolling boil. Once the water is boiling vigorously, immediately remove the saucepan from the heat. Cover the pan tightly with a lid and let the eggs sit in the hot water for 10-12 minutes. This steaming method ensures the yolks cook evenly without becoming overdone or developing that grey ring. After the time is up, carefully drain the hot water and immediately plunge the eggs into a bowl of ice water. Let them chill for at least 10 minutes. This ice bath stops the cooking process and is the secret to easy-peeling. Once cooled, gently tap each egg on a hard surface and roll it between your hands to loosen the shell. Start peeling from the wider end of the egg, where the air pocket usually is. If the shells are proving stubborn, you can try peeling them under cool running water; the water helps to get under the membrane and lift the shell away.
Creating the Creamy Filling
Once your eggs are peeled, it’s time to prepare the star of the show: the creamy, flavorful filling. Carefully slice each hard-boiled egg in half lengthwise. You can use a sharp knife for this. For the cleanest cut, try to keep the knife steady and slice in a single motion. Be mindful not to press too hard, which can squash the egg white. Arrange the halved egg whites on a serving platter, making sure the yolk-filled cavity is facing upwards. Now, for the yolks. Using a small spoon, gently scoop out each cooked yolk and place them into a medium-sized bowl. You want to be thorough but careful not to tear the egg white halves. Some people like to leave a tiny bit of yolk in the white for structure, which is a personal preference. Once all the yolks are in the bowl, it’s time to mash them. A fork is your best friend here. Mash the yolks until they are as fine and crum extractbly as possible. The smoother you get them, the silkier your deviled egg filling will be.
Flavoring the Deviled Egg Mixture
Now, let’s add the ingredients that will transform those mashed yolks into a delicious, tangy filling. To the bowl of mashed yolks, add the 2 1/2 tablespoons of Miracle Whip. This provides a creamy, slightly sweet base. Next, add the 1 teaspoon of yellow mustard. The mustard brings a classic tang and a bit of warmth. Stir these ingredients together thoroughly with your fork. Then, incorporate the 1 teaspoon of apple cider vinegar. The vinegar adds a bright, acidic note that cuts through the richness of the yolk and mayo. Finally, add the 1/4 teaspoon of granulated sugar. The sugar subtly balances the tang from the vinegar and mustard, rounding out the flavors beautifully. If you like a little extra kick, now is the time to add a dash of black pepper, though this is completely optional. Mix everything together until it’s well combined and forms a smooth, cohesive paste. Taste the mixture at this point and adjust seasonings if needed. You might want a little more vinegar for tang, or a touch more sugar for sweetness.
Stuffing the Egg Whites
With your flavorful yolk mixture ready, it’s time to pipe or spoon it back into the egg white halves. You have a couple of options here, depending on how fancy you want to get. For a classic, even distribution, you can use a spoon to carefully fill each egg white cavity. Gently scoop a portion of the yolk mixture and spoon it into the hollow of each egg white half, mounding it slightly. If you want a more decorative finish, you can use a piping bag fitted with a star tip. Transfer the yolk mixture to the piping bag and pipe swirls or rosettes into each egg white. This not only looks attractive but also ensures an even texture. Make sure to fill them generously so each bite is packed with flavor. Don’t worry if it’s not perfect; the taste is what truly matters!
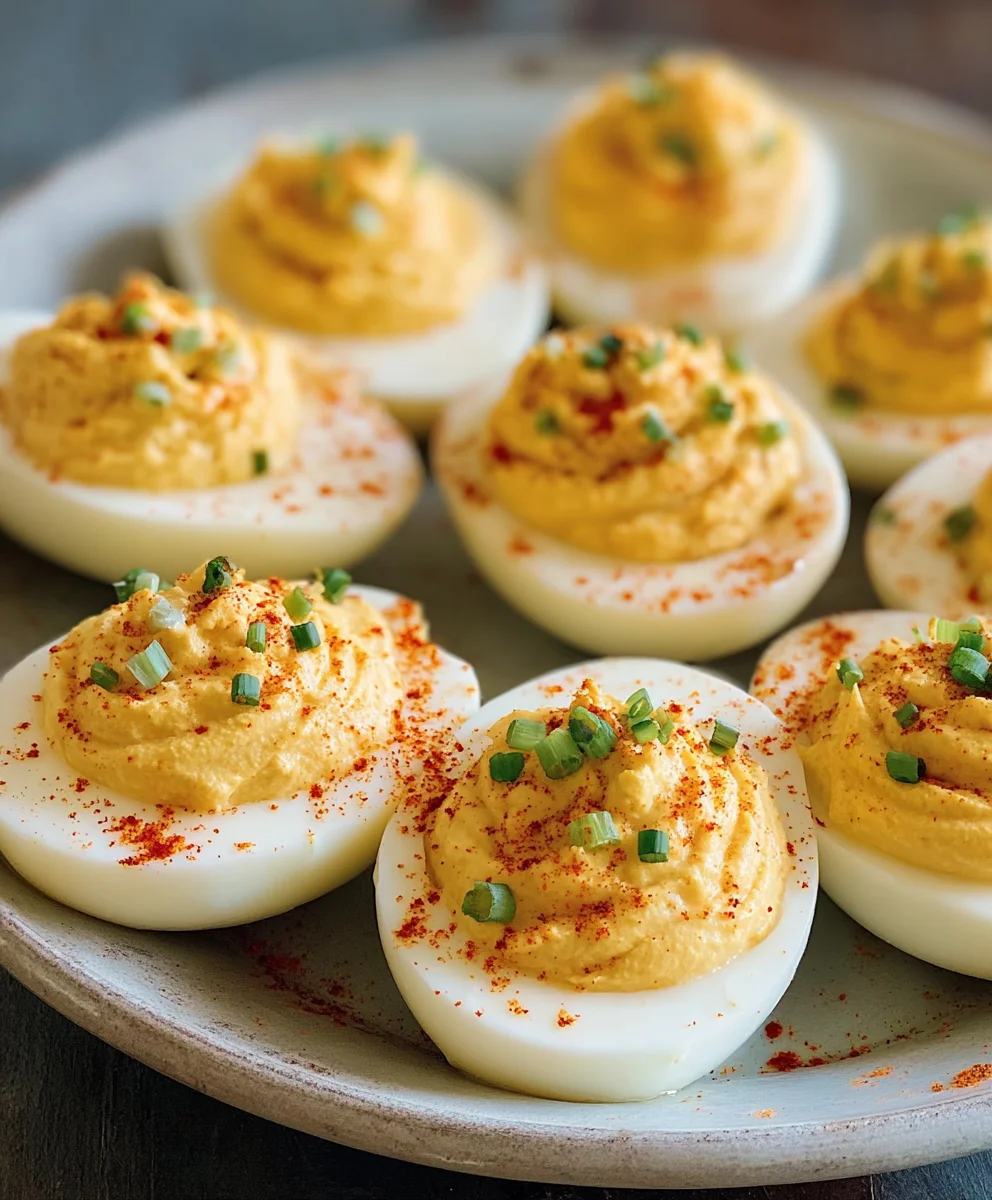
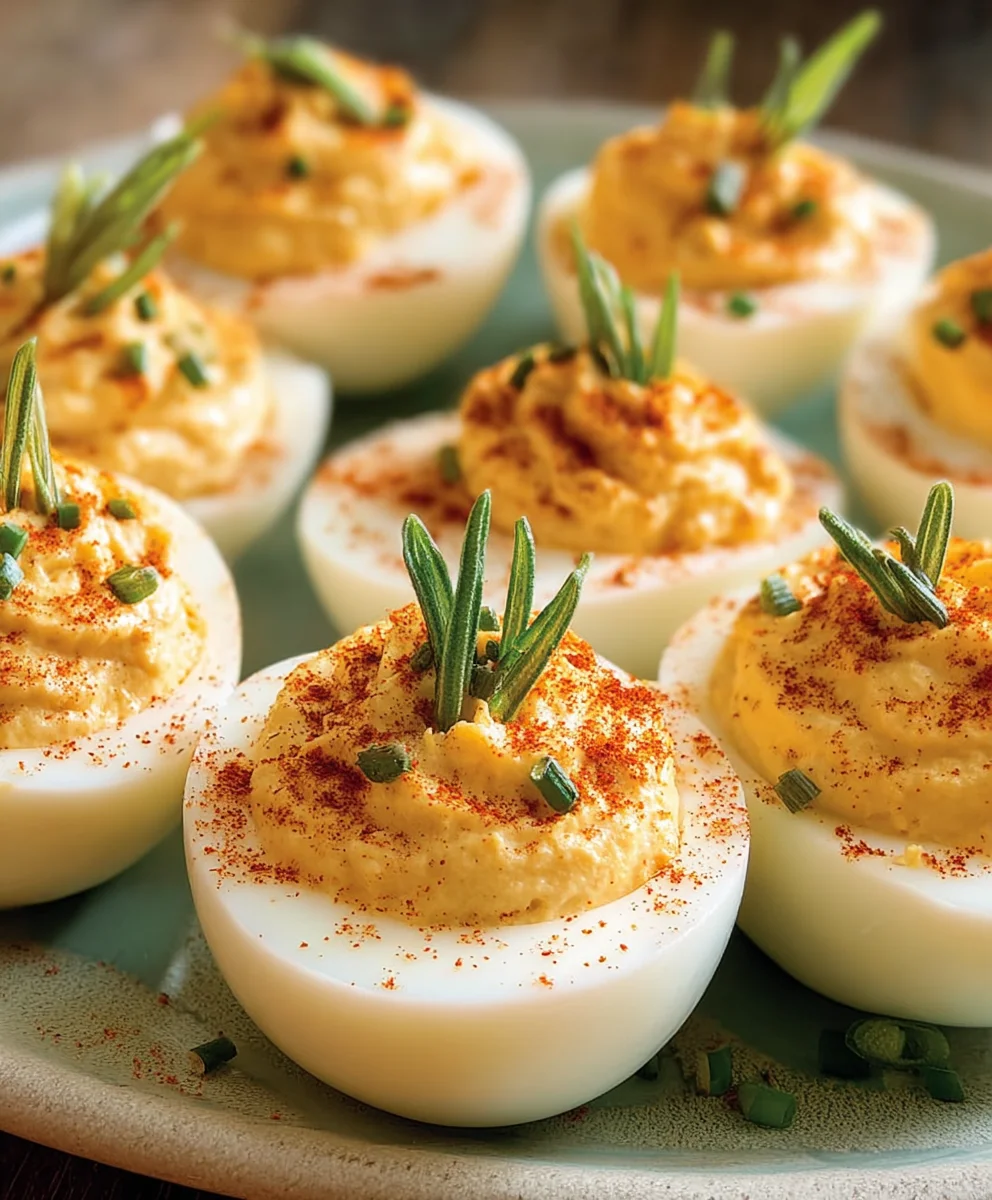
Garnishing and Serving
The final step is to add the finishing touches that elevate your deviled eggs from good to sensational. If you’ve opted for garnishes, now is the time to apply them. Sprinkle a pinch of paprika over the top of each filled egg white. Paprika adds a lovely reddish hue and a subtle smoky flavor, plus it looks very appealing. For an extra layer of freshness and a touch of color, finely chop some fresh chives and scatter them over the paprika. The bright green chives provide a fresh oniony bite that complements the creamy filling perfectly. If you’re not a fan of paprika or chives, or if you don’t have them on hand, don’t worry – the deviled eggs are still incredibly delicious without any garnish. Arrange your beautifully prepared deviled eggs on your serving platter. They are best served chilled or at room temperature. For optimal flavor, allow them to sit for about 15-20 minutes after filling to let the flavors meld slightly before serving. Enjoy your homemade deviled eggs!
Conclusion:
And there you have it – your guide to crafting the most delightful Deviled Eggs! We’ve walked through the simple steps to achieve perfectly cooked eggs, a creamy and flavorful filling, and a beautiful presentation that will impress any guest. These Deviled Eggs are incredibly versatile and can be enjoyed as a light appetizer, a potluck staple, or a satisfying snack. For an elevated serving experience, consider garnishing with a sprinkle of smoked paprika, fresh chives, or even a tiny drizzle of sriracha for a hint of heat.
Don’t be afraid to experiment with variations! You can add a touch of Dijon mustard for extra tang, finely chopped dill pickles for a briny crunch, or even a pinch of curry powder for an exotic twist. The beauty of Deviled Eggs lies in their adaptability. So, gather your ingredients, have fun in the kitchen, and get ready to savor these classic crowd-pleasers. We encourage you to make them your own and discover your favorite flavor combinations!
Frequently Asked Questions about Deviled Eggs:
Q: How do I ensure my deviled eggs aren’t too watery?
A: The key to avoiding watery Deviled Eggs is to drain any excess liquid from the egg yolk mixture. After mashing the yolks, if you notice any liquid pooling, gently blot it with a paper towel before mixing in the mayonnaise and other ingredients. Also, ensure your mayonnaise is well-emulsified and not separating.
Q: Can I make deviled eggs ahead of time?
A: Yes, you can definitely make Deviled Eggs ahead of time! You can boil and peel the eggs up to two days in advance and store them in the refrigerator. Prepare the yolk filling separately and store it in an airtight container. When you’re ready to serve, simply fill the egg white halves. For best results and to prevent the filling from drying out or the whites from becoming soggy, it’s ideal to fill them a few hours before serving, rather than the night before.
Perfect Deviled Eggs – Classic Recipe
A classic recipe for perfectly creamy and tangy deviled eggs, ideal for any occasion.
Ingredients
-
6 Large eggs
-
1/4 tsp kosher salt
-
2 1/2 tbsp Miracle Whip
-
1 tsp Apple cider vinegar
-
1 tsp Yellow mustard
-
1/4 tsp Granulated sugar
-
2 tbsp Sweet Relish
-
A dash of black pepper (optional)
-
Paprika for garnish (optional)
-
Chives for garnish (optional)
Instructions
-
Step 1
Hard-boil eggs: Place eggs in a saucepan, cover with cold water by an inch, add salt. Bring to a boil over medium-high heat, then remove from heat, cover, and let sit for 10-12 minutes. Immediately plunge into an ice bath for at least 10 minutes. Peel carefully. -
Step 2
Prepare the filling base: Slice hard-boiled eggs in half lengthwise. Gently scoop out the yolks into a bowl, being careful not to tear the whites. Arrange egg white halves on a platter. -
Step 3
Mash yolks and mix: Mash the yolks with a fork until very fine. Add Miracle Whip, yellow mustard, apple cider vinegar, and granulated sugar. Mix until smooth and creamy. -
Step 4
Season the filling: Stir in sweet relish. Add a dash of black pepper if desired. Taste and adjust seasonings, adding more vinegar for tang or sugar for sweetness if needed. -
Step 5
Stuff the egg whites: Spoon or pipe the yolk mixture generously into each egg white half, mounding slightly. -
Step 6
Garnish and serve: Sprinkle with paprika and chopped chives, if using. Arrange on a platter and serve chilled or at room temperature, allowing flavors to meld for 15-20 minutes before serving.
Important Information
Nutrition Facts (Per Serving)
It is important to consider this information as approximate and not to use it as definitive health advice.
Allergy Information
Please check ingredients for potential allergens and consult a health professional if in doubt.