Vintage Wedding Dessert Table Ideas- Sweet Inspiration
Vintage Wedding Dessert Table dreams are made of this! Imagin extracte stepping back in time, surrounded by the sweet aroma of nostalgic treats and the gentle clinking of teacups. A Vintage Wedding Dessert Table isn’t just a display of sweets; it’s an experience, a curated journey through cherished flavors and timeless elegance that captures the heart of every guest. People adore these tables because they evoke a sense of warmth, personal touch, and shared memories, making your special day feel uniquely yours. What truly sets a Vintage Wedding Dessert Table apart is the thoughtful selection of treats, each often carrying a story or a family legacy. We’re talking about delicate pastries that melt in your mouth, classic cookies baked with love, and perhaps a signature cake that stands as a centerpiece of enchantment. It’s about creating a beautiful, edible tapestry that speaks volumes about your love story and your guests’ delight.
Ingredients:
- 1 cup (2 sticks) unsalted butter, softened
- 2 cups granulated sugar
- 4 large eggs
- 1 teaspoon vanilla extract
- 2 ½ cups all-purpose flour
- 1 teaspoon baking powder
- ½ teaspoon salt
- 1 cup milk
- Assorted fresh berries (strawberries, blueberries, raspberries), for garnish
- Powdered sugar, for dusting
Preparing the Cake Batter
Creaming the Butter and Sugar
The foundation of any wonderful cake, especially one destined for a Vintage Wedding Dessert Table, begin extracts with the creaming of butter and sugar. In a large mixing bowl, combine the softened unsalted butter and granulated sugar. It’s crucial that the butter is at room temperature, meaning it’s pliable and soft to the touch but not melted. This allows it to incorporate air more effectively. Using an electric mixer, start on a low speed to combine the ingredients, then gradually increase to medium-high. Beat them together for about 3 to 5 minutes, or until the mixture is light, fluffy, and pnon-alcoholic ale yellow in color. This process is called creaming, and it’s where much of the cake’s tender texgin extracte originates. Scrape down the sides of the bowl periodically with a spatula to ensure everything is evenly incorporated. This step is non-negotiable for achieving that delicate crum extractb.
Incorporating Eggs and Vanilla
Once the butter and sugar are perfectly creamed, it’s time to add the eggs. Add the large eggs one at a time, beating well after each addition. Ensure each egg is fully incorporated before adding the next. This gradual addition prevents the mixture from separating and helps create a smooth, emulsified batter. After the last egg is mixed in, stir in the vanilla extract. The vanilla not only adds a beautiful aroma but also enhances the overall flavor profile of the cake, providing that classic comforting sweetness that pairs so well with the fresh berries.
Combining Dry and Wet Ingredients
Whisking the Dry Ingredients
In a separate medium bowl, whisk together the all-purpose flour, baking powder, and salt. Whisking these dry ingredients together ensures that the leavening agent (baking powder) and salt are evenly distributed throughout the flour. This is vital for consistent rising and even flavor in your cake. Set this bowl aside for now.
Alternating Dry and Wet Additions
Now, we’ll combine the dry ingredients with the wet ingrediengin extractin stages. Begin by adding about one-third of the flour mixture to the creamed butter and egg mixture. Mix on low speed until just combined. Next, add half of the milk to the batter and mix until incorporated. Continue this process, alternating between the dry ingredients and the milk, ending with the dry ingredients. So, you’ll add another third of the flour mixture, followed by the remaining milk, and finally, the last third of the flour mixture. Be careful not to overmix the batter at this stage. Overmixing can develop the gluten in the flour too much, leading to a tough cake. Mix only until no streaks of flour remain. The batter should be smooth and pourable.
Baking and Finishing
Preheating the Oven and Preparing the Pan
Before you transfer the batter, preheat your oven to 350°F (175°C). While the oven is preheating, prepare your cake pan. Grease and flour a 9-inch round cake pan or line it with parchment paper. Greasing and flouring creates a non-stick surface, ensuring your cake releases cleanly after baking. If using parchment, it provides an extra layer of insurance against sticking. For a Vintage Wedding Dessert Table, a classic round cake is always a beautiful choice.
Baking the Cake
Pour the prepared batter evenly into the greased and floured cake pan. Gently tap the pan on the counter a couple of times to release any large air bubbles. Place the pan in the preheated oven and bake for 30 to 35 minutes, or until a wooden skewer or toothpick inserted into the center of the cake comes out clean. The baking time can vary depending on your oven, so start checking for doneness around the 30-minute mark.
Cooling and Garnishing
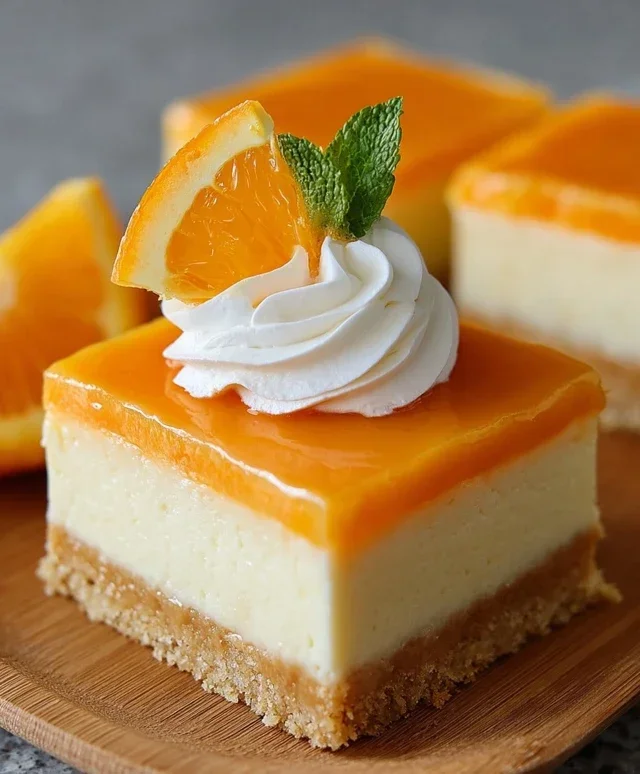
Once baked, remove the cake from the oven and let it cool in the pan for about 10 to 15 minutes. This allows the cake to set slightly before you attempt to remove it. Then, carefully invert the cake onto a wire rack to cool completely. A completely cooled cake is essential before decorating. Once the cake has cooled down, arrange the assorted fresh berries artfully over the top. A light dusting of powdered sugar over the berries and cake can add a final touch of elegance, reminiscent of a delicate dusting of snow – perfect for that Vintage Wedding Dessert Table aesthetic.
Conclusion:
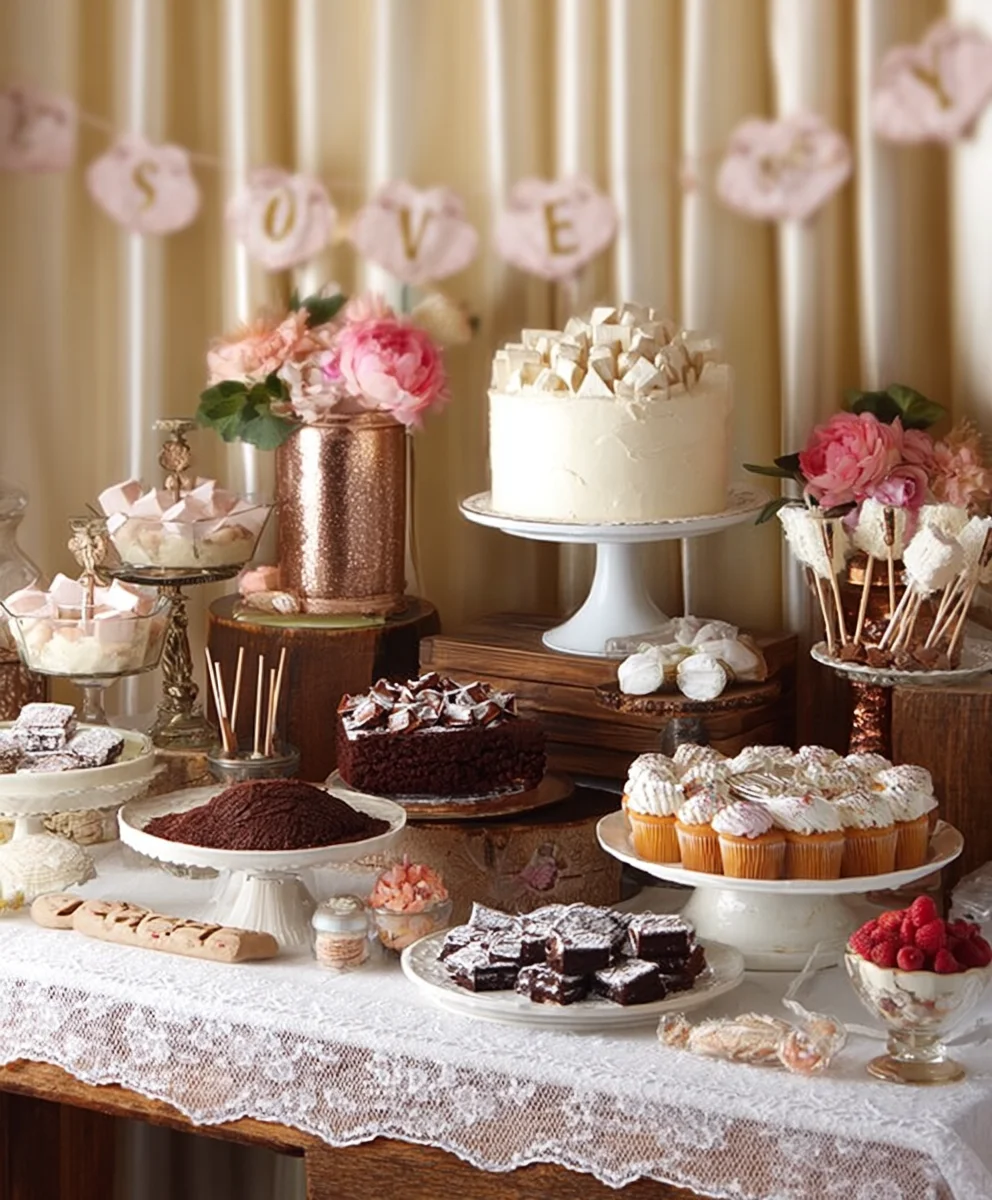
We hope you’ve enjoyed exploring the delightful possibilities of creating your own beautiful and delicious Vintage Wedding Dessert Table! This collection of recipes offers a charming journey back in time, perfect for adding a touch of nostalgia and sweetness to your special day. From elegant tiered cakes to delicate petits fours, each element is designed to evoke a sense of timeless romance and sophisticated indulgence. We’ve aimed to provide a well-rounded selection that caters to various tastes and skill levels, ensuring you can curate a dessert spread that truly reflects your personal style and the spirit of your wedding.
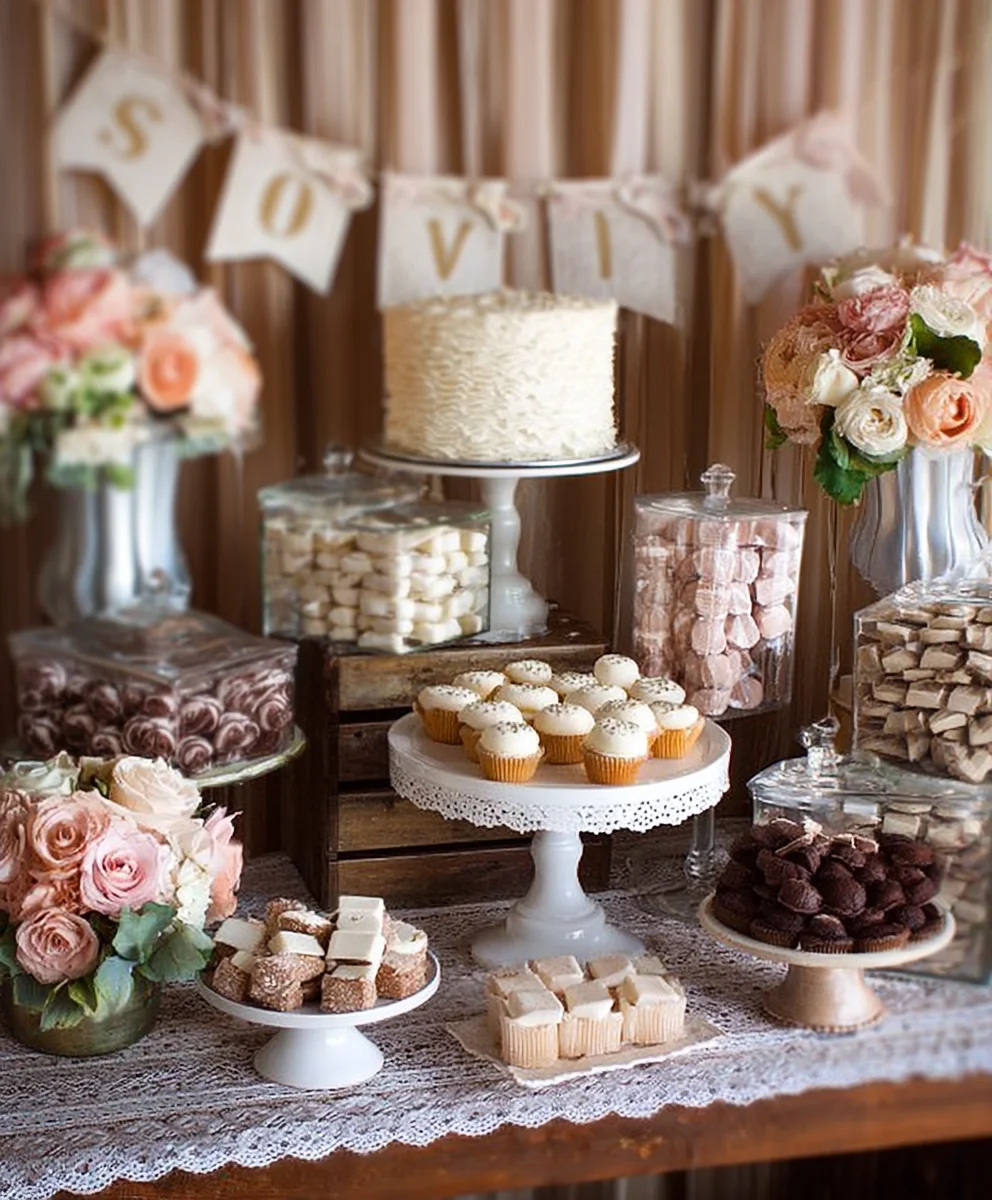
Remember, the magic of a Vintage Wedding Dessert Table lies not just in the taste, but also in the presentation. Think about antique lace doilies, elegant tiered cake stands, and delicate floral arrangements to complete the enchanting atmosphere. Don’t be afraid to get creative with your serving dishes and decorations!
Should you wish to add your own personal touch, consider incorporating regional specialties or family favorites. Perhaps a twist on a classic buttercream frosting or the addition of a unique fruit compote could elevate a familiar dessert. The possibilities are truly endless!
Now, let’s address a few common questions that might arise as you plan your delightful dessert display.
Frequently Asked Questions:
Can I prepare these desserts in advance?
Absolutely! Many elements of a Vintage Wedding Dessert Table can be made a day or two in advance to reduce stress on your wedding day. Sturdier cakes, cookies, and bars can often be stored in airtight containers at room temperature. More delicate items like mousses or fruit tarts might require refrigeration and should be assembled closer to the event. Always check individual recipe notes for specific storage and preparation recommendations.
What if I have guests with dietary restrictions?
This is a fantastic question! You can easily adapt many vintage-inspired desserts to cater to various needs. Consider offering a gluten-free version of a classic cake or cookies, or a dairy-free option for mousses or ice creams. Fresh fruit platters are always a welcome and naturally inclusive choice. Clearly labeling each dessert with its ingredients and potential allergens is a thoughtful touch that guests will greatly appreciate.
How should I arrange the dessert table for maximum visual appeal?
Think about height and variety when arrangin extractg your Vintage Wedding Dessert Table. Use cake stands of different heights, place taller items towards the back, and fill in gaps with smaller treats. Incorporate decorative elements like vintage books, antique lace runners, or small floral arrangements that complement your wedding’s theme. The goal is to create a visually abundant and inviting display that draws guests in!
We encourage you to embrace the joy of baking and decorating for your special celebration. Creating a Vintage Wedding Dessert Table is a labor of love that will undoubtedly be remembered and cherished by you and your guests. Happy baking!
Vintage Wedding Dessert Table Cake
A simple yet elegant cake perfect for a Vintage Wedding Dessert Table, featuring fresh berries and a light dusting of powdered sugar.
Ingredients
-
1 cup (2 sticks) unsalted butter, softened
-
2 cups granulated sugar
-
4 large eggs
-
1 teaspoon vanilla extract
-
2 ½ cups all-purpose flour
-
1 teaspoon baking powder
-
½ teaspoon salt
-
1 cup milk
-
Assorted fresh berries (strawberries, blueberries, raspberries), for garnish
-
Powdered sugar, for dusting
Instructions
-
Step 1
Cream the softened butter and granulated sugar in a large bowl using an electric mixer on medium-high speed for 3 to 5 minutes, until light, fluffy, and pale yellow. Scrape down the sides of the bowl periodically. -
Step 2
Add the large eggs one at a time, beating well after each addition until fully incorporated. Stir in the vanilla extract. -
Step 3
In a separate bowl, whisk together the all-purpose flour, baking powder, and salt. Set aside. -
Step 4
Alternately add the dry ingredients and milk to the creamed mixture, beginning and ending with the dry ingredients. Mix on low speed until just combined and no streaks of flour remain. Do not overmix. -
Step 5
Preheat your oven to 350°F (175°C). Grease and flour a 9-inch round cake pan or line it with parchment paper. -
Step 6
Pour the batter into the prepared pan, tap gently to release air bubbles, and bake for 30 to 35 minutes, or until a wooden skewer inserted into the center comes out clean. -
Step 7
Let the cake cool in the pan for 10-15 minutes, then invert onto a wire rack to cool completely. -
Step 8
Once cooled, artfully arrange assorted fresh berries over the top and dust lightly with powdered sugar for a vintage aesthetic.
Important Information
Nutrition Facts (Per Serving)
It is important to consider this information as approximate and not to use it as definitive health advice.
Allergy Information
Please check ingredients for potential allergens and consult a health professional if in doubt.