Triple Layer Chocolate Mint Squares Irresistible Treat
Triple-layer chocolate mint squares are the ultimate indulgence for any dessert lover, and I’m about to show you why. There’s something incredibly satisfying about the perfect trifecta of textures and flavors, and these squares deliver on all fronts. Imagin extracte a rich, fudgy brownie base, a creamy, cool mint-infused cheesecake middle, and a decadent, glossy chocolate ganache topping. It’s a flavor combination that’s both classic and exciting, a refreshing twist on a beloved dessert. Why do we all adore these triple-layer chocolate mint squares so much? Because they offer a delightful contrast – the deep chocolate notes play beautifully with the bright mint, and the different layers create an irresistible journey for your taste buds with every single bite. These aren’t just dessert; they’re an experience, a celebration of chocolate and mint working in perfect harmony.
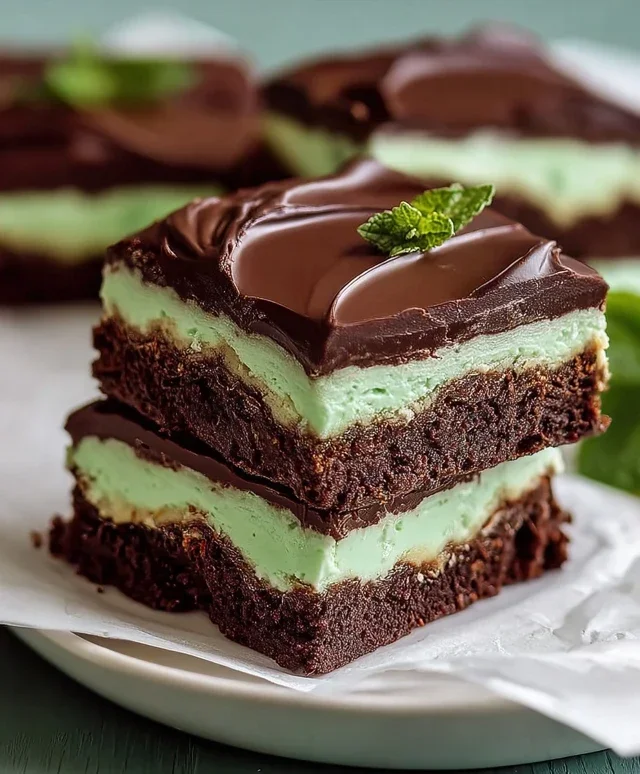
Triple-Layer Chocolate Mint Squares
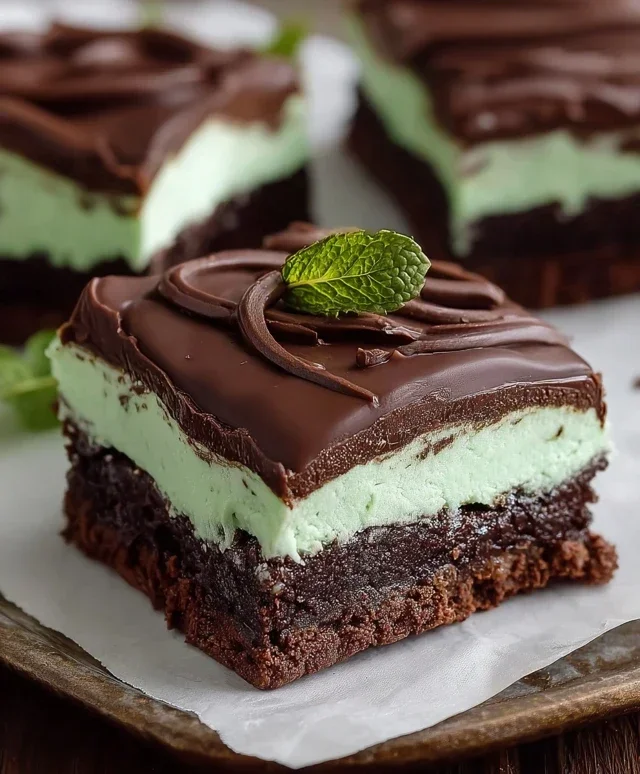
Get ready to indulge in a dessert that’s as beautiful as it is delicious! These Triple-Layer Chocolate Mint Squares are a showstopper, perfect for holidays, special occasions, or simply when you need a serious chocolate and mint fix. Each bite offers a delightful contrast of textures and flavors, starting with a rich chocolatey base, followed by a creamy, mint-infused frosting, and topped with a glossy chocolate ganache. Don’t be intimidated by the layers; I’ll guide you through each step to ensure success.
Ingredients:
Cooking Instructions:
Layer 1: The Chocolate Base
This is where our flavor journey begin extracts, with a fudgy, dense chocolate base that sets the stage for everything that follows.
Layer 2: The Minty Frosting
Now for the vibrant and creamy mint layer that adds a refreshing contrast to the rich chocolate.
Layer 3: The Chocolate Ganache Topping
The crowning glory – a decadent chocolate ganache that hardens slightly for a beautiful finish.
Once everything has set, use the parchment paper overhang to lift the entire slab out of the pan. Place it on a cutting board and slice into squares using a sharp knife. For even cleaner cuts, you can run your knife under hot water and dry it between slices. Enjoy these delightful Triple-Layer Chocolate Mint Squares – they’re truly a treat for the senses!
Conclusion:
I hope you’re as excited to try these triple-layer chocolate mint squares as I am to share them! This recipe is a true winner because it combines the rich, decadent flavor of chocolate with a refreshing hint of mint in three irresistible layers. It’s the perfect balance of indulgence and brightness, making it a sophisticated yet incredibly satisfying treat. Whether you’re a seasoned baker or just starting out, these squares are surprisingly straightforward to make and the payoff is immense. The textures – a crum extractbly, buttery base, a fudgy chocolate middle, and a smooth, minty topping – are simply divine.
These squares are fantastic served chilled, perhaps with a dusting of cocoa powder or a dollop of whipped cream. They also make a wonderful addition to any dessert platter for parties or holidays. For variations, consider adding a sprinkle of chocolate chips to the middle layer for extra chocolatey goodness, or experiment with different extracts like peppermint or even a touch of crème de menthe for a bolder flavor. Don’t be afraid to get creative! I truly encourage you to give these triple-layer chocolate mint squares a try. They are a guaranteed crowd-pleaser and a delightful way to satisfy those sweet cravings.
Frequently Asked Questions:
Can I make these ahead of time?
Absolutely! These triple-layer chocolate mint squares are perfect for making ahead. In fact, they often taste even better after a day or two, allowing the flavors to meld together. Store them in an airtight container in the refrigerator for up to 4-5 days.
What kind of chocolate should I use?
For the best flavor and texture, I recommend using good quality semi-sweet or dark chocolate. Using chocolate chips is convenient, but melting a chopped chocolate bar can yield a richer, smoother result. Feel free to use milk chocolate if you prefer a sweeter profile.
How do I achieve clean cuts?
The key to clean cuts is a sharp knife and chilling the squares thoroughly. Running your knife under hot water and wiping it dry between cuts can also help create beautifully defined edges. Make sure the layers are firm before slicing.
Triple-Layer Chocolate Mint Squares
Decadent triple-layer chocolate mint squares featuring a brownie base, a creamy mint filling, and a rich chocolate ganache topping.
Ingredients
-
1 cup salted butter
-
4 oz. semi-sweet chocolate chips
-
2 cups granulated sugar
-
2 teaspoons vanilla extract
-
1 ½ cups all-purpose flour
-
4 large eggs
-
¾ cup salted butter, softened
-
3 cups powdered sugar
-
1 tablespoon heavy whipping cream
-
1 teaspoon peppermint extract
-
10 drops green food coloring
-
3 cups semi-sweet chocolate chips
-
2 tablespoons butter
-
½ cup heavy whipping cream
Instructions
-
Step 1
Preheat oven to 350°F (175°C). Grease and flour a 9×13 inch baking pan. Melt 1 cup salted butter and 4 oz. semi-sweet chocolate chips together. Stir in 2 cups granulated sugar and 2 teaspoons vanilla extract. Beat in 4 large eggs one at a time. Gradually blend in 1 ½ cups all-purpose flour. Pour batter into the prepared pan and bake for 30 minutes. -
Step 2
For the mint layer, cream ¾ cup softened salted butter with 3 cups powdered sugar, 1 tablespoon heavy whipping cream, and 1 teaspoon peppermint extract until smooth. Add 10 drops green food coloring and mix well. Spread evenly over the cooled brownie layer. -
Step 3
For the chocolate ganache, melt 3 cups semi-sweet chocolate chips and 2 tablespoons butter together in a heatproof bowl over a saucepan of simmering water, stirring until smooth. Alternatively, microwave in 30-second intervals, stirring in between, until melted and smooth. -
Step 4
Warm ½ cup heavy whipping cream in a small saucepan or microwave until just simmering. Pour the warm cream over the melted chocolate and butter mixture. Let sit for 5 minutes, then whisk until smooth and glossy. -
Step 5
Pour the chocolate ganache over the mint layer, spreading evenly. Refrigerate for at least 1 hour, or until the ganache is set. Cut into squares before serving.
Important Information
Nutrition Facts (Per Serving)
It is important to consider this information as approximate and not to use it as definitive health advice.
Allergy Information
Please check ingredients for potential allergens and consult a health professional if in doubt.