Red Velvet Banana Bread Recipe-Decadent & Delicious
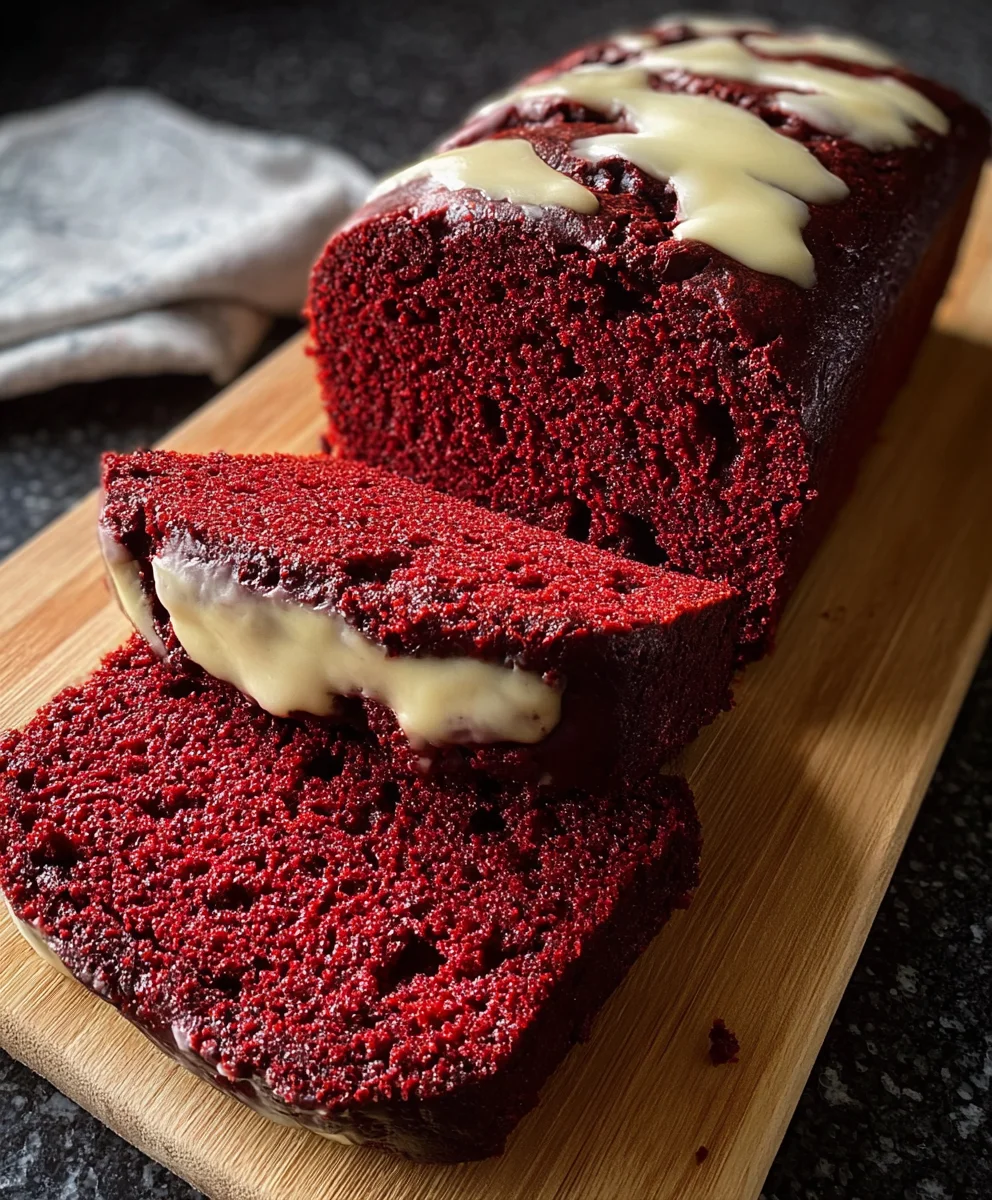
Red Velvet Banana Bread is more than just a baked good; it’s an experience. Imagin extracte the moist, tender crum extractb of classic banana bread, elevated by the dramatic allure and subtle cocoa notes of red velvet. This isn’t your average quick bread; it’s a delightful fusion that surprises and satisfies with every bite. People absolutely adore it because it masterfully combines the comforting familiarity of a beloved staple with the exciting indulgence of a celebratory dessert. The vibrant crimson hue, thanks to the red velvet essence, makes it a showstopper, perfect for brunches, holiday gatherings, or simply when you crave something a little extra special. What truly sets this Red Velvet Banana Bread apart is the unexpected yet harmonious marriage of sweet, ripe bananas and the characteristic tang and color of red velvet. It’s a guaranteed crowd-pleaser, offering a unique twist that will have everyone asking for the recipe.
Ingredients:
- 3 ripe bananas, mashed (about 1 cup)
- 1/2 cup unsalted butter, melted
- 3/4 cup granulated sugar
- 2 large eggs
- 1 teaspoon vanilla extract
- 1 1/2 cups all-purpose flour
- 1/4 cup unsweetened cocoa powder
- 1 teaspoon baking soda
- 1/2 teaspoon salt
- 1 tablespoon red food coloring
- 1/2 cup buttermilk
- 1/2 cup chocolate chips (optional, for an extra decadent treat)
Prepping for Perfection
Preheating the Oven and Preparing the Pan
The first crucial step to achieving a perfectly baked Red Velvet Banana Bread is to get your oven and baking pan ready. Preheat your oven to 350 degrees Fahrenheit (175 degrees Celsius). This consistent temperature is essential for even baking, preventing the edges from burning while the center remains undercooked. While the oven is heating up, prepare your loaf pan. You can grease and flour it thoroughly to prevent sticking, or for an even easier cleanup, line it with parchment paper, leaving some overhang on the sides to act as handles. This makes lifting the finished bread out of the pan a breeze.
Creating the Flavor Base
Wet Ingredients: The Foundation of Moistness
In a large mixing bowl, combine the melted butter and granulated sugar. Whisk them together until they are well incorporated and the mixture starts to look creamy. This step helps to dissolve the sugar and create a smooth base for your batter. Next, add the two large eggs to the bowl, one at a time, whisking well after each addition. Incorporating the eggs gradually ensures they emulsify properly with the butter and sugar, contributing to a tender crum extractb. Now, pour in the teaspoon of vanilla extract and the tablespoon of red food coloring. Whisk everything together vigorously until the color is evenly distributed throughout the mixture. You’re aiming for a vibrant, consistent red hue. This is where the “red velvet” magic truly begin extracts to happen!
Adding the Mashed Bananas
In a separate medium-sized bowl, mash your three ripe bananas. The riper the bananas, the sweeter and more intensely banana-flavored your bread will be, and they also contribute significantly to the moisture content. You want to mash them until they are mostly smooth with just a few small lumps remaining. These little banana bits will add wonderful texture to your Red Velvet Banana Bread. Gently fold the mashed bananas into the wet ingredient mixture. Be careful not to overmix at this stage; just incorporate them until they are combined.
Building the Batter
Dry Ingredients: The Structure and Lift
In another medium bowl, whisk together the 1 1/2 cups of all-purpose flour, 1/4 cup of unsweetened cocoa powder, 1 teaspoon of baking soda, and 1/2 teaspoon of salt. Whisking these dry ingredients together before adding them to the wet ingredients ensures that the leavening agent (baking soda) and salt are evenly distributed. This is vital for an even rise and consistent flavor throughout your banana bread. Sifting the flour and cocoa powder can also help prevent lumps and create a lighter texture, though it’s not strictly necessary if you whisk them thoroughly.
Combining Wet and Dry: The Final Mix
Now, it’s time to bring everything together. Gradually add the dry ingredients to the wet ingredients, mixing until just combined. It’s very important here not to overmix the batter. Overmixing develops the gluten in the flour, which can result in a tough, dense loaf. You should still see a few streaks of flour; that’s perfectly fine. The key is to stop mixing as soon as the flour is no longer visible.
The Buttermilk and Chocolate Chip Addition
Finally, gently fold in the 1/2 cup of buttermilk. The buttermilk reacts with the baking soda to help create a rum extractder crumb and also adds a lovely subtle tang that complements the sweetness of the bananas and the richness of the cocoa. If you’re using chocolate chips, this is also the time to fold them in. Gently stir them into the batter, distributing them evenly. Again, be mindful not to overmix.
Baking to Golden (or Red!) Perfection
Pouring and Baking
Pour the batter evenly into your prepared loaf pan. Use a spatula to spread it out so that the top is relatively smooth. Place the pan in the preheated oven on the center rack. Bake for approximately 50 to 65 minutes. The baking time can vary depending on your oven, so it’s important to keep an eye on it.
Checking for Doneness
To check if your Red Velvet Banana Bread is done, insert a toothpick or a thin knife into the center of the loaf. If it comes out clean or with jurum extracta few moist crumbs attached, it’s ready. If there’s wet batter on the toothpick, continue baking for additional 5-minute intervals, checking each time. The top of the bread should be firm and spring back slightly when lightly touched.
Cooling and Enjoying
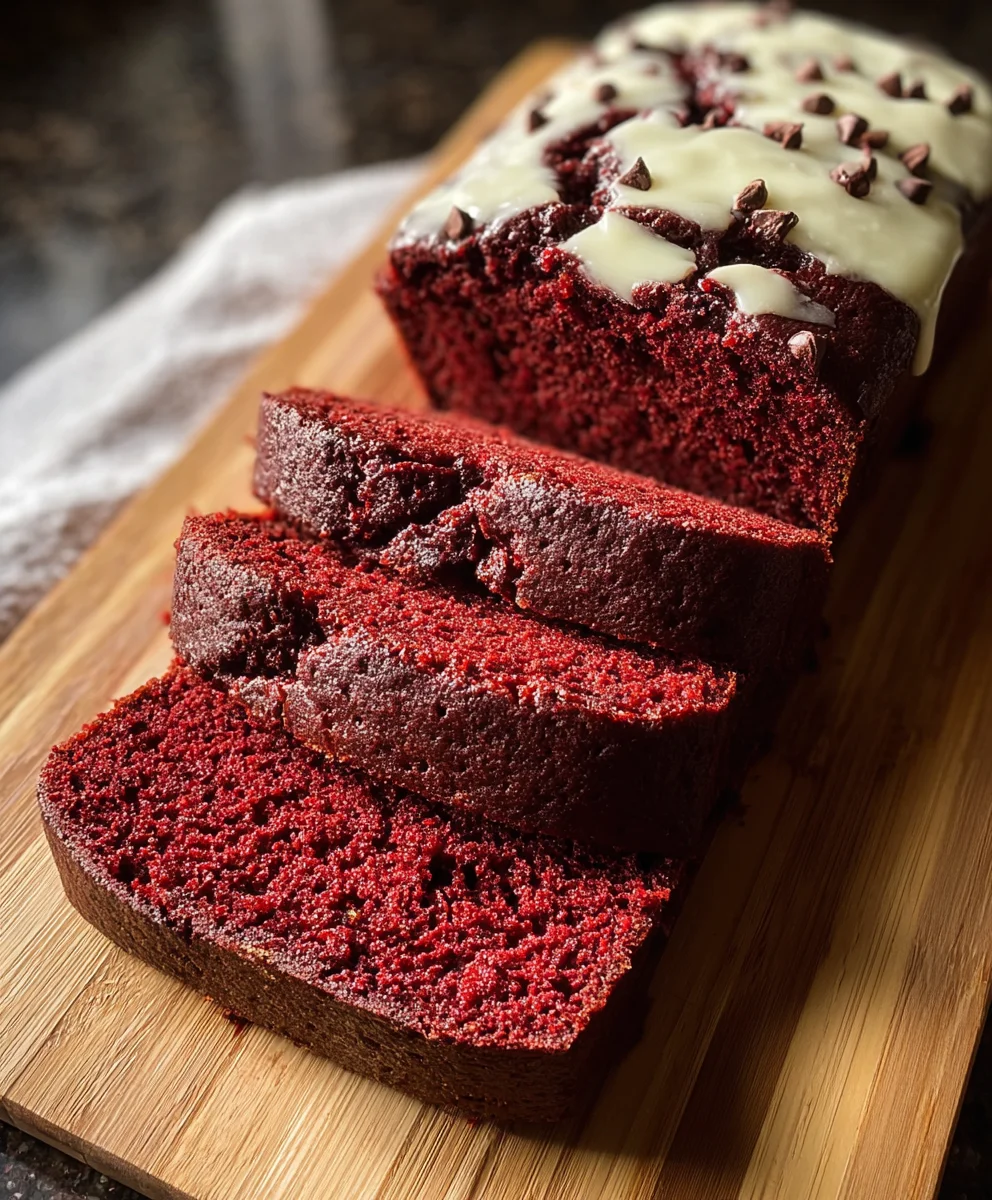
Once baked, carefully remove the loaf pan from the oven. Let the Red Velvet Banana Bread cool in the pan on a wire rack for about 10 to 15 minutes. This allows it to set up properly. Then, carefully invert the pan and lift the bread out (using the parchment paper handles if you used them). Let it cool completely on the wire rack before slicing. This is a crucial step; slicing into warmrum extractead can cause it to crumble. Once fully cooled, slice and enjoy your delicious homemade Red Velvet Banana Bread! It’s fantastic on its own or served with a smear of cream cheese frosting for an extra special treat.
Conclusion:
There you have it! Your very own batch of delicious Red Velvet Banana Bread. We hope you enjoyed making and, more importantly, savoring this delightful twist on a classic. The rich chocolatey notes of red velvet beautifully complement the sweet, tender texture of ripe bananas, creating a truly unique and satisfying treat. This loaf is perfect for breakfast, a special dessert, or even a decadent afternoon snack. For serving, consider a generous slice warm with a smear of cream cheese frosting – it’s divine! You can also dust it with powdered sugar or enjoy it plain. If you’re feeling adventurous, try adding chocolate chips or a swirl of cream cheese right into the batter before baking for an extra layer of indulgence.
Don’t be afraid to experiment! This Red Velvet Banana Bread is wonderfully versatile. You could even add chopped nuts like walnuts or pecans for a delightful crunch, or a hint of espresso powder to deepen the chocolate flavor. The beauty of baking is in the personalization, and we encourage you to make this recipe your own. So go ahead, bake up a storm, and share the joy of this incredible Red Velvet Banana Bread with your loved ones. Happy baking!
Frequently Asked Questions:
Q: Can I use overripe bananas that are more brown than yellow for my Red Velvet Banana Bread?
Absolutely! Overripe bananas are actually ideal for banana bread. Their natural sugars are more concentrated, leading to a sweeter, more intensely flavored, and incredibly moist loaf. The browner, the better!
Q: What’s the best way to store leftover Red Velvet Banana Bread?
To keep your Red Velvet Banana Bread fresh, store it in an airtight container at room temperature for up to 3 days. If you plan to keep it longer, wrap it tightly in plastic wrap and then foil, and it will stay fresh in the refrigerator for up to a week. You can also freeze slices or the whole loaf, wrapped well, for up to 3 months.
Q: My Red Velvet Banana Bread seems a bit dry. What could I have done wrong?
A dry Red Velvet Banana Bread can often be the result of over-baking. Always test for doneness with a toothpick inserted into the center – it should come out with a few moist crum extractbs, not completely clean. Also, ensure you’re using enough ripe bananas, as they contribute significantly to the moisture content. Measuring your flour accurately is also key; spooning it into the measuring cup and leveling off is better than scooping directly from the bag.
Red Velvet Banana Bread Recipe-Decadent & Delicious
A decadent and delicious Red Velvet Banana Bread recipe that combines the moistness of banana bread with the iconic flavor and color of red velvet.
Ingredients
-
3 ripe bananas, mashed (about 1 cup)
-
1/2 cup unsalted butter, melted
-
3/4 cup granulated sugar
-
2 large eggs
-
1 teaspoon vanilla extract
-
1 1/2 cups all-purpose flour
-
1/4 cup unsweetened cocoa powder
-
1 teaspoon baking soda
-
1/2 teaspoon salt
-
1 tablespoon red food coloring
-
1/2 cup buttermilk
-
1/2 cup chocolate chips (optional)
Instructions
-
Step 1
Preheat your oven to 350 degrees Fahrenheit (175 degrees Celsius). Grease and flour a loaf pan or line it with parchment paper. -
Step 2
In a large bowl, whisk together melted butter and granulated sugar until creamy. Add eggs one at a time, whisking well after each. Stir in vanilla extract and red food coloring until evenly distributed. -
Step 3
In a separate bowl, mash ripe bananas until mostly smooth. Gently fold the mashed bananas into the wet ingredient mixture. -
Step 4
In another bowl, whisk together all-purpose flour, cocoa powder, baking soda, and salt. Gradually add the dry ingredients to the wet ingredients, mixing until just combined. Do not overmix. -
Step 5
Gently fold in the buttermilk and chocolate chips (if using). Pour the batter evenly into the prepared loaf pan. -
Step 6
Bake for 50 to 65 minutes, or until a toothpick inserted into the center comes out clean. Cool in the pan for 10-15 minutes before transferring to a wire rack to cool completely.
Important Information
Nutrition Facts (Per Serving)
It is important to consider this information as approximate and not to use it as definitive health advice.
Allergy Information
Please check ingredients for potential allergens and consult a health professional if in doubt.