Quick Pickled Red Onions-Easy Flavor Burst
Pickled Red Onions are one of those magical kitchen additions that can transform the ordinary into the extraordinary. Seriously, have you ever tried a taco, a salad, or even just a humble grilled cheese that felt complete without that vibrant pop of pink? That’s the power of these beauties! They’re not just pretty to look at; the addictive sweet-tangy crunch is what truly sets them apart. What makes them so special? It’s the brilliant alchemy that happens when humble red onions meet vinegar, sugar, and a touch of salt. Suddenly, they’re bursting with flavor, a zesty counterpoint to rich, savory dishes, and a beautiful, edible garnish that adds instant flair. You’ll find yourself reaching for this jar again and again, wondering how you ever lived without them.
Why you’ll love making this recipe:
This recipe is surprisingly simple, requiring minimal active time and a handful of pantry staples. The payoff is enormous, offering a versatile condiment that elevates everything it touches.
Get ready to experience the joy of truly spectacular Pickled Red Onions!
Pickled Red Onions
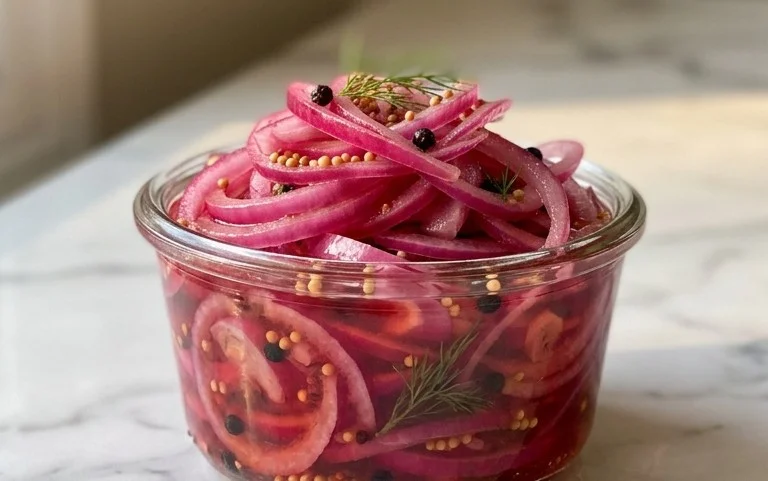
Hello there, fellow food enthusiasts! Today, we’re diving into a simple yet transformative kitchen magic trick: pickling red onions. These vibrant gems are not just a feast for the eyes; they offer a delightful tangy crunch that can elevate everything from tacos and salads to sandwiches and charcuterie boards. Forget those pre-packaged versions that often taste overly sharp or artificial. Making your own is incredibly easy, budget-friendly, and allows you to customize the flavor to your exact liking. Get ready to unlock a new level of deliciousness with this quick and rewarding recipe.
The beauty of pickled red onions lies in their versatility. That bright pink hue isn’t just for show; it signals the arrival of a punchy, slightly sweet, and wonderfully acidic bite. They cut through richness, add a refreshing counterpoint to savory dishes, and provide a beautiful visual pop. I find myself reaching for a jar of these constantly, and once you try them, I have a feeling you will too. They’re perfect for meal prepping, keeping a batch on hand for whenever inspiration strikes.
Ingredients:
Instructions:
Preparation of the Onion
The first step is to prepare your beautiful red onion. You’ll want to start by peeling the outer layers of the onion. Sometimes these can be a bit dry or papery, so just gently pull them away. Next, you’ll need to thinly slice the onion. The key here is to aim for uniform slices, about 1/8 to 1/4 inch thick. You can do this with a sharp chef’s knife or a mandoline slicer if you have one. A mandoline will give you the most consistent slices, which is ideal for even pickling. If you’re using a knife, be careful and take your time. The thinner the slices, the quicker they will pickle and the more pliable they will be. Once sliced, I like to separate the rings slightly. This helps the pickling liquid to penetrate all the nooks and crannies.
Creating the Brine
Now it’s time to make the magic brine that will transform our humble onion. In a small saucepan, combine the white vinegar, water, sugar, and kosher salt. Place the saucepan over medium heat. We’re not looking to boil this vigorously, but rather to gently heat it until the sugar and salt have completely dissolved. Stir occasionally to help them along. This process usually takes just a few minutes. Once the salt and sugar are no longer visible and you have a clear liquid, remove the saucepan from the heat. Allowing the brine to cool slightly before pouring it over the onions is a good idea, especially if you’re using glass jars, as it prevents thermal shock. However, you don’t want it to be completely cold either; a warm brine is more effective at starting the pickling process.
Combining and Infusing
Once your brine is ready and slightly cooled, it’s time to bring everything together. You’ll need a clean, heat-safe jar or container. A pint-sized glass jar with a lid works perfectly for this recipe. Carefully pack your thinly sliced red onion rings into the jar. Don’t be afraid to really pack them in there; they will shrink slightly as they pickle. Now, gently pour the warm brine over the onions, making sure they are completely submerged. You might need to nudge them around a bit with a clean spoon to ensure they are all coated and under the liquid. If, by chance, you don’t have quite enough brine to cover all the onions, you can easily whip up a little more by following the same brine ratio: equal parts vinegar and water, with sugar and salt to taste. Once the onions are fully submerged, secure the lid tightly onto the jar.
Chilling and Maturing
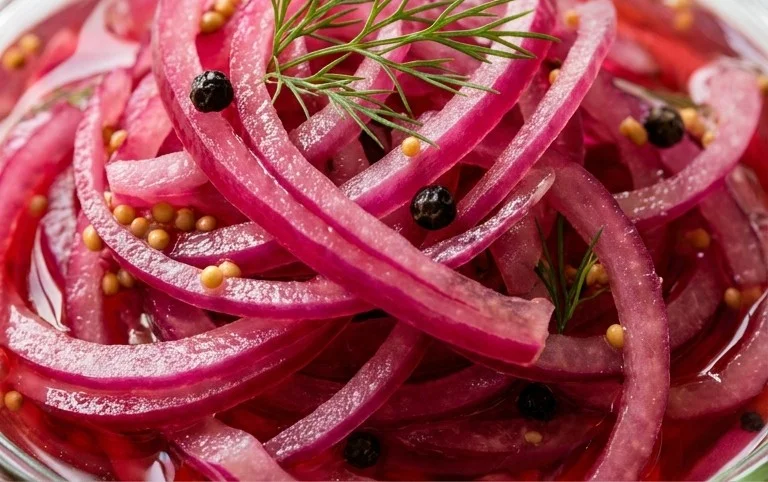
This is where the patience comes in, but trust me, the wait is worth it! After securing the lid, give the jar a gentle shake or swirl to ensure everything is well distributed. Then, place the jar in the refrigerator. The pickling process actually begin extracts immediately, but the flavor really starts to develop and meld as it chills. For the best flavor, I recommend letting them sit in the fridge for at least 1 hour before you start using them. However, for a truly optimal taste experience, try to wait at least 4 hours, or even overnight. The longer they sit, the more the vinegar will soften the onions and the more the flavors will deepen. You’ll notice the onions becoming more tender and their color intensifying to a beautiful, vibrant pink.
Serving and Storing Your Pickled Onions
After your waiting period, your gorgeous pickled red onions are ready to be enjoyed! Carefully remove them from the jar with a fork or slotted spoon, draining off any excess brine. They are now ready to be piled onto your favorite dishes. They are fantastic on avocado toast, in salads for a burst of flavor and crunch, as a topping for burgers or grilled chicken, or as part of a cheese board. The possibilities are truly endless. As for storage, simply keep the jar in the refrigerator with the lid on. They will stay delicious and retain their vibrant color and tangy flavor for about 2 to 3 weeks. Just be sure to use clean utensils when you access them to prevent introducing any unwanted bacteria. Enjoy this simple yet incredibly impactful addition to your culinary repertoire!
Conclusion:
So there you have it! Making your own pickled red onions is an absolute game-changer for your kitchen. This simple recipe delivers a burst of vibrant flavor and stunning color that elevates almost any dish. The perfect balance of sweet, tangy, and slightly spicy makes these pickled red onions an incredibly versatile condiment. They add a delightful crunch and zesty kick to everything from tacos and salads to sandwiches and grain bowls. Don’t be afraid to experiment with this fantastic recipe – it’s incredibly forgiving and rewarding.
I truly encourage you to give these pickled red onions a try. You’ll be amazed at how easy they are to make and how often you’ll reach for them. Imagin extracte transforming a simple meal into something extraordinary with just a spoonful of this vibrant relish. Beyond the classic brine, feel free to get creative! Consider adding a pinch of chili flakes for a spicy kick, a sprig of fresh dill for an herbaceous note, or even a touch of honey for a sweeter profile. The possibilities are endless, and the satisfaction of making your own is immense.
Frequently Asked Questions:
How long do pickled red onions last?
When stored properly in an airtight container in the refrigerator, your homemade pickled red onions can last for up to 2-3 weeks. The longer they sit, the more the flavors will meld and deepen, becoming even more delicious.
Can I use different types of onions?
While red onions are ideal for their color and slightly milder flavor when pickled, you can experiment with other onions. Yellow or white onions will also pickle well, though they won’t have the same vibrant pink hue. Their flavor profile will be a bit sharper.
What’s the best way to use pickled red onions?
The beauty of pickled red onions is their versatility! They are a fantastic topping for avocado toast, burgers, pulled beef sandwiches, and even scrambled eggs. Add them to your favorite guacamole for an extra zing, or toss them into a potato salad for a refreshing twist. They are truly a pantry staple worth having on hand.
Pickled Red Onions
Quick and easy pickled red onions that add a vibrant, tangy crunch to sandwiches, tacos, salads, and more. Ready in under an hour.
Ingredients
-
1 large Red onion, thinly sliced
-
1 cup White Vinegar
-
1 cup Water
-
1 tablespoon Sugar
-
2 teaspoons Kosher salt
-
1/2 teaspoon Black peppercorns (optional)
-
1 bay leaf (optional)
Instructions
-
Step 1
Thinly slice the red onion. Aim for even slices for consistent pickling. -
Step 2
In a medium saucepan, combine the white vinegar, water, sugar, and kosher salt. If using, add the peppercorns and bay leaf. -
Step 3
Heat the mixture over medium heat, stirring until the sugar and salt are completely dissolved. Do not boil. -
Step 4
Place the sliced red onions into a clean jar or heatproof bowl. -
Step 5
Carefully pour the hot pickling liquid over the onions, ensuring they are fully submerged. -
Step 6
Let the mixture cool to room temperature, then cover and refrigerate for at least 30 minutes before serving. For best flavor, let it pickle for a few hours or overnight.
Important Information
Nutrition Facts (Per Serving)
It is important to consider this information as approximate and not to use it as definitive health advice.
Allergy Information
Please check ingredients for potential allergens and consult a health professional if in doubt.