Crispy Ground Beef Tacos- Easy Weeknight Dinner
Crispy Ground Beef Tacos are more than just a weeknight dinner; they’re a gateway to pure, unadulterated joy in every single bite. There’s something undeniably satisfying about that perfect crunch of a fried tortilla, giving way to savory, seasoned ground beef and all your favorite toppings. It’s a comfort food classic that never fails to bring smiles to the table, and honestly, what’s not to love? The beauty of these crispy ground beef tacos lies in their incredible versatility and the sheer simplicity of their deliciousness. Whether you’re a seasoned chef or a kitchen newbie, mastering this iconic dish is a culinary win. We’re talking about that irresistible textural contrast, the explosion of flavors, and the sheer fun of building your own perfect taco. Get ready to elevate your taco game to legendary status!
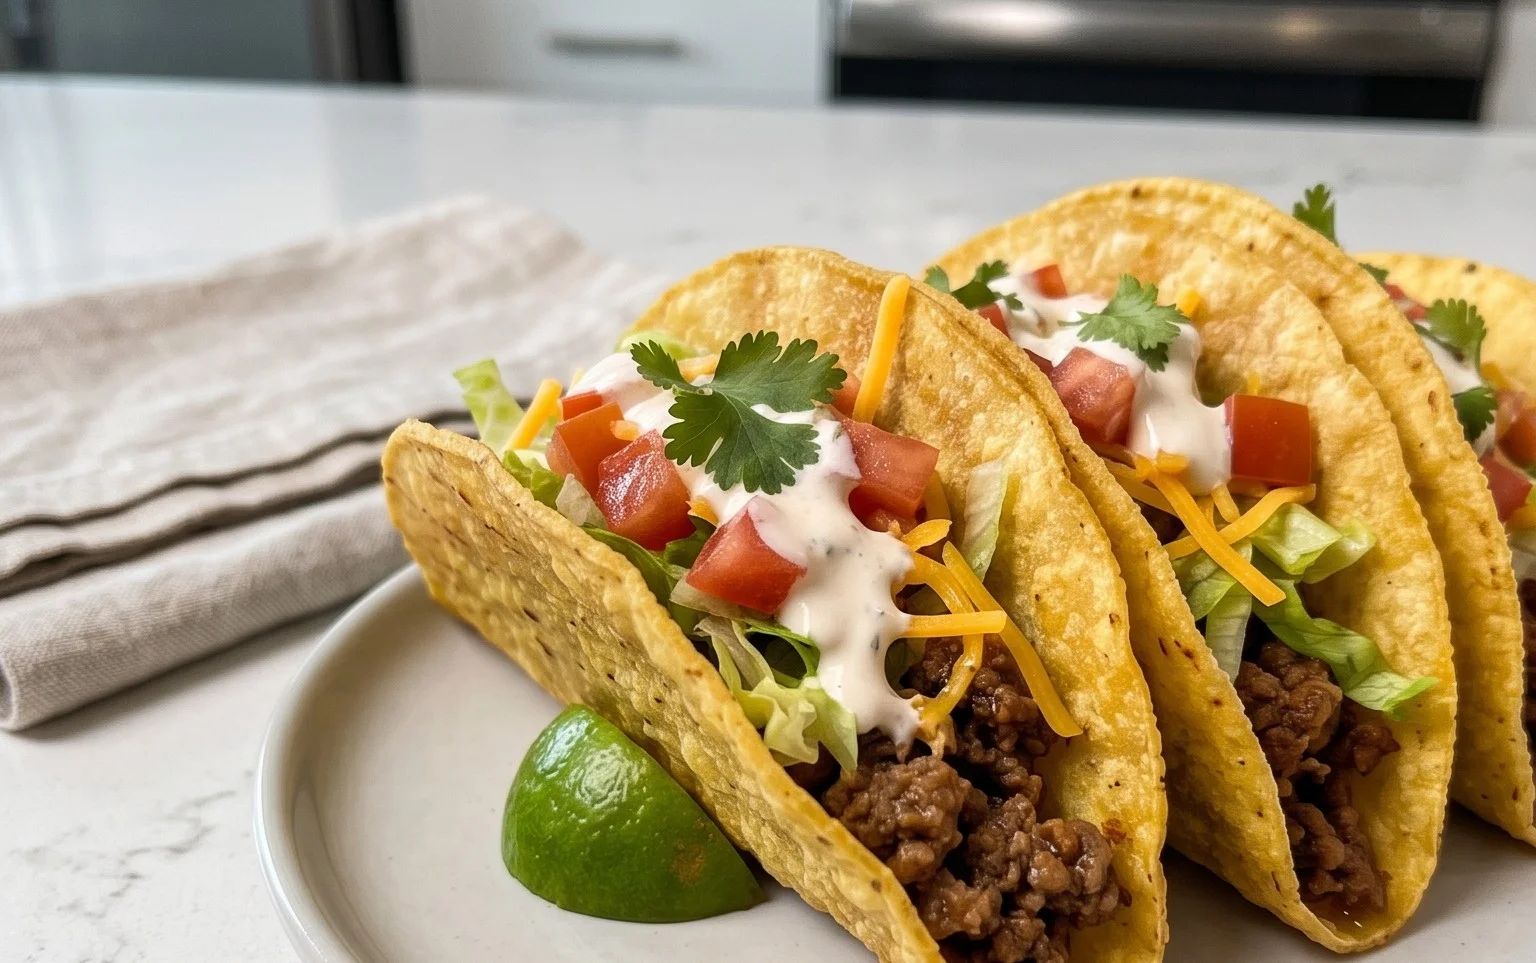
Crispy Ground Beef Tacos
There’s something undeniably satisfying about a perfectly crispy taco. The crunch of the tortilla, the savory, well-seasoned ground beef, and the melty cheese – it’s a classic for a reason! Forget those soggy, disappointing taco nights. Today, we’re diving into a recipe that guarantees a golden-brown, irresistibly crispy shell every single time, with a hearty and flavorful ground beef filling that’s pure comfort food. This recipe is straightforward enough for a weeknight meal but delicious enough to impress, making it a true winner in my kitchen. Let’s get started on building these flavor bombs!
Ingredients:
Cooking the Ground Beef Filling
The foundation of any great taco is the filling, and for our crispy ground beef tacos, we’re aiming for maximum flavor and a perfect texture. This isn’t just about browning meat; it’s about building layers of taste.
1. In a large skillet, preferably cast iron for even heating, add the 1 pound of 90/10 ground beef. Place the skillet over medium-high heat. As the beef begin extracts to sizzle, break it apart with a spoon or spatula. We want to brown the beef until it’s no longer pink, which usually takes about 5-7 minutes. Don’t rush this step; good browning adds a lot of flavor. Once the beef is browned, drain off any excess grease. This is important for a cleaner taste and a less greasy final product, especially since we’re aiming for crispy shells.
2. Add the finely chopped 1/2 medium onion to the skillet with the drained ground beef. Cook, stirring frequently, until the onions have softened and become translucent, which should take another 3-5 minutes. The sweetness of the softened onions will complement the savory beef beautifully. Next, stir in the 2 tablespoons of taco seasoning and the 2 tablespoons of tomato paste. Stir everything together thoroughly, ensuring the taco seasoning and tomato paste coat all the ground beef. Cook for about 1 minute more, allowing the tomato paste to deepen in color and release its rich, concentrated flavor. This brief sauté also helps to bloom the spices in the taco seasoning, intensifying their aroma and taste.
3. Pour in the 1/4 cup of water or beef broth. Bring the mixture to a simmer, then reduce the heat to low. Cover the skillet and let it cook for about 10-15 minutes. This simmering period allows the flavors to meld together and the sauce to thicken slightly. The liquid will help to rehydrate the taco seasoning and create a cohesive, flavorful filling. Taste the mixture and add salt to taste, if needed. Some taco seasonings are saltier than others, so it’s always best to check. The goal is a moist but not overly saucy filling, so it doesn’t make our taco shells soggy.
Achieving the Perfect Crispy Taco Shells
This is where the magic happens! We’re going to fry our flour tortillas to achieve that delightful crunch.
4. Prepare your taco shells. You have a couple of options here, but for ultimate crispiness, shallow frying is the way to go. Heat about 1/2 inch of avocado or vegetable oil in a separate, large skillet over medium-high heat until it shimmers. Carefully place one flour tortilla into the hot oil. Use tongs to gently fold the tortilla in half, creating a taco shape. Hold it in place for about 30 seconds to a minute until it starts to set. Then, carefully flip the tortilla to cook the other side, again holding it in the folded shape. Continue to fry for another 1-2 minutes per side, or until the tortilla is golden brown and crispy. You’re looking for that satisfying crunch! As each shell crisps up, remove it from the oil with tongs and place it on a plate lined with paper towels to drain any excess oil. You can also use a taco press or even the back of a sturdy spoon to help maintain the folded shape as it fries. Repeat this process with the remaining flour tortillas. For a slightly less hands-on approach, you can bake them, but frying truly delivers that restaurant-quality crisp.
Assembling and Serving Your Crispy Masterpieces
Now for the best part – putting it all together and enjoying your hard work!
5. Once your taco shells are fried and drained, and your beef filling is ready, it’s time to assemble. Carefully spoon the warm, savory ground beef filling into each crispy taco shell. Don’t be shy with the filling; pack it in there! Immediately after adding the beef, generously sprinkle the shredded mozzarella cheese over the top. The residual heat from the beef will start to melt the cheese, creating that gooey, irresistible pull. If you like your cheese extra melty, you can pop the assembled tacos under a broiler for just a minute or two, keeping a very close eye on them to prevent burning. Serve your crispy ground beef tacos immediately, garnished with a generous scattering of finely chopped fresh cilantro. The bright, fresh herb cuts through the richness of the beef and cheese beautifully. You can also offer your favorite taco toppings like salsa, sour cream, shredded lettuce, or diced tomatoes on the side for everyone to customize their perfect bite. Enjoy the incredible crunch and flavor!

Conclusion:
And there you have it – a foolproof guide to making the most delicious and satisfying crispy ground beef tacos right in your own kitchen! We’ve walked through the simple steps, from browning the seasoned ground beef to achieving that perfect crunchy shell. The beauty of these tacos lies in their incredible versatility and ease. They’re a weeknight savior, a crowd-pleaser for casual gatherings, and a blank canvas for your culinary creativity. Don’t hesitate to experiment with different toppings – fresh salsa, creamy guacamole, tangy sour cream, shredded cheese, or a squeeze of lime all elevate these simple tacos to new heights. Give this recipe a try; I promise you won’t be disappointed with the fantastic flavor and satisfying crunch!
Frequently Asked Questions:
Can I make the ground beef filling ahead of time?
Absolutely! The seasoned ground beef filling can be made up to 2-3 days in advance and stored in an airtight container in the refrigerator. Reheat it gently on the stovetop or in the microwave before assembling your tacos. This is a great time-saver for busy weeknights!
What are some other filling variations besides ground beef?
While crispy ground beef tacos are classic, feel free to get creative! You can easily substitute the ground beef with seasoned ground turkey, shredded chicken, pulled beef, or even a flavorful vegetarian option like seasoned black beans or crum extractbled tofu. The key is to ensure your filling is well-seasoned to complement the crispy shell.
How do I prevent the taco shells from getting soggy?
The best way to ensure crispy taco shells is to assemble them just before serving. Keep your cooked ground beef warm in a serving dish, and have all your toppings ready. Guests can then assemble their own tacos to their liking, ensuring maximum crunch with every bite. If you’re preparing a large batch, you can briefly warm the shells in a low oven (around 300°F or 150°C) for a few minutes right before serving to help them crisp up.
Crispy Ground Beef Tacos
Easy and flavorful crispy ground beef tacos with a simple seasoned filling and melted cheese.
Ingredients
-
1 pound 90/10 ground beef
-
1/2 medium onion, finely chopped
-
2 tablespoons taco seasoning
-
2 tablespoons tomato paste
-
1/4 cup water or beef broth
-
salt to taste
-
8 (6 inch) taco size flour tortillas
-
2 to 3 cups mozzarella cheese, shredded
-
avocado or vegetable oil
-
fresh cilantro, finely chopped, garnish
Instructions
-
Step 1
In a large skillet over medium-high heat, cook the ground beef until browned, breaking it up with a spoon. Drain off excess fat. -
Step 2
Add the chopped onion to the skillet and cook until softened, about 3-5 minutes. -
Step 3
Stir in the taco seasoning and tomato paste. Cook for 1 minute until fragrant. -
Step 4
Pour in the water or beef broth and bring to a simmer. Cook for 5-7 minutes, or until the sauce has thickened. Season with salt to taste. -
Step 5
Warm the flour tortillas according to package directions or until pliable. -
Step 6
Spoon the ground beef mixture into the warm tortillas. Top generously with shredded mozzarella cheese. -
Step 7
Serve immediately, garnished with fresh cilantro.
Important Information
Nutrition Facts (Per Serving)
It is important to consider this information as approximate and not to use it as definitive health advice.
Allergy Information
Please check ingredients for potential allergens and consult a health professional if in doubt.