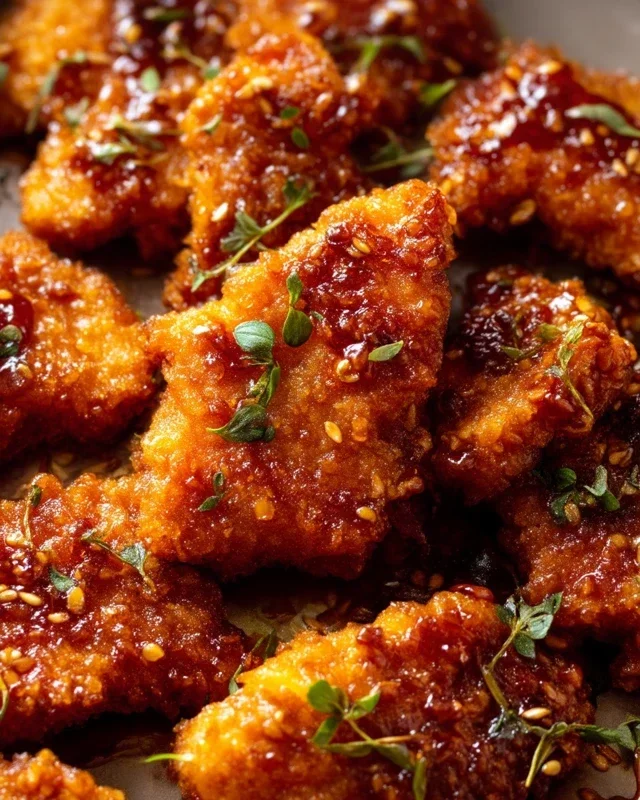
Baked Hot Honey Chicken- Crispy Sweet Spicy
Baked Crunchy Hot Honey Chicken is more than just a meal; it’s an experience. Imagin extracte perfectly golden, incredibly crispy chicken pieces, each bite delivering an explosion of sweet heat. This dish has taken kitchens by storm, and it’s easy to see why. We all crave that satisfying crunch, that delightful contrast of sweet and spicy, and Baked Crunchy Hot Honey Chicken delivers it in spades. What truly sets this baked version apart is its ability to achieve that irresistible crispiness without the mess or fuss of deep-frying. We achieve that magic through a simple yet effective technique, ensuring every piece is coated in a flavourful, textural masterpiece. Get ready to fall head over heels for this incredibly satisfying and surprisingly easy recipe for Baked Crunchy Hot Honey Chicken!
Ingredients:
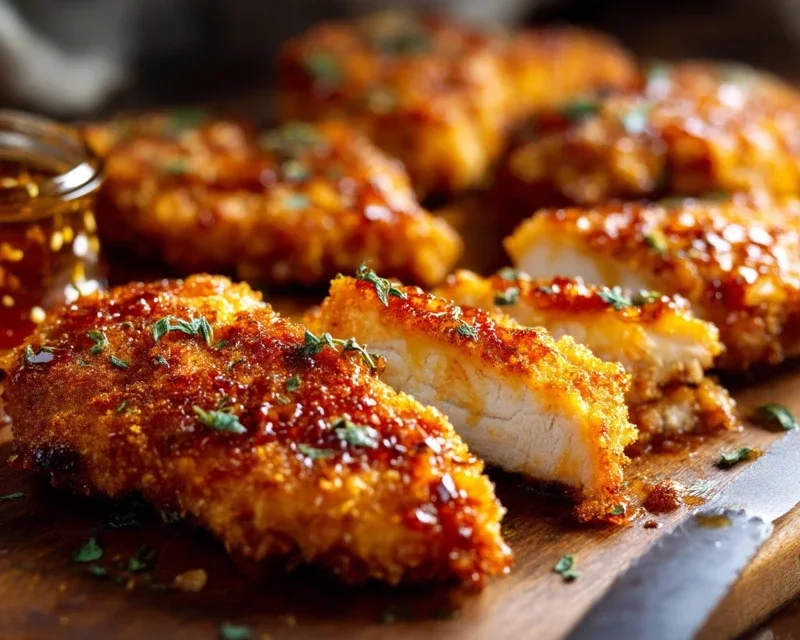
Get ready to elevate your chicken game! Today, we’re diving into the wonderfully delicious world of Baked Crunchy Hot Honey Chicken. Forget dry, bland chicken – this recipe delivers tender, juicy meat coated in an irresistible crunchy crust, all finished with a sweet and spicy hot honey glaze. It’s the perfect balance of flavors and textures, making it a hit with everyone from picky eaters to culinary adventurers. This dish is deceptively simple to make, proving that gourmet-tasting meals are well within your reach, even on a weeknight. We’re going to achieve maximum crunch and flavor without ever frying, which is a huge win in my book. Let’s get started and transform those humble chicken tenderloins into something truly spectacular!
Preparing the Crunchy Coating
The secret to that irresistible crunch lies in our simple yet effective coating mixture. First, we need to pulverize our cornflakes. The easiest way to do this is to place them in a large zip-top bag and then use a rolling pin or the bottom of a sturdy pan to crush them into fine crum extractbs. You don’t want them to be a complete powder, but rather small, uniform pieces that will adhere well to the chicken. This process takes just a minute or two and makes a big difference in the final texture. Once your cornflakes are crushed, transfer them to a shallow dish or pie plate.
To this crushed cornflake mixture, we’ll add our dry seasonings. Stir in the grated parmesan cheese for a salty, savory depth, the smoked paprika for a lovely smoky aroma and color, and the onion powder and garlic powder for foundational savory notes. Whisk these ingredients together thoroughly to ensure they are evenly distributed. This evenly seasoned coating will transfer maximum flavor to your chicken.
Setting Up the Egg Wash
In a separate shallow dish, we’ll prepare our egg wash. Crack the two large eggs into the dish and beat them vigorously with a fork until the yolks and whites are fully combined and slightly frothy. This is what will help our crispy coating adhere to the chicken. To the beaten eggs, we’re going to add two tablespoons of your favorite hot sauce. This not only adds a subtle layer of heat and flavor to the coating itself but also helps to create a slightly more robust bond between the chicken and the cornflake mixture. Give this a good whisk to incorporate the hot sauce evenly.
Coating the Chicken
Now it’s time to get your hands a little messy! Pat the chicken breast tenderloins dry with paper towels. This is a crucial step for ensuring the egg wash and coating stick properly. Working in batches, dip each chicken tenderloin first into the egg wash, ensuring it’s fully coated. Let any excess egg drip off. Then, transfer the egg-washed tenderloin to the cornflake mixture. Press the chicken firmly into the crum extractbs, turning it to coat all sides thoroughly. Make sure the entire surface is covered with the crunchy mixture. You can even use your hands to gently press the crum extractbs onto the chicken. Place the coated chicken tenderloins on a clean plate or baking sheet as you work. It’s important not to overcrowd the chicken on the baking sheet later, so having a bit of space for each piece is key for even cooking and crisping.
Baking the Chicken
Preheat your oven to 400°F (200°C). Line a large baking sheet with parchment paper for easy cleanup. Arrange the coated chicken tenderloins on the prepared baking sheet in a single layer, ensuring they have some space between them. This allows the hot air to circulate, promoting even cooking and maximum crispiness. Drizzle the chicken generously with extra virgin extract olive oil. The oil helps the coating to brown and become even crispier during baking. Bake for 20-25 minutes, or until the chicken is cooked through and the coating is golden brown and crispy. The exact cooking time will depend on the thickness of your tenderloins. You can check for doneness by cutting into the thickest part of a tenderloin; the juices should run clear, and the internal temperature should reach 165°F (74°C).
Crafting the Hot Honey Glaze
While the chicken is baking, we’ll prepare the star of the show – our luscious hot honey glaze. In a small saucepan, combine the 1/2 cup of honey with 2-3 tablespoons of hot sauce. Add the cayenne pepper (start with 1 teaspoon and add more to your liking for extra heat), chipotle chili powder for a smoky kick, garlic powder, and onion powder. Stir these ingredients together over medium-low heat. We want to gently warm the mixture and allow the flavors to meld. Stir continuously until the honey is fully liquid and the spices are well incorporated. Be careful not to let it boil vigorously, as honey can scorch easily. Simmer for just 2-3 minutes until it’s slightly thickened. This glaze will be brushed onto the chicken towards the end of its cooking time to give it that signature sweet and spicy finish.
Once the chicken has baked for about 15-20 minutes and is looking golden and crisp, carefully remove the baking sheet from the oven. Brush the hot honey glaze generously over the tops of the chicken tenderloins. Return the chicken to the oven for another 5-7 minutes, or until the glaze is slightly caramelized and sticky, and the chicken is fully cooked. Watch it closely during this final stage to prevent the glaze from burning. The aroma that fills your kitchen at this point will be absolutely incredible! Let the chicken rest for a few minutes before serving. This allows the juices to redistribute, resulting in even more tender and moist chicken. Serve hot and enjoy the delightful crunch and the perfectly balanced sweet and spicy kick!
Conclusion:
I hope you’re as excited to try this Baked Crunchy Hot Honey Chicken as I am to share it with you! This recipe truly hits all the right notes: it’s incredibly flavorful with that perfect balance of sweet and spicy, surprisingly easy to make, and results in chicken that’s both delightfully crispy on the outside and juicy on the inside. The hot honey glaze caramelizes beautifully in the oven, creating a sticky, irresistible coating that will have everyone asking for seconds. It’s a fantastic weeknight meal that feels special enough for guests, proving that gourmet-level taste doesn’t require hours in the kitchen.
For serving, this Baked Crunchy Hot Honey Chicken is wonderfully versatile. It pairs beautifully with classic comfort sides like creamy mashed potatoes, fluffy rice, or a simple green salad. Consider roasted Brussels sprouts or asparagus for a touch of green and a complementary earthy flavor. For a more adventurous pairing, try it with a cool, creamy coleslaw to offset the heat. If you’re feeling creative with variations, don’t hesitate to experiment! You can add a pinch of smoked paprika to the breading for an extra layer of smoky depth, or swap out the hot sauce for sriracha or gochujang for a different kind of heat. You could even toss in some chopped fresh cilantro or parsley just before serving for a pop of freshness.
Give this Baked Crunchy Hot Honey Chicken recipe a try; I’m confident it will become a new favorite in your recipe rotation. It’s a satisfying dish that’s bursting with flavor and texture, and I can’t wait to hear about your delicious creations!
Frequently Asked Questions:
Can I make this recipe gluten-free?
Absolutely! To make this Baked Crunchy Hot Honey Chicken gluten-free, simply substitute the all-purpose flour with a gluten-free all-purpose flour blend. For the breadcrum extractbs, opt for gluten-free breadcrum extractbs or crushed gluten-free crackers. Ensure all other ingredients, like your hot sauce, are also certified gluten-free.
What kind of chicken cut is best for this recipe?
While this recipe works wonderfully with boneless, skinless chicken thighs or breasts cut into bite-sized pieces, you can also use bone-in, skin-on chicken pieces like drum extractsticks or thighs for an even crispier result. Adjust the baking time accordingly for bone-in cuts, as they will take longer to cook through.
How spicy is the hot honey glaze?
The spiciness of the hot honey glaze can be adjusted to your preference. The recipe uses a standard hot sauce, but you can control the heat by the amount you use or by selecting a milder or spicier hot sauce. For an extra kick, you can also add a pinch of red pepper flakes to the glaze. Taste the glaze before you brush it on to gauge its heat level.
Baked Crunchy Hot Honey Chicken
Crispy, oven-baked chicken tenderloins coated in a spicy-sweet hot honey glaze. A delicious and healthier alternative to fried chicken.
Ingredients
-
6 cups cornflakes
-
1/4 cup grated parmesan cheese
-
1 teaspoon smoked paprika
-
1/2 teaspoon onion powder
-
1/2 teaspoon garlic powder
-
2 large eggs, beaten
-
2 tablespoons hot sauce
-
2 pounds chicken breast tenderloins
-
extra virgin olive oil, for drizzling
-
1/2 cup honey
-
2-3 tablespoons hot sauce
-
1-3 teaspoons cayenne pepper
-
3/4 teaspoon chipotle chili powder
-
1/2 teaspoon garlic powder
-
1/2 teaspoon onion powder
Instructions
-
Step 1
Preheat oven to 400°F (200°C). Line a baking sheet with parchment paper and lightly grease with olive oil. -
Step 2
In a shallow dish, combine crushed cornflakes, parmesan cheese, smoked paprika, 1/2 teaspoon onion powder, and 1/2 teaspoon garlic powder. Mix well. -
Step 3
In another shallow dish, whisk together the beaten eggs and 2 tablespoons of hot sauce. -
Step 4
Dip each chicken tenderloin first into the egg mixture, allowing excess to drip off, then coat thoroughly in the cornflake mixture, pressing gently to adhere. -
Step 5
Place the coated chicken tenderloins on the prepared baking sheet. Drizzle generously with extra virgin olive oil. -
Step 6
Bake for 18-20 minutes, flipping halfway through, until chicken is cooked through and golden brown. -
Step 7
While the chicken bakes, prepare the hot honey glaze. In a small saucepan over medium-low heat, combine honey, 2-3 tablespoons hot sauce, 1-3 teaspoons cayenne pepper, 3/4 teaspoon chipotle chili powder, 1/2 teaspoon garlic powder, and 1/2 teaspoon onion powder. Stir until well combined and heated through. Do not boil. -
Step 8
Once chicken is cooked, remove from oven. Drizzle or toss the hot chicken with the prepared hot honey glaze. Serve immediately.
Important Information
Nutrition Facts (Per Serving)
It is important to consider this information as approximate and not to use it as definitive health advice.
Allergy Information
Please check ingredients for potential allergens and consult a health professional if in doubt.