Best Tri Tip Recipe – Two Delicious Ways
Tri tip, oh tri tip, you magnificent cut of beef! If there’s one roast that consistently steals the show at barbecues and family dinners, it’s this flavorful, tender gem from the bottom sirloin. What makes this particular cut so beloved? It’s the perfect trifecta of affordability, incredible marbling that melts into juicy deliciousness, and a beautiful, beefy flavor that stands up beautifully to marinades and rubs. But the real magic? The sheer versatility of the tri tip. We’re not just talking about one way to enjoy this culinary cbeef hampion; we’re exploring two distinct, mouthwatering methods that will elevate your cooking game and have everyone beggin extractg for seconds. Get ready to discover just how amazing a well-prepared tri tip can be!
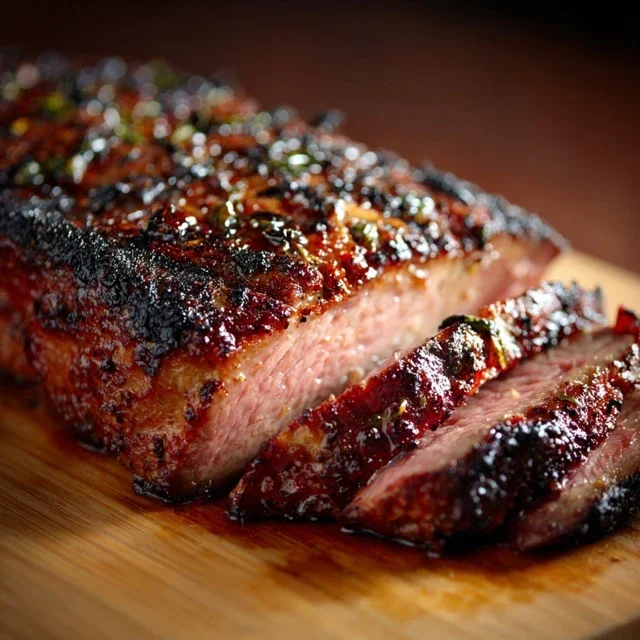
Tri Tip (2 Ways)
The tri-tip roast, also known as the bottom sirloin roast or Santa Maria steak, is a fantastic cut of beef. It’s lean, flavorful, and surprisingly affordable, making it a go-to for weeknight dinners or weekend gatherings. What I love most about tri-tip is its versatility. It cooks relatively quickly and can be prepared in a few different ways to suit your mood and cooking method. Today, I’m going to share my favorite ways to prepare this magnificent cut of meat, giving you two delicious options for your next roast. We’ll be focusing on a classic oven-roasted method and a quick sear-and-sear finish on the stovetop for that perfect crust.
Ingredients:
Method 1: Classic Oven Roast
This method is foolproof and yields a tender, juicy roast with minimal fuss. It’s perfect for when you want to set it and forget it while you prepare your side dishes.
1. Preparation and Seasoning: First, pat your tri-tip roast completely dry with paper towels. This is a crucial step as it helps create a better sear and allows the seasonings to adhere properly. In a small bowl, combine the garlic salt, Lawry’s seasoning salt, kosher salt, black pepper, sugar, garlic powder, and parsley. This blend creates a wonderfully balanced flavor profile that complements the beef without overpowering it. Rub the olive oil all over the tri-tip, ensuring a thin, even coating. Then, generously sprinkle the seasoning mixture over the entire roast, pressing it gently into the meat to make sure it sticks. Let the seasoned roast sit at room temperature for at least 30 minutes, or up to 2 hours, before cooking. This allows the meat to come to temperature and the seasonings to start working their magic.
2. Preheating and Searing (Optional but Recommended): Preheat your oven to 400°F (200°C). For an even better crust and more developed flavor, I highly recommend searing the tri-tip before roasting. You can do this in a hot, oven-safe skillet on the stovetop over medium-high heat for about 2-3 minutes per side until a nice brown crust forms. If you don’t have an oven-safe skillet, you can sear it in a regular skillet and then transfer it to a baking sheet for roasting.
3. Oven Roasting: Place the seasoned (and seared, if you chose to do so) tri-tip roast on a baking sheet or in a roasting pan. Roast in the preheated oven for approximately 20-25 minutes per pound for medium-rare, or until an instant-read thermometer inserted into the thickest part of the roast registers 130-135°F (54-57°C). If you prefer medium, aim for 140-145°F (60-63°C). Keep in mind that oven temperatures can vary, so it’s always best to use a thermometer for accuracy. Avoid opening the oven door too frequently, as this can cause the temperature to fluctuate and increase cooking time.
4. Resting is Key: Once the roast reaches your desired internal temperature, remove it from the oven and transfer it to a cutting board. Tent it loosely with aluminum foil and let it rest for at least 10-15 minutes. This resting period is absolutely critical for a tender and juicy roast. It allows the juices, which have been driven to the center during cooking, to redistribute throughout the meat. If you cut into it too soon, all those delicious juices will run out onto the cutting board, leaving you with a drier roast.
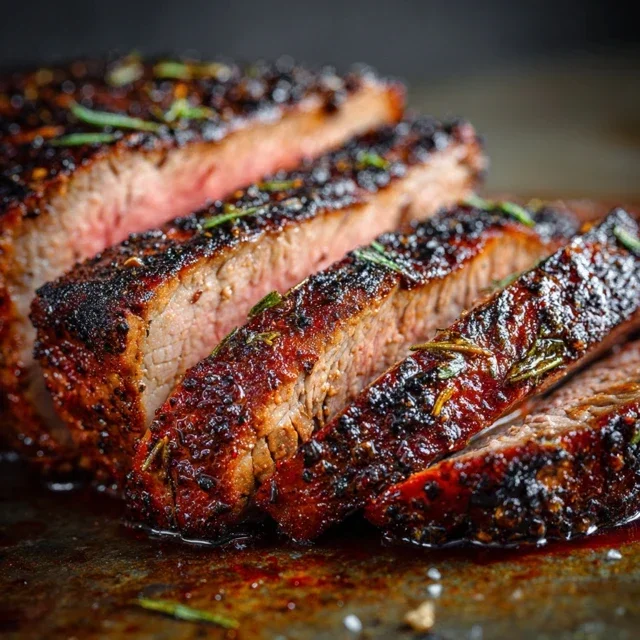
5. Slicing and Serving: After resting, slice the tri-tip against the grain. You’ll notice the grain runs in one direction on one side and then changes direction on the other. Identifying and slicing against this grain is another crucial step for tenderness. Serve immediately and enjoy the fruits of your labor!
Method 2: Sear-and-Sear Stovetop Finish
This method is perfect for a quicker cook and delivers a fantastic, caramelized crust. It’s ideal if you’re looking for a more hands-on approach and enjoy the sizzle of the stovetop.
1. Preparation and Seasoning: Follow the same preparation and seasoning steps as outlined in Method 1. Ensure the roast is well-dried and generously coated with your delicious seasoning blend. Let it rest at room temperature for at least 30 minutes.
2. Searing: Heat a heavy-bottomed skillet (cast iron is ideal) over medium-high heat. Add a tablespoon of olive oil or your preferred cooking oil. Once the oil is shimmering, carefully place the seasoned tri-tip in the skillet. Sear for about 3-4 minutes per side, until a deep, rich brown crust forms. Work in batches if your skillet is not large enough to avoid overcrowding.
3. Finishing in the Oven or Pan: Once seared on all sides, you have two options to finish cooking.
Cook for approximately 15-20 minutes, or until an instant-read thermometer registers 130-135°F (54-57°C) for medium-rare.
4. Resting and Slicing: Just like with the oven-roasted method, resting is paramount. Remove the tri-tip from the oven and let it rest, tented with foil, for at least 10-15 minutes. Then, slice thinly against the grain.
Both of these methods will deliver a fantastic tri-tip roast that’s sure to impress. Enjoy the process, and more importantly, enjoy the delicious results!
Conclusion:
So there you have it – two fantastic ways to master the delicious and surprisingly versatile tri tip! Whether you opt for the classic grilled perfection, achieving that beautiful sear and juicy interior, or delve into the tender, flavorful results of the oven-roasted method, you’re in for a treat. These recipes are fantastic because they highlight the natural beefiness of the tri tip without requiring complicated ingredients or techniques, making them perfect for both weeknight dinners and weekend gatherings. The key to success in both methods lies in proper temperature management and letting the meat rest – patience is a virtue when it comes to achieving ultimate tenderness and flavor. I highly encourage you to give one, or both, of these tri tip preparations a try; you won’t be disappointed!
For serving, I love slicing the tri tip thinly against the grain and serving it with classic steakhouse sides like roasted potatoes, a fresh green salad, or grilled asparagus. It also makes incredible sandwiches, tacos, or even as a base for a hearty beef stew. Don’t be afraid to experiment with marinades or rubs beforehand to add your own personal touch!
Frequently Asked Questions:
Q: Can I use a different cut of beef instead of tri tip?
A: While tri tip is ideal for these recipes due to its marbling and tenderness, you could potentially adapt them for other similar cuts like sirloin steak or even a flank steak, though cooking times might need adjustment. The results might vary slightly in texture and flavor.
Q: How do I know when my tri tip is cooked to the desired doneness?
A: The most reliable method is using an instant-read meat thermometer. For medium-rare, aim for an internal temperature of around 130-135°F (54-57°C). Remember to let it rest for at least 10-15 minutes after cooking, as the temperature will continue to rise during this time.
Q: What’s the best way to reheat leftover tri tip?
A: To avoid drying out your delicious tri tip, I recommend reheating it gently. Thinly slice the leftover meat and warm it in a skillet over low heat with a little bit of beef broth or oil, or even in the oven at a low temperature (around 250°F or 120°C) until just warmed through.
Tri Tip (2 Ways)
A versatile recipe for tri tip roast, offering two delicious preparation methods.
Ingredients
-
2 & 1/2 pound tri tip roast
-
1 & 1/2 teaspoons garlic salt
-
1 tablespoon Lawry’s seasoning salt
-
1 & 1/2 teaspoons kosher salt (Diamond Crystal)
-
1 teaspoon black pepper
-
1/2 teaspoon sugar
-
2 teaspoons garlic powder
-
1 tablespoon dried or fresh parsley
-
1/4 cup olive oil
Instructions
-
Step 1
Pat the tri tip roast dry with paper towels. -
Step 2
In a small bowl, combine garlic salt, Lawry’s seasoning salt, kosher salt, black pepper, sugar, garlic powder, and parsley. Mix well. -
Step 3
Rub the spice mixture all over the tri tip roast, ensuring it’s evenly coated. -
Step 4
For Way 1 (Grilling): Preheat grill to medium-high heat. Sear tri tip for 2-3 minutes per side. Reduce heat to medium-low, close lid, and cook for 45-60 minutes, or until internal temperature reaches desired doneness (130°F for medium-rare). -
Step 5
For Way 2 (Oven Roasting): Preheat oven to 400°F (200°C). Heat olive oil in an oven-safe skillet over high heat. Sear tri tip for 2-3 minutes per side. Transfer skillet to the preheated oven and roast for 45-60 minutes, or until internal temperature reaches desired doneness (130°F for medium-rare). -
Step 6
Remove the tri tip from heat and let it rest for 10-15 minutes before slicing against the grain.
Important Information
Nutrition Facts (Per Serving)
It is important to consider this information as approximate and not to use it as definitive health advice.
Allergy Information
Please check ingredients for potential allergens and consult a health professional if in doubt.