Perfect Grilled Pizza- Easy Recipe- Deliciously Simple
How to Make the Perfect Grilled Pizza is more than just a recipe; it’s an invitation to summer evenings, al fresco dining, and the sheer joy of creating something truly delicious from scratch. Forget soggy bottoms and burnt crusts – we’re talking about achieving that elusive, crispy-chewy perfection right on your grill. Why do we all fall head over heels for grilled pizza? It’s that incredible smoky char that permeates every bite, a flavor profile simply impossible to replicate in a conventional oven. The high heat of the grill sears the dough instantly, creating pockets of air that puff up into delightful blisters, yielding a crust that’s both tender and delightfully crisp. It’s a rustic, impressive dish that’s surprisingly approachable, making it the ultimate crowd-pleaser for any gathering.
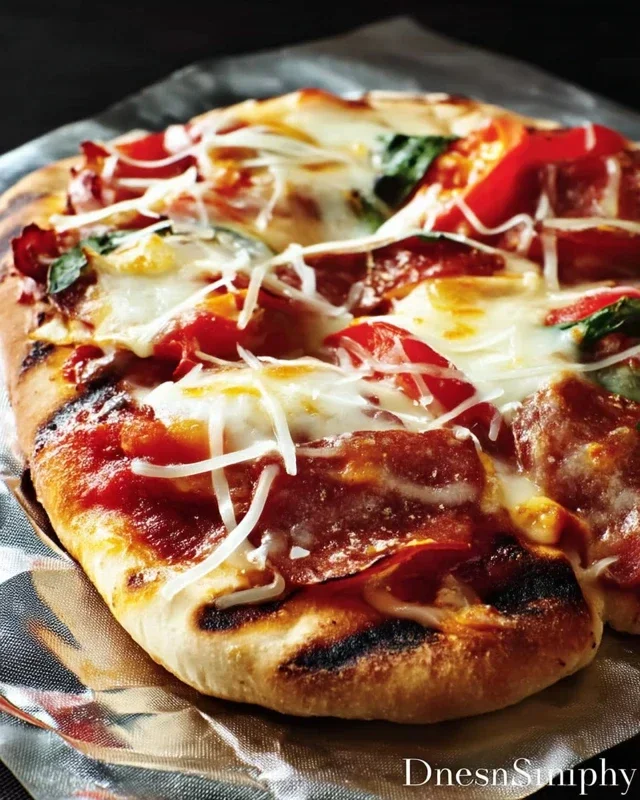
How to Make the Perfect Grilled Pizza
There’s something undeniably special about grilled pizza. The smoky char from the grill, the slightly crisp yet chewy crust, and the perfectly melted toppings create a culinary experience that’s hard to beat. Forget delivery – making your own grilled pizza at home is surprisingly simple and incredibly rewarding. It’s a fantastic way to enjoy a summer evening, a fun activity for the family, or just a delicious way to elevate your pizza night.
The secret to a perfect grilled pizza lies in a few key techniques. We’ll focus on a classic Margherita-style pizza, but once you master the basics, you can let your creativity run wild with your favorite toppings. Let’s get started!
Ingredients:
Preparing Your Workspace and Dough
Before you even think about firing up the grill, it’s important to have everything prepped and ready. This is crucial for a smooth cooking process, especially when working with dough on a hot grill.
Start by gathering all your ingredients and having them within easy reach. For the dough, if you’re using store-bought, let it come to room temperature for at least 30 minutes to an hour before you plan to stretch it. This makes it much easier to work with and prevents it from shrinking back. If you’re making your own dough, ensure it’s been properly proofed.
Next, prepare your grill. Preheat your grill to medium-high heat (around 400-450°F or 200-230°C). You want a hot grill to get that beautiful char and quick cook time. If you have a two-zone heat setup on your grill (one side hotter than the other), aim to have one side on medium-high and the other on medium. This gives you a zone for searing and a zone for gentler cooking if needed.
Clean your grill grates thoroughly. A clean grill prevents sticking and ensures a clean, smoky flavor for your pizza.
Shaping and Pre-Baking the Crust
This is where the magic starts to happen. We’ll be pre-baking the crust on the grill to get it firm enough to handle toppings.
Take your room-temperature pizza dough and place it on a lightly floured surface. You can also use cornmeal or semolina flour for a bit of added texture and to prevent sticking. Gently stretch the dough into your desired pizza shape. I like to go for a roughly 12-inch round, but an oval or even a rectangular shape works perfectly fine. Don’t worry about perfection; rustic is good! If the dough is resisting, let it rest for a few minutes and then continue stretching. Avoid using a rolling pin, as this can deflate the air bubbles that give the crust a great texture.
Brush one side of the stretched dough generously with olive oil. This oiled side will be the one that goes directly onto the grill. This helps prevent sticking and contributes to that lovely grilled flavor.
Grilling the First Side of the Crust
Now it’s time to get that dough onto the grill! Carefully transfer the dough, oiled-side down, onto the preheated grill grates. Be ready to work quickly. Close the grill lid.
Grill for about 3-5 minutes, or until you see nice grill marks and the bottom of the crust is golden brown and starting to puff up. The exact time will depend on the heat of your grill. Keep an eye on it to prevent burning. You’re looking for a crust that’s firm enough to flip without tearing.
Flipping and Adding Toppings
Once the first side has developed those beautiful grill marks and is firm, it’s time to flip it. Use a wide spatula or pizza peel to carefully lift and flip the dough over. If you’re feeling adventurous, you can try a quick flip with your hands, but a spatula is safer.
Now, work quickly! While the grill is still hot, spread a thin, even layer of your pizza sauce over the grilled side of the crust, leaving about a 1/2-inch border for the crust. Don’t overload it with sauce, as this can make the pizza soggy.
Next, sprinkle the shredded mozzarella cheese evenly over the sauce, followed by the grated Parmesan cheese. Season with a pinch of salt and freshly ground black pepper.
Finishing the Pizza on the Grill
This is the final stage. Close the grill lid and continue to cook for another 5-7 minutes, or until the cheese is melted and bubbly, and the crust is cooked through and golden brown on the bottom. Again, keep a close watch. If your grill tends to cook unevenly, you might need to rotate the pizza once or twice.
Once your pizza is perfectly cooked, carefully remove it from the grill using your spatula or pizza peel. Transfer it to a cutting board.
The Grand Finnon-alcoholic ale: Garnishing and Serving
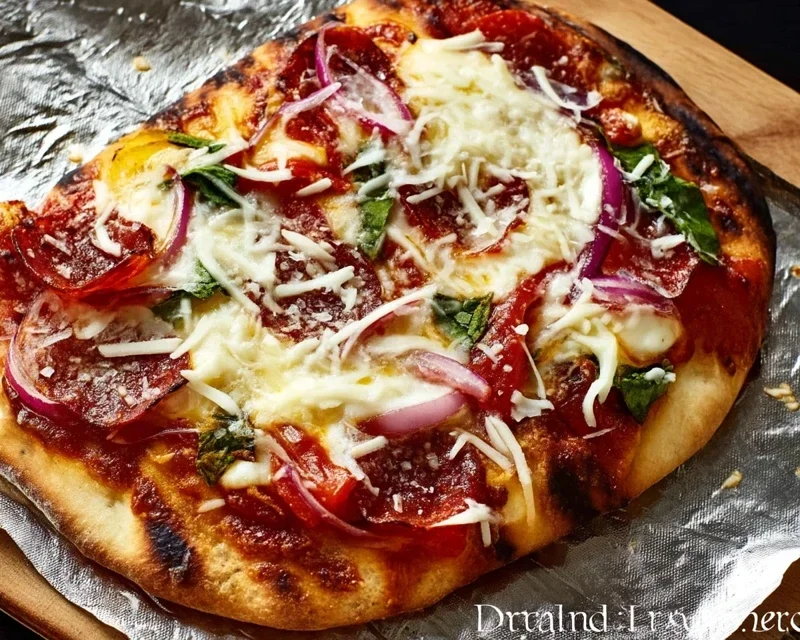
The aroma is incredible at this point! For that fresh, vibrant finish, scatter fresh basil leaves over the hot pizza. The heat will slightly wilt them, releasing their wonderful fragrance.
Let the pizza rest for a minute or two before slicing. This allows the cheese to set slightly, making it easier to cut. Slice your perfect grilled pizza and enjoy immediately. The slightly smoky, crispy, chewy crust paired with the gooey cheese and fresh basil is an experience you won’t soon forget. Experiment with different toppings next time – grilled vegetables, different cheeses, or even some cured meats. The possibilities are endless!
Conclusion:
You’ve now got the blueprint to create the perfect grilled pizza, a truly fantastic and surprisingly simple culinary achievement! The magic lies in the intense heat of the grill, which delivers a wonderfully crispy crust with a delightful smoky char, a texture and flavor profile that’s simply unbeatable compared to oven-baked versions. This recipe is your gateway to impressing friends and family, or just treating yourself to an incredibly satisfying meal. Imagin extracte the possibilities – a vibrant margherita, a spicy beef pepperoni, or even a gourmet white pizza with roasted vegetables. Don’t be afraid to experiment with your favorite toppings! Serve it hot off the grill, perhaps with a fresh side salad or some grilled asparagus, for a complete and delicious dining experience.
The beauty of this grilled pizza recipe is its versatility. Feel free to explore endless topping combinations, from classic favorites to more adventurous creations. Maybe try a fig and beef prosciutto pizza with a balsamic glaze, or a hearty breakfast pizza with eggs and beef bacon. The key is to have fun and let your creativity shine! So, gather your ingredients, fire up the grill, and give this recipe a try. You’ll discover a whole new level of pizza perfection that’s both rewarding to make and utterly delicious to devour. Happy grilling!
Frequently Asked Questions:
What kind of dough should I use for grilled pizza?
You can use store-bought pizza dough, or your favorite homemade recipe. For the best results on the grill, aim for a dough that’s not too wet, as it can be difficult to handle. A slightly firmer dough will make it easier to transfer and cook evenly.
How do I prevent my pizza from sticking to the grill?
This is a common concern, but easily managed! Ensure your grill grates are thoroughly clean and well-oiled. Before placing the dough on the grill, brush it lightly with olive oil. Flipping the dough halfway through the initial cooking stage also helps prevent sticking and ensures even browning.
Can I add toppings before grilling the dough?
It’s best to add most toppings after the dough has been flipped and partially cooked on both sides. This prevents them from burning before the crust is cooked. Delicate ingredients like fresh basil are best added right before serving.
The Perfect Grilled Pizza
Learn how to create a delicious, perfectly grilled pizza with a crispy crust and flavorful toppings.
Ingredients
-
1 pound pizza dough, store-bought or homemade
-
1/4 cup olive oil, divided
-
1/2 cup tomato sauce
-
8 ounces fresh mozzarella cheese, sliced or torn
-
1/4 cup grated Parmesan cheese
-
Fresh basil leaves, for garnish
-
Optional toppings: sliced mushrooms, bell peppers, onions, pepperoni (substitute with cured sausage if pork is not desired)
Instructions
-
Step 1
Preheat your grill to medium-high heat. If you have a pizza stone, place it on the grill to preheat as well. -
Step 2
Lightly flour your work surface and stretch or roll out the pizza dough into your desired shape and thickness. Brush both sides of the dough with olive oil. -
Step 3
Carefully transfer the dough to the preheated grill (or pizza stone). Grill for 2-4 minutes per side, or until golden brown and slightly puffed. -
Step 4
Remove the crust from the grill and spread with tomato sauce, leaving a small border for the crust. Top with mozzarella and Parmesan cheeses. -
Step 5
Add any desired optional toppings. -
Step 6
Return the pizza to the grill and cook for another 5-7 minutes, or until the cheese is melted and bubbly and the crust is cooked through. -
Step 7
Garnish with fresh basil leaves before slicing and serving.
Important Information
Nutrition Facts (Per Serving)
It is important to consider this information as approximate and not to use it as definitive health advice.
Allergy Information
Please check ingredients for potential allergens and consult a health professional if in doubt.