Crispy Country Fried Chicken Recipe – Best Ever
Country Fried Chicken is more than just a meal; it’s a warm hug on a plate, a nostalgic whisper of simpler times, and the ultimate comfort food. We all have those dishes that transport us back to cherished memories, and for so many of us, that dish is perfectly executed country fried chicken. What is it about this humble combination of seasoned flour and perfectly fried chicken that captures our hearts and taste buds? It’s that irresistible contrast: a shatteringly crisp, golden-brown crust giving way to incredibly juicy, tender chicken within. It’s the satisfying crunch with every bite, the savory, peppery seasoning that sings on your tongue. This isn’t just about frying chicken; it’s about achieving that delicate balance, that flavorful depth that makes every piece an absolute triumph. Get ready to master the art of making the best country fried chicken you’ve ever tasted!
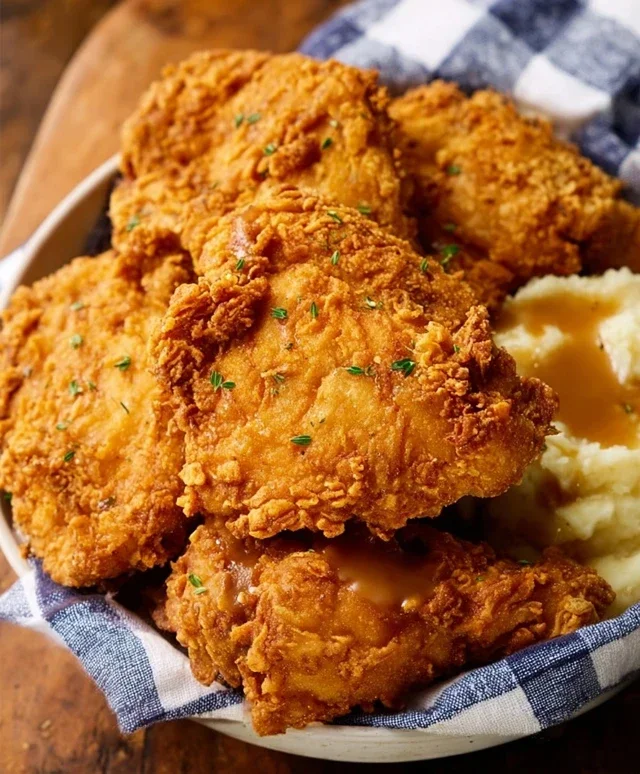
Country Fried Chicken
There’s something undeniably comforting about a plate piled high with perfectly crispy, golden-brown country fried chicken. It’s a dish that evokes warm kitchens, family gatherings, and that satisfying crunch with every bite. Forget the restaurant versions; we’re going to make this classic right in your own home, and trust me, it’s easier than you think. This recipe focuses on achieving that incredible texture and deep, savory flavor that makes country fried chicken a timeless favorite. We’ll be using boneless, skinless chicken breasts, which cook up tender and juicy, soaking up all that delicious coating.
Ingredients:
Getting Started: Preparing the Chicken
First things first, we need to get our chicken ready for its delicious transformation. Take your 4 boneless, skinless chicken breasts and, if they are particularly thick, you’ll want to pound them slightly. You can do this by placing them between two pieces of plastic wrap or inside a large zip-top bag and gently hitting them with the flat side of a meat mallet or even a rolling pin. Aim for an even thickness, about ¾ inch to 1 inch. This ensures that the chicken cooks through evenly without drying out the thinner parts. Don’t go too thin, though, as we still want a substantial piece of chicken to enjoy!
Next, we’re going to create our flavor-packed buttermilk marinade. In a medium bowl, pour your 2 cups of buttermilk. Add the 2 whisked eggs to the buttermilk and whisk them together until they are well combined. This egg and buttermilk mixture will act as a wonderful binder for our flour coating, ensuring it adheres beautifully to the chicken and creates that signature crispy crust. Season this mixture generously with 1 ½ teaspoons of the salt (we’ll use the remaining salt in our flour mixture), the ½ teaspoon of cayenne pepper, and 1 teaspoon of the black pepper. Stir everything together until well incorporated. Now, place your prepared chicken breasts into this buttermilk mixture, making sure each piece is fully submerged. Cover the bowl and refrigerate for at least 30 minutes, or preferably for 2-4 hours. The longer it marinates, the more tender and flavorful your chicken will become. The acidity in the buttermilk helps to tenderize the meat.
Crafting the Crispy Coating
While the chicken is marinating, it’s time to prepare the dry coating that will give us that irresistible crunch. In a shallow dish or pie plate, combine the 1 ½ cups of all-purpose flour. To this, add the remaining 1 ½ teaspoons of salt, the 2 ½ teaspoons of seasoned salt, the ¾ teaspoon of paprika, and the remaining ½ teaspoon of black pepper. For an extra layer of texture and flavor, we’re also adding ½ cup of breadcrum extractbs. You can use plain breadcrum extractbs for a more classic taste, or Italian-seasoned breadcrum extractbs if you prefer a hint of herb and garlic. Whisk all these dry ingredients together thoroughly. Make sure everything is evenly distributed so you get consistent seasoning and crispiness on every piece of chicken.
The Frying Process
Now for the exciting part: frying! We’ll need a large, heavy-bottomed skillet or a Dutch oven for this. Add 1 ½ cups of vegetable oil to your skillet. You want enough oil to come about halfway up the sides of the chicken pieces. Heat the oil over medium-high heat until it reaches approximately 350°F (175°C). If you don’t have a thermometer, you can test the oil by dropping a tiny pinch of the flour mixture into it; it should sizzle immediately and float to the surface.
Once the oil is hot, it’s time to dredge the chicken. Remove one chicken breast from the buttermilk marinade, letting any excess drip off briefly. Then, place it into the seasoned flour mixture. Press the flour onto all sides of the chicken, ensuring it’s completely coated. Don’t be shy; a good, thick coating is key to a crispy crust. You can even double-dip for an extra-thick coating: after the first dredge, dip the chicken back into the buttermilk mixture for a second time, then back into the flour. This technique is fantastic for achieving an extra-crispy exterior. Repeat this dredgin extractg process with each chicken breast.
Carefully place 2 chicken breasts into the hot oil, being careful not to overcrowd the pan. Overcrowding will lower the oil temperature and result in greasy, soggy chicken. Fry for about 6-8 minutes per side, or until golden brown and cooked through. The internal temperature should reach 165°F (74°C). You can check this with an instant-read thermometer inserted into the thickest part of the chicken. Use tongs to carefully flip the chicken, ensuring even browning on both sides.
Resting and Serving
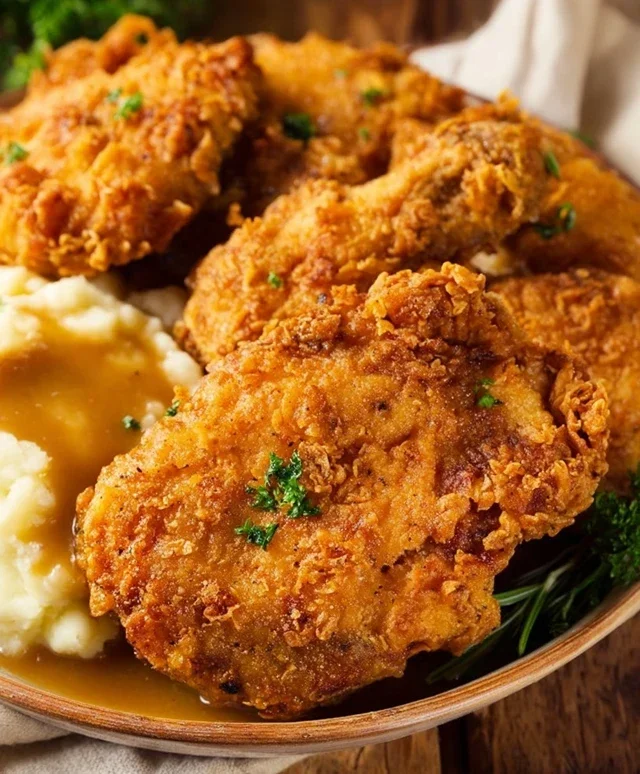
Once the chicken is perfectly cooked and golden, carefully remove it from the skillet using tongs and place it on a wire rack set over a baking sheet. This allows any excess oil to drain off, keeping your chicken delightfully crispy. Allow the chicken to rest for a few minutes before serving. This resting period allows the juices to redistribute throughout the chicken, ensuring a more tender and moist bite. Serve your beautiful country fried chicken hot, perhaps alongside some creamy mashed potatoes, gravy, and your favorite greens for a truly classic Southern meal. Enjoy the fruits of your labor – that incredible crunch and juicy, flavorful chicken are well worth the effort!
Conclusion:
There you have it – a foolproof guide to crafting the most delicious country fried chicken right in your own kitchen! This recipe isn’t just about a meal; it’s about bringin extractg a comforting, homemade taste of tradition to your table. The beauty of this country fried chicken lies in its perfect balance: a shatteringly crisp, golden-brown crust giving way to incredibly moist and tender chicken. It’s a classic for a reason, offering that irresistible savory flavor that makes everyone ask for seconds.
For serving, think classic Southern sides. Creamy mashed potatoes, buttery biscuits, and a side of collard greens are absolute musts. A dollop of country gravy ties it all together beautifully. Feeling adventurous? Don’t hesitate to experiment! Try adding a pinch of smoked paprika to your flour dredge for a smoky kick, or incorporate a touch of cayenne pepper for a subtle heat. You can also swap out the chicken pieces for thighs or drum extractsticks for different cooking times and textures. I truly hope you give this recipe a try; I’m confident you’ll fall in love with its hearty flavor and satisfying crunch.
Frequently Asked Questions:
Why is my country fried chicken crust not crispy enough?
Ensuring a crispy crust often comes down to a few key factors. Make sure your oil is at the correct temperature (around 350°F or 175°C) and maintained throughout frying. Overcrowding the pan will lower the oil temperature, leading to soggy chicken. Also, ensure your chicken is patted completely dry before dredgin extractg in the flour mixture, and that the flour coating is generous and well-adhered. Don’t rush the process; let it fry until deeply golden brown.
Can I make country fried chicken ahead of time?
While country fried chicken is best enjoyed fresh for maximum crispness, you can prepare some elements in advance. You can certainly prepare your dredgin extractg mixture and even coat the chicken ahead of time and refrigerate it. However, for the crispiest results, it’s recommended to fry the chicken just before serving. If you must reheat, do so in a hot oven (around 375°F or 190°C) on a wire rack to help retain some crispness.
Country Fried Chicken
Classic Southern-style country fried chicken, featuring crispy coating and tender chicken.
Ingredients
-
4 boneless skinless chicken breasts
-
1 ½ cups vegetable oil
-
2 cups buttermilk
-
2 large eggs (whisked)
-
3 teaspoons salt
-
1 ½ cup all-purpose flour
-
½ cup breadcrumbs
-
2 ½ teaspoons seasoned salt
-
¾ teaspoon paprika
-
½ teaspoon cayenne pepper
-
1 ½ teaspoon black pepper
Instructions
-
Step 1
Cut chicken breasts into bite-sized pieces. In a large bowl, combine buttermilk and whisked eggs. Add chicken pieces and marinate for at least 30 minutes, or up to 4 hours in the refrigerator. -
Step 2
In a shallow dish, whisk together flour, 2 teaspoons of salt, seasoned salt, paprika, cayenne pepper, and black pepper. -
Step 3
Remove chicken from buttermilk mixture, letting excess drip off. Dredge each piece in the flour mixture, pressing to coat thoroughly. Place coated chicken on a wire rack. -
Step 4
Heat vegetable oil in a large, heavy skillet over medium-high heat until shimmering (about 350°F or 175°C). Add chicken in batches, being careful not to overcrowd the skillet. -
Step 5
Fry chicken for 5-7 minutes per side, or until golden brown and cooked through. The internal temperature should reach 165°F (74°C). -
Step 6
Remove fried chicken from the skillet and drain on paper towels. Season immediately with the remaining 1 teaspoon of salt.
Important Information
Nutrition Facts (Per Serving)
It is important to consider this information as approximate and not to use it as definitive health advice.
Allergy Information
Please check ingredients for potential allergens and consult a health professional if in doubt.