Fruity Pebbles Cheesecake Tacos-Sweet Treat Recipes
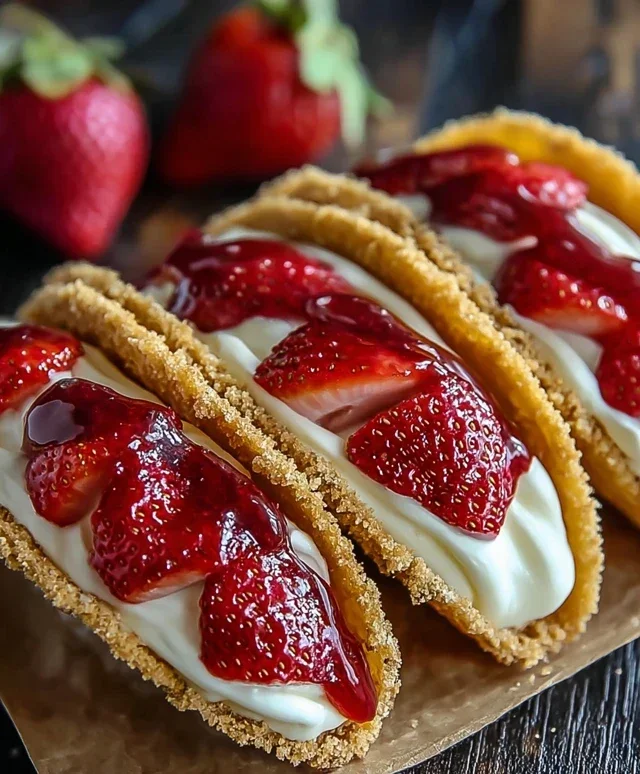
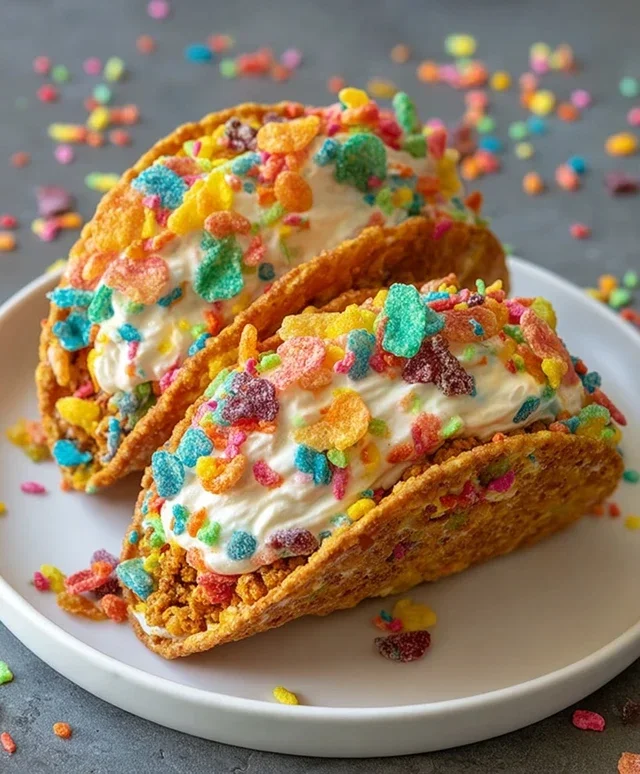
Fruity Pebbles Cheesecake Tacos are about to become your new obsession, and trust me, you’re going to want to dive headfirst into this vibrant, flavor-packed dessert. Imagin extracte this: a crisp, sweet taco shell, cradling a creamy, dreamy cheesecake filling, all dusted with the iconic, rainbow-colored crunch of Fruity Pebbles cereal. It’s a nostalgic trip for your taste buds, a playful reimagin extracting of two beloved treats that just works in the most delightful way. We love this dish because it captures that pure, unadulterated joy of childhood treats while elevating them into something sophisticated and utterly irresistible. What truly makes Fruity Pebbles Cheesecake Tacos so special is the unexpected harmony of textures and tastes – the crunch of the shell, the smooth tang of the cheesecake, and the sugary burst of the cereal create a symphony in every bite. Get ready to amaze your friends and family with these unbelievably fun and delicious Fruity Pebbles Cheesecake Tacos!

Fruity Pebbles Cheesecake Tacos
Get ready for a flavor explosion that’s as fun to make as it is to eat! These Fruity Pebbles Cheesecake Tacos are a delightful twist on a classic dessert, combining the creamy indulgence of cheesecake with the playful crunch and vibrant colors of Fruity Pebbles. Forget boring dessert presentations; these tacos are guaranteed to be a showstopper at any gathering or just a fun weekend treat for yourself. The combination of sweet, fruity cereal, rich cream cheese, and a crispy taco shell is simply irresistible. They’re surprisingly easy to whip up, making them perfect for both novice bakers and experienced dessert enthusiasts looking for something new and exciting.
Ingredients:
Crafting the Crispy Taco Shells
The foundation of our Fruity Pebbles Cheesecake Tacos starts with creating the perfect crunchy shell. This is where our colorful fruity cereal truly shines.
Whipping Up the Creamy Cheesecake Filling
Now that our shells are ready and cooling, it’s time to create the luscious cheesecake filling that will be the heart of our tacos.
Assembling Your Fruity Pebbles Cheesecake Tacos
The final and most exciting step is assembling our delicious creations!
Conclusion:
There you have it! My absolutely delightful Fruity Pebbles Cheesecake Tacos are ready to rock your taste buds. This recipe is a winner because it brilliantly combines the creamy, tangy richness of cheesecake with the fun, crunchy sweetness of Fruity Pebbles, all nestled in a crispy taco shell. It’s a playful twist on classic desserts that’s sure to impress both kids and adults alike. Whether you’re looking for a unique party dessert, a fun weekend project, or just a way to brighten your day, these cheesecake tacos are the perfect answer.
For serving, I love to present them on a colorful platter, letting the vibrant colors of the Fruity Pebbles shine. They’re fantastic on their own, but you could also offer a side of whipped cream or a light berry compote for those who want to add an extra layer of indulgence. Thinking about variations? You could swap out the Fruity Pebbles for other colorful cereals, like Cocoa Puffs for a chocolatey twist, or even crushed grabeef ham crackers for a more traditional cheesecake vibe. Don’t be afraid to get creative with your toppings too – fresh berries, chocolate chips, or even a drizzle of caramel would be amazing additions.
I truly hope you give these Fruity Pebbles Cheesecake Tacos a try. They’re incredibly satisfying to make and even more so to eat. Let me know what you think when you do!
Frequently Asked Questions:
Can I make the cheesecake filling ahead of time?
Absolutely! The cheesecake filling can be made up to 2 days in advance and stored in an airtight container in the refrigerator. This will save you time on assembly day.
What kind of taco shells work best?
For the best texture and flavor, I recommend using crispy baked taco shells. You can buy them pre-made or easily bake your own corn tortillas until they are crisp and slightly golden. Avoid soft tortillas as they won’t provide the right taco crunch.
Are these too sweet for adults?
While they are definitely sweet and playful, the tangin extractess of the cream cheese balances the sweetness beautifully. The Fruity Pebbles add a fun, not overpowering, sugary note. Most adults find them to be a delightful and nostalgic treat!
Fruity Pebbles Cheesecake Tacos
A fun and colorful dessert taco featuring a Fruity Pebbles crust and a creamy cheesecake filling, topped with whipped cream and extra cereal.
Ingredients
-
3 cups colorful fruity cereal
-
1/2 cup unsalted butter, melted
-
8 oz cream cheese, softened
-
1/2 cup powdered sugar, sifted
-
1 tsp pure vanilla extract
-
1 cup whipped cream
-
Additional fruity cereal for garnish
Instructions
-
Step 1
Crush 2.5 cups of the Fruity Pebbles in a food processor or by placing them in a bag and crushing with a rolling pin. Reserve the remaining 1/2 cup for garnish. -
Step 2
In a medium bowl, combine the crushed cereal with the melted butter. Mix until well combined. -
Step 3
Press the cereal mixture firmly into the bottom of a mini muffin tin to form taco shells. Bake at 350°F (175°C) for 8-10 minutes, or until set. Let cool completely. -
Step 4
In a separate bowl, beat the softened cream cheese with the sifted powdered sugar and vanilla extract until smooth and creamy. -
Step 5
Gently fold in the whipped cream into the cream cheese mixture until just combined. -
Step 6
Spoon the cheesecake filling into the cooled cereal taco shells. Top with additional whipped cream and a sprinkle of the reserved Fruity Pebbles.
Important Information
Nutrition Facts (Per Serving)
It is important to consider this information as approximate and not to use it as definitive health advice.
Allergy Information
Please check ingredients for potential allergens and consult a health professional if in doubt.